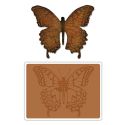
Hi everybody! Toni here with a summer project I made using the fabulous Tim Holtz Layered Butterfly Die. If you're not already aware, this die comes complete with a beautiful embossing folder. My talented team mate Sue Carrington, used it to create a gorgeous
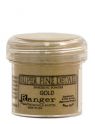
journal page last week, now I've used it here to create a strip of bunting. I think that makes it a pretty versatile die! My butterflies have been treated with some splats of Distress Stain and a little heat embossing with gold embossing powder and this is how I did it....
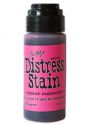
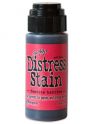
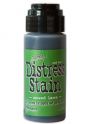
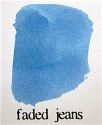
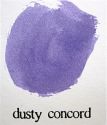
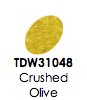
I started by die cutting several butterflies in white card, there are nine in this strip. Using an odd number, ensures that there is one in the middle with an equal number on each side. I splattered each die cut, with various colours of Distress Stain. I kind of stuck roughly to symmetrical splattering, as the idea of butterflies having symmetrical patterns on their wings, is something that was imprinted on my mind in my earliest schooldays!
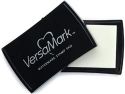
My hot tip here would be to apply the light colours first, so that the Distress Stain applicators don't get contaminated by the darker colours, which are pretty strong. It's also important to dry the butterflies thoroughly before proceeding with the next step. Once these were dry, I applied Versa mark ink to one side of the Butterfly Embossing Folder, by tapping it gently over the surface. I then placed the butterfly, coloured side down, onto the embossing folder,
closed it up and ran it through my Big Shot embossing machine. After removing the butterfly, I sprinkled on the gold embossing powder and heated with my heat tool. The embossing powder sticks to the deep embossed spaces where the Versa Mark ink was pressed into the surface from the embossing folder. Don't worry if some ends up on the raised patterns you can remove it with a small dry paintbrush, or leave it for added texture.
I repeated this with each butterfly. I also applied embossing ink to the other side of the folder...
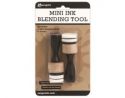
which gave a slightly different effect. I lightly applied Vintage Photo Distress Ink with a blending tool, over the surface, to just take the edge off the brightness of the colours. I also used a touch of Black Soot Distress Ink around the edges. In order to string the butterflies together, I punched a hole in the top of each wing and attached a brass rivet using a Crop-A-Dile tool. I dyed some lengths of white seam binding with Distress stains, and used short pieces to tie each butterfly together.
This is how the 'bunting' looks with all the butterflies attached
I thought this would be a nice decoration for a summer gathering, It's surprising how quick it was to make. I took a couple of photos in my garden...
and....
This was a fun project to do and with so much embossing going on, it fits in nicely with our current
ePlay 'Embossing Challenge'. If you haven't seen this yet, follow the link here and you'll see some fab work by the eTeam, as well as some wonderful entries by the participants. The challenge doesn't end until the last Thursday in August so you've got loads of time to get involved ! I hope you like my butterfly bunting, if you fancy having a go at something like this, You'll find plenty of supplies at Kim's fabulous
eclectic Paperie Shop. If you are lucky enough to live close by, you could pop into Kim's 'bricks and mortar' shop, if not everything you need can be accessed by the touch of a button or two at the
eP online shop. Click on any of the following products to be transported straight there! Until next time, happy crafting and enjoy the rest of the summer ! x


16 comments:
This is soooo pretty! 9 butterflies at a stretch...amazing! definitely trying the versamark on embossing folder.
Beautiful!! TFS!
Genius idea! This is gorgeous.
Omy...so gorgeous!
Toni, this is stunning! The multi-coloured butterflies are gorgeous in themselves and then when you add the gold embossing and the dyed seam binding...outstanding. Didn't think I needed this die but you and Sue have changed my mind...lol.
this is really beautiful Toni!
Gorgeous Toni ! Love the colours and the idea is fabulous ! Sue C x
Just spectacular, Toni and what a FABULOUS idea! I just got this butterfly die and can't wait to play! FAB colors on each and every one!
Wow, oh wow, Toni! This is absolutely spectacular! LOVE it!
Toni!! This is absolutely , positively stunningly gorgeous!! OMGosh! how creative are you?!! Can you tell i love this?! ")
Wow Toni! what a marvelous project - I can't believe how many butterflies you colored and embossed - they look so pretty with the gold and bright colors! and the connecting ribbons hanging down add lovely texture to your pretty hanging!
It is gorgeous! Love the colors with the texture! And I absolutely LOVE how it looks infront of your window. xoxoxo
So colorful and cheerful! I love that you tried the embossing ink on both sides of the folder and how different it looks! I now definitely have to add this set to my collection! Thanks for sharing!
I was sent over by a friend to have a look - wow! What a creative and beautiful project.
OMG they are BEAUTIFUL!
This is such an outstanding project! The colors you used really put it over the top as well as the ample ribbons that tie it together. I love seeing it strung outside with all the greenery. So glad I happened to see it!
Post a Comment