Hi everyone,
Julia here - for my first time hosting the 1st Thursday of the month ePlay Challenge - and I challenge you to Alter a Bottle! It can be glass, plastic, big or small - I just want to see how you will take it from plain to WOW!
I started my project with a triangle shaped, clear glass bottle with a cork stopper in it from Michaels that cost $1.00. It measures about 2 1/2"x 2 1/2" x 2 1/2" x 4 1/4" high.
And here is how I turned it into 'WOW'!
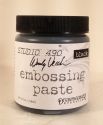
I learned this crackling technique from Wendy Vecchi, when I took her class at Kim's brick and mortar eclectic Paperie shop in Exeter, NH. We didn't make one that day - but Wendy had two on display and she explained her technique to me. You start by covering the bottle with a paste - I used
Wendy's Silver Embossing paste.
After that's dry - you cover it with
Wendy's Crackled Texture Paste (if you don't use the embossing paste first - the crackle will peel right off after it drys!)
I took the floral border from
Industrious Stickers/Borders and inked it with 3
Adirondack Alcohol Inks - Stonewashed, Rust and Lettuce. I dried it with my heat tool and adhered it along the base of the bottle. I added ScorTape to it even though it already has adhesive just to give it a sticking boost against the inked crackled surface!
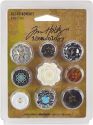
I wanted to hang something around the neck of my bottle and I had just purchased some Idea-ology Fragments/Charms. I thought I remembered that Tim Holtz had a technique for using them in one of his Compendium of Curiosities - and sure enough, I found it on page 55 of his first book.
First you pounce ink on the charm using the felt applicator and some
Adirondack Alcohol inks. I used the same ones I used on my Industrious Border above - Stonewashed, Rust and Lettuce.
Then you put some
Alcohol Blending Solution on a corner of the
felt applicator and touch it to the center of the charm - that makes the ink flow away - so you want to blow on it once it clears out just the center area to stop it from clearing all the way to the edges. You can add more color to the edges if you want after this step.
Look how beautiful it looks - and it's such a simple technique! I looped a piece of
Linen Ribbon through the hole and tied it around the neck of the bottle. I knotted a shorter piece of Linen Ribbon just above the charm and spread out the ends - I love the wonderful texture that gives to the ribbon!
I used Glossy Accents to adhere the Charm to the bottle - I didn't want it swinging around or loosening the ribbon.
Here's a close up of the inking on the Border Sticker - and you can see the Silver Embossing paste showing through the cracks of the paste better on the next two photos.
Here's a close up of the lovely Linen Ribbon with it's pulled apart ends.
A side view of the bottle - I left the two sides plain - wanting to show off the wonderful crackle and also to appreciate the beauty of the charm on the front!
And here is my pretty little bottle in use as a vase - as soon as I finished my bottle - I rushed out to my front garden and cut a few things that were blooming to see how they would look - here are a few pics! Here it is filled with a stem from Solomon's Seal and Goldenstar blooms.
Here's my vase with a big orange marigold and a Solomon's Seal stem.
And a final variation of blooms - Goldenstar and Dianthus.
My little flower filled bottle is now proudly sitting on my kitchen windowsill where I can enjoy it each morning before I leave for work!
I can't wait to see what kind of bottle you choose to alter and what techniques you use to take it from plain to WOW!
If you would like to "Alter a Bottle" we would love to see your
creations. There is a generous $25 gift certificate for Kim's fabulous
eclectic Paperie Shop, for one lucky winner. You have the whole month of July to get your project done and add it to Mr. Linky at the end of this post!
Thanks so much for stopping by the eclectic Paperie Blog today - where every day a member of the Design Team posts something inspirational!
Paper: Idea-ology Paper Stash 8"x8" Collage
Ink: Ranger Distress Salty Ocean, Mustard Seed, Gathered Twigs, Adirondack Alcohol Inks Stonewashed, Rust, Lettuce and Alcohol Blending Solution
Accessories: Studio 490 Wendy Vecchi Silver Embossing Paste and Crackle Texture Paste. Idea-ology Fragments/Charms, Linen Ribbon, Industrious Stickers/Borders; Glossy Accents, ScorTape.