Photobucket Photobucket Photobucket Photobucket Photobucket Photobucket
Showing posts with label Tim Holtz. Show all posts

Wednesday, July 22, 2015

Bo Bunny Cards

Hi everyone,  Steph Ackerman here.  It's Wednesday and I'd love to show you my newest projects this week for Eclectic Paperie.

 
Supplies:

Bo Bunny Pattern paper - Gabrielle Collection
Bo Bunny Stickers - Gabrielle Collection
Tim Holtz Roses - Heirloom Roses
Dina Wakely Metallic Paint - Sterling
The Crafter's Workshop Stencil - Word Association
Ribbon


The Bo Bunny collection is lovely for creating a variety of projects
The dotted paper is double sided and I chose to use both sides for this card
I cut the dotted paper to fit a premade card
Using the reverse side, I matted it with brown cardstock and added it to the card
Using the Word Association stencil with Sterling paint, I stenciled DREAM on the panel
Using a tag sticker from the Gabrielle collection, I matted it to cardstock and added it to the card
A rose was stained with Coral distress stain and added to the tag


For a different twist, I tore this ornate pattern paper and edged it with cardstock
Using the reverse side of the pattern paper, I added the panel to the card
I created a tag and inserted it between the layers
To finish a 3D layered sticker was added to the tag
 
Thanks for stopping by today.
 
Steph
 

Wednesday, July 15, 2015

Love Letters ensemble

Hi everyone,  Steph Ackerman here again.  It's Wednesday and I'd love to show you my newest projects this week for Eclectic Paperie.


Supplies:

Tim Holtz Stencil - Blossom
Tim Holtz Distress Stain - Abandoned Coral
Bo Bunny Stickers - Gabrielle Collection
Tim Holtz Roses - Heirloom Roses


I began by painting the gift bag with Coral Distress Stain.
Since I was covering the center, I left that area blank.

 
Cutting a panel of white cardstock to fit, I created the background with Blossom Stencil and Coral Distress Stain
After inking the edges with Coral Distress Stain, I matted it with cardstock and adhered it to the bag
The Bo Bunny chipboard stickers are lovely 3D stickers that were perfect for the focal element
Roses were inked with Distress Stain and then scattered around the bag


The coordinating card was inked with Coral Distress Stain
A panel of white was cut and the Blossom stencil was used again to create the background
Once matted with black cardstock, the panel was added to the card
Again the Bo Bunny stickers were perfect as the focal elements

I'm thinking this would be a great ensemble to give your loved one something special.

Thanks for stopping by today.

Steph


Wednesday, July 8, 2015

Happy Cards

Hi everyone,  Steph Ackerman here.  It's Wednesday and I'm so sorry for this late post.  Seems I scheduled it for PM and not AM!!!

But I'd love to show you my newest projects this week.


Supplies:

Tim Holtz Stencil - Blossom
Tim Holtz Distress Stain - Abandoned Coral
Tim Holtz Roses - Heirloom Roses
Dina Wakely Metallic Paint - Sterling
The Crafter's Workshop Stencil - Word Association
Bo Bunny Paper Pack - Gabrielle Collection
Bo Bunny Stickers - Gabrielle Collection

Create a 5 1/2" square card from Bo Bunny cardstock.
Cut striped paper slightly smaller and adhere.
Cut Bo Bunny cardstock slightly smaller, then cut watercolor paper to fit.
Place stencil on watercolor paper and paint with Sterling Paint.
Once dry, place Blossom Stencil on top and ink.
Adhere panel to card and embellish with a sticker matted with kraft cardstock.


My second card uses a premade card, and I cut Bo Bunny cardstock to fit.
Cut striped paper slightly smaller and adhere.
Embellish with a sticker matted with 2 layers of cardstock.
Tear a strip of brown to fit across card.
Adhere sticker.


 I inked the Roses with Clearsnap Ink, then dabbed Coral Stain on top for a little more color.

 
Adhere the roses to the card.  Since they are lightweight, they add very little weight to the card.
 
 
Thanks for stopping by today.

Steph

Wednesday, July 1, 2015

Stained and Stencilled Tags

Hi everyone, Steph Ackerman here and I am thrilled to be the Guest Designer this month for Eclectic Paperie.  Thanks so much Kim.

I received some wonderful products to work with this month and I used the same products to create 3 different tags.  I hate to waste ink, stain, or paint and I try to find ways to use up all the color on a stencil rather than wiping it off. 

Supplies:

Tim Holtz Stencil - Blossom
Tim Holtz Distress Stain - Abandoned Coral
Gelli Arts Rubber Brayer
Bo Bunny Stickers - Gabrielle Collection
Ribbon


Tag #1
Create a tag from watercolor paper
Place Blossom Stencil on top and ink with Abandoned Coral Stain
Ink edges of tag with Abandoned Coral Stain, then mat with cardstock
Wrap with ribbon
Adhere to Coral cardstock
Select stickers, mat with cardstock and add to tag


Tag #2
Flip stencil over onto another piece of watercolor paper
Using a brayer, roll over stencil to release the left over stain
Ink edges of tag with Abandoned Coral Stain, then mat with cardstock
Wrap with ribbon
Adhere to Coral cardstock
Select stickers, mat with cardstock and add to tag


Tag #3
Create a tag from watercolor paper
Place stencil on top and rub over it with a baby wipe releasing the remaining stain (you get a nice subtle design)
Ink edges of tag with Abandoned Coral Stain, then mat with cardstock
Wrap with ribbon
Adhere to coral cardstock
Select stickers, mat with cardstock and add to tag


 So what do you think?  Do you use all the color off your stencils?

Please stop by my blog to see more of my projects.

Thanks for stopping by today.

Steph


Friday, June 19, 2015

Gelli Plate Printing Fun

Hi folks! Kim here today to share two project with you, both created with one Gelli Plate print. (All product links at the bottom of the post)

Now...let me start by sharing that I spent the majority of today creating a darling video for all of you, showcasing the new 6" round gelli plate and textured acrylic sheets. And...I spent the other half of the day trouble shooting said video, with zero success. My video is "stuck" on my phone and I have been unable to get it to upload to my computer or You Tube. (This is even with the help of my genius IT savvy brother-in-law!) Call me frustrated! So...I'm sorry that I don't have a lot of photos to share of the process, but I will let you know just as soon as I'm able to get the computer issue figured out...whether by hammer or some other means...LOL!...I'm kidding...kind of...

I started with the 6" round Gelli Plate, three Textured Acrylic Sheets, a non-stick craft sheet, a few stencils, a brayer, and some paper towels.  Here are the steps:

  1. Apply acrylic paint to gelli plate, use brayer to spread paint over entire plate.
  2. Press one of the Textured Acrylic Sheets into the wet paint, remove.
  3. Press all or a portion of your paper on to the gelli plate and smooth with your hand to create the print.
  4. Remove your paper, use another piece of paper is pick up any excess ink.
  5. You can see a great video, created by Gelli Arts, on using the new 4" and 6" round Gelli Plates here.
  6. Once I completed my 8.5x11" gelli print, shown below, I cut the paper into 2x2" and 1x1" squares.


Using the 1x1" squares, I created a card, shown at the top of today's post. I simply layered the 1" squares onto 1 1/8" black squares and then adhered them onto a piece of white, embossed cardstock. I'm giddy over how the colors pop against the stark white!

Next, I followed this video to created a book (I trimmed my book down to a 3" square...it's SO cute!) I used the Believe Script stencil, from The Crafters Workshop, and Wendy Vecchi's white embossing paste to add some design and texture to each page of my book. Here's the finished cover...
Once the paste was dry, I used foam tape to add a 2" square to each page. I stamped images from the Primitive Icons stamp set (see the bottom of the post for this week's special!!) to stamp images onto white cardstock. I cut out the images and words and added one to each book page...


I'm seriously so in love with these tiny books (my friend Godelieve was my inspiration!) that I'm going to make one for everyone I know...want one? :-)

If you've made it this far...hang on for this week's special and product links.

For one week only, purchase the 6" round Gelli Plate, Dina Wakley Primitive Icons, and/or Tim Holtz Mesh Texture Fade for a 25% discount! Use code GELLI when checking out!

Supply List:

Wednesday, September 10, 2014

Wallflower Assemblage Clock.

Hi Guys, Karen here with you again on this wonderful Wednesday to share with you my second guest DT project.
This week I have a Tim Holtz Assemblage clock to share with you.
  I started off by altering my clock base using Antique Linen distress paint. I painted the whole of the clock, and allowed it to nearly dry all the way, and the rubbed the clock with a soft dry cloth to remove the small amounts of still damp paint  to achieve a distressed finish.. have to say I love how it turned out!

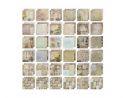
Next I chose my papers that I was going to use from the Tim Holtz Wallflower paper stash.. I have to say I absolutely adore this paper pad, and have a hard time choosing which papers to use, as I think they are all awesome!  After I chose my papers, I cut a strip approx. 2  1/2 inches wide to line the inside of the clock and traced around the back of the clock onto my chosen background piece, cut it out and inked the edges, to form the background base for the face of my clock. I then added in some remnant rubs, a distress ink reinker coloured woodlands tree and a couple of fussy cut butterflies to finished of my background. I cut some of the bristles off the back of the woodlands tree to flatten it  and kept these aside to add in later.  


I then die cut some glassine paper and a piece of the wallflower paper with the Tim Holtz Tattered floral die ( using the two smallest flowers)  and made some flowers to add into my clock. I also fussy cut a bird from another piece of wallflower paper, I adhered these to the left hand side of the inside of the clock and added in some of the pieces I had cut off the back of my woodlands tree.


 As a final touch I added a bow made of coloured crinkle ribbon and some baubles and trinkets to the top of the clock. and I was done.


There are so many possibilities that come to mind when I look at these assemblage clocks I hope you find a little inspiration in mine.
Thanks so much for stopping by today, Until next week.. Happy Creating!!
Karen xx


Wednesday, September 3, 2014

Configurations Book

Hi It's Karen Knight here with you today to share with you my very first project as your Guest Designer here at eclectic Paperie for the month of September.
I want to say a huge thank you to Kim and Bonnie for inviting me to hare some projects with you this month. I appreciate this opportunity and hope that I can leave you feeling a little inspired.  For those of you who don't know me, I love all things vintage, grungy and Tim Holtz.. So lets jump on in..
My first project that I have is a Tim Holtz Mini Configurations Book..
 I adore these, and have used this one to create a little keepsake using some things that are important to me.. A feather from my son's feather collection, and some of the dried flowers that I've kept that he picks for me as we take a walk sometimes.


 I started off by painting all the parts of the mini configurations book with Frayed Burlap Distress paint, and letting it dry. 


I then sanded the edges of the book and each compartment and inked the edges using Walnut Stain Distress ink.


Next came the fun part...cutting various pieces of Tim Holtz Wallflower Paper to size to fit each of the included compartments, and the spine, front and back covers.


I then inked all the cut to size pieces and machine stitched around a few of the pieces as well.


Then I used double sided tape to adhere all my pieces, and started to fill each compartment with some of my chosen trinkets and treasures.. (this is the part where I do lots of changing of my mind..) and I was done..


 This is my finished keepsake..


And you really can't go past a few close ups.. 

Remnent Rubs are perfect to mix and match using various sets to add your chosen phrase or sentiment!


Inside the Wishes jar ( my empty Tim Holtz Wishbones  jar ) I have  a little bit of spanish moss, some Tim Holtz Baubles, and two little tiny feathers from my son's feather collection.


On the cover I have used one of my dried flowers. I  sealed these after drying with some Ranger Multi Medium to give them a little bit of extra strength.


Sigh.. I adore the Tim Holtz Ruler Bindings teamed with a photo, another dried flower,  some hitch fasteners and Tim Holtz Ephemera...


 I love how this has turned out, and the fact that's it's made just that little bit more special and personal with the little added extras from adding in found things that are special to me.

 I hope I've inspired you.. Thanks for stopping by. Have a wonderfully creative week.. and see you all next Wednesday!
Karen xx