Photobucket Photobucket Photobucket Photobucket Photobucket Photobucket
Showing posts with label big brush pens. Show all posts

Thursday, May 22, 2014

Altered Playing Cards


Hi everyone! It's Bonnie here today to share a trio of altered playing cards with you. This is often where I go when my mojo has gone for a walkabout. I'm not sure if it's the smaller size, the freedom of the background, or just that they are so fun to create but it seems to be a great place to start when I'm in a creative slump. I start out with sanded and gessoed backgrounds which I've added basic colour to using Neocolor II crayons, gelatos, and big brush pen. Stencilling and stamping are then done on a whole bunch at once with no idea of what image I'll be adding. Bits of scrap papers, scrap die cuts, and leftover embossed scraps are added randomly, again with no thought as to the outcome. Finally, I go through my little bin of precut images, often from Deviant Scrap, to match up images with backgrounds. I usually audition several at once (sometimes up to 10 cards and images) and switch them out until I am pleased with the results. Then I go looking for appropriate (or inappropriate...lol) sayings. Occasionally I will start with the saying and then look for an image that suits it.

The card above started with the same process emphasizing the colour around the card with gelatos, stampimg with Jet Black Archival ink, and stencilling with TCW's Mini Punchinella and white gesso. The saying was chosen first and then the image paired with it because the couple look like they are full of joy (kidding). That unexpected or unusual pairing makes me laugh. After doodling and black Big Brush pen around the outside, some punched black stars which happened to be sitting on my table were added.


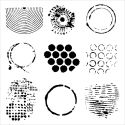
The second card followed the same process but used TCW's Mini Halftone Borders stencil with white gesso. Black gesso bottle top rings were added to the background before the images. I generally mat the wording with black cardstock and in this case, I did the same with the image to make her more visible against the busy background. The sun was popped up on foam tape to add dimension and that great shadow behind him.


The third card's background looked like a sunset and the torn papers looked like mountains in the horizon so I thought this image of the couple looking off into the distance suited it. The background stencilling is white gesso through TCW's Well Rounded stencil. Again, black gesso rings were added with bottle top stamping. More stamping was done with a TH zigzag stitching stamp and also with my dotty stamp and Coffee Archival ink. The scallop border was a punched remnant edged with Walnut Brown Big Brush pen. The threaded black buttons are from my stash.

The great thing about a project like this is that it can be accomplished over several shorter sittings. Maybe one day. I'll print and fussy cut images, another I'll prep backgrounds, another I'll add colour and so on. It allows me to continue to create at the level that suits my mood and seems to entice my mojo to return one small step at a time. What do you do when your mojo goes into hibernation? I'd love to hear.

Thanks for visiting today. I appreciate that!
Bonnie

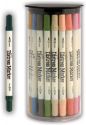
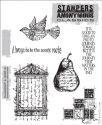
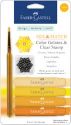
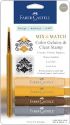
These are some of the products from the eclectic Paperie shop that I used on these cards:


Saturday, April 5, 2014

The Bee's knees ~ Altered book cover


Hello ePers. It's Bonnie here today. I had finished the inside spreads in my bee-themed altered child's board book a few weeks ago but hadn't found the time to alter the front and back covers to complete the project. I made up my mind to make the time this week. I already have my ideas percolating for the next board book or two so I wanted to finish this one.


I started by tearing up pages from an old thrift store book with French text. The pieces were random in size and shape and I layered them onto the covers using Matte Medium and overlapping until the entire surface was covered. Once dry the text papers were sprayed with three Art Anthology colours: Glorious, Paprika, and Timeless. The book was tipped at different angles so that drips and runs occurred. Butterscotch, Butter Cream, and lemon gelatos were scuffed onto the covers and spread with a finger. The butterscotch was used around the edges. Walnut Brown Big Brush pen was also used on the edges to frame the covers.


Jet Black Archival ink was sponged through TCW's Mini Reversed Chicken Wire stencil onto the now coloured text. White gesso was pounced through TCW's Well Rounded stencil and picked up some of the colours of the sprays softening the effect. More of the Paprika spray was spritzed through TCW's Mini Punchinella stencil and then it was flipped over to get the reverse imprint.


Stampotique's medium and tiny bees were stamped onto white cardstock and the yellow was coloured in with Mustard Seed and Spiced Marmalade Distress markers before the bees were fussy cut...yes even those tiny ones :)

The bee skep and honey label were printed from my computer files and the skep was matted in brown cardstock to allow it to show up and have greater visual weight. Scraps of striped paper were cut into fishtail flags and matted with the same brown before being adhered to the covers with Scor tape. Bits of diamond and scalloped borders were added to both pages and doodled on with white gel pen.


The lettering is a mix of Ransom Alpha Parts, Alpha Tiles, and small black sticker letters. Again, white dots were added for detail and to make them more noticeable. The quote comes from TH Classics 16 stamp set. A few of the Remnant Rubs Elements images were added to the piece: the crown on the bee at the bottom, the pointing hand and word fly, and the pen nib. White circles were punched from cardstock, inked with Black Soot Distress ink, and scattered around the pages. A spiral stamp was added to a few and they were outlined with both a Stabilo graphite pencil and black pen. Other elements were shaded in the same way to create depth.


To embed some of the collage pieces into the background and create more layers, black gesso was stamped in rings onto the covers using a bottle top, White gesso was again used to add more texture and embed pieces when it was pounced through TCW's Mini Punchinella stencil. By stencilling on both the background and the collage elements in the same area, it joins them into one layer and gives you less of a "stuck-on" look to your mixed media art.


The final two details were to add the bee charm beside the word Bee's and to add the washi tape to the spine using additional glue.


Thanks for hanging out with me today. I'm happy to have completed my bee book and to have had you here to share the experience. Until next time, take care and I do hope you make time to get messy and play. Remember, a new ePlay challenge has started...Wood.

Bonnie

Here are links to the eP store for some of the products I used:


Thursday, March 13, 2014

Luckily Ever After!

Good Morning EPeeps!!  St. Patrick's Day is coming up and I wanted to share with you a little canvas I made of a lucky four leaf clover!!  This is a super fun little project - you could make one for a friend or just for yourself!!  You just need a small canvas, blue paint, white spray and some fun paper!!


I started off with another background idea in mind.  I just couldn't get it to look right ... but we know that even when we are stuck to just keep going.  You never know what the end will turn out to be!!
So, I re-started with the background of blue and white paint. ( If you want to recreate this canvas, I would start here!!)

To lighten up the blue, I used Dylusions White Linen spray.  I used one of my favorite stencils, The Crafter's Warehouse Peacock Doily, to create the shapes in the background. 


Then I took out my fun washi tape collection and created a border around the edge!


Using an old heart shaped paper punch and some scrap paper, I punched out 4 hearts for the leaves.  Then I grabbed my new favorite Authentique Aboard paper to make the planter!  I used gel medium to glue them down. I was careful not to smear it around because the Dylustions spray will reactivate and move around with the gel medium!


Doodles, rub-ons, and highlights finish off the canvas!

I hope you enjoyed my project and have a wonderfully lucky day today!! Be sure to stop by the ePaperie to see all the new fun products that are coming in - I can't wait to get my hands on a few new items ...
-Karen

PS - I also can't wait to see what you all create for this month's ePlay Challenge . . . did you find a book to alter yet???? Have any questions?  Feel free to ask me!!
http://eclecticpaperie.blogspot.ca/2014/03/eplay-challenge-alter-book.html