Photobucket Photobucket Photobucket Photobucket Photobucket Photobucket
Showing posts with label Gelatos. Show all posts

Thursday, June 19, 2014

Gelato Canvas and Wendy Vecchi products

Well it is official. Andiepants is becoming a southern bell!!! We will be moving to the lovely state of Louisiana very soon!

With all of our friends and family up here in Michigan it is very difficult to say goodbye, so one of the things that I like to do is to leave a little something with my friends and family as a token of my love. 

My friend from church, Delores, had a bit of spell and is currently in a rehabilitation facility re-learning how to use her arm. She misses her friends and her church very much. She is such an inspiration to me. Back in her hay-day she rode through the entire continental U.S. on the back of a Harley, all except for Alaska. As a hobby she paints these GORGEOUS china pieces and alters children's bouncy horses into carousel horses.

So for Delores I decided to make her a canvas. Something she could hang on her wall


This is actually a canvas I began a long time ago with the background stamping. It was just sitting in my cubby waiting for the right moment. So I doused it with water and used my gelatos, blending with my fingers.


I started with just blues and then decided it made a pretty sky and I wanted a scene of some sort.

Next I covered all the edges with Tea Dye distress ink. I used my finger to smudge in and over the white areas to give it an antique look.


Then I bust out my Wendy Vecchi crackle paste. This stuff ROCKS!!!


I used the crackle to make the "clouds" of my scene.

I forgot to take pictures of the next step. For this part I sprayed some water on my craft mat and added some drops from a Distress Stain re-inker in Antique linen. Then I used this wash to cover the entire canvas. This helped the gelatos to blend better and highlighted the cracks in my crackle clouds while giving the whole thing an antique appearance.


Then I bust out my stamp it stencil it by Wendy Vecchi. I used her archival inks to color it in  and went back over the base of the stem with gelatos to help highlight the grass. I ADORE how this turned out. I went with red in honor of Donna Downey. I love her:)


I then used gesso and water to create a water white paint and flicked the paint onto the bottom of the canvas to mimic flowers growing in the grass. 

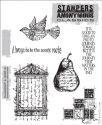
Using my Tim Holtz layering stencils, I took a phrase from some Stampers Anonymous stamps and I added my title with a smudge stick and black gelato 


and voila...


My parting gift is complete. I  hope it inspires her as much and she has inspired me.

Til next time...

{{hugs}}

Andiepants


Monday, June 2, 2014

Sweet Cow in Gelatos and Distress ink

Hi, everyone!  It's Broni here with you today and I'd like to show you how I made my Sweet Cow one-layer card.


I used a digital stamp image (from A Day For Daisies), and printed him on the bottom left side of a piece of mixed media paper first.  Then I cut the paper in half length-wise, and folded it in half.  I had my card base ready.


I took a piece of copy paper and laid it askew on top of my cow, taping it to my craft sheet to hold it in place.


I inked up an old cheesecloth background stamp that I had using Versamark.  Then I stamped it onto my card front and embossed with clear embossing powder and my Ranger heat tool.


Next, I made my sweet little cow look like he was very sick by painting some art masking fluid onto him.    When it dries it protects him, so that I can prepare my entire background and not worry about having to be careful of getting color on him.


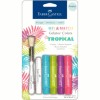
I then used my Watermelon and Snow Cone colors from my Tropical gelatos to create the sky and the cheesecloth frame.  You can see where I started rubbing the Snow Cone color in with my finger in this photo.


I used my finger and a water brush to blend and soften the colors.


Then I used some Crushed Olive Distress ink to create the grass.  Now it was time to remove the masking fluid.


It's usually pretty easy to remove just by rubbing your finger over an edge to get it started.  Then you just peel it.  If I have an issue removing it from a smaller spot, I just use an eraser to rub over it.  Here's how he looked with it removed.


Finally, I colored my Sweet Cow with my Copic markers.  I shaded around him and the frame using my black Stabilo pencil.  I also used a blending stump to soften the black.

Lastly I added a sentiment on a little flag banner and popped it up on some foam mounting tape.  The sequins were my finishing touch.


I hope you like it!  And I appreciate your taking the time to stop by for a visit!
 
Happy crafting!


Saturday, May 31, 2014

Always Take the Scenic Route ~ Altered Canvases


Hello, friends. It's Bonnie here today. I was totally in the mood for beachy colours and scenery when I decided to have a play with these four canvases. I thought it would be fun to create one scene treating the four as one...an experiment. I started with four pre-gessoed 4x4" canvases. To get some initial colour down, I scribbled over the sand part with gold and brown watercolour crayon and over the sky area with two shades of blue and spread the colour with a wet brush. I intensified the colours with gelatos, spreading their colour with a dry finger (or two).


Next I stencilled with white gesso through TCW's Tiny Circles and stamped some text using Wendy Vecchi's Forget-Me-Not Archival ink, both in the sky area. The same ink was used to stamp Wendy Vecchi's Vintage Mesh randomly rolling the pattern on the canvases so as not to get any harsh edges.


The same text stamp was applied to the sand areas using WV orange Blossom Archival ink and white gesso stencilling was also applied to the sand, although it doesn't show much. It just adds another layer and a bit of change in the colour here and there. The birds and the sentiment are stamps from Tim Holtz's Classics 16 set using Jet Black Archival ink. The birds were stamped onto some paper used to catch the excess spray so they are a mix of colours but were both shaded with Barn Door Distress marker. I leave paper in the bottom of a box that I use for spraying and then use the paper for mixed media bits when I like what I have, The two birds are actually the same stamp but I surgically removed the wings from the one and reattached one to his side so he would be walking on the beach. The sentiment piece was torn around and edged with Black Soot Distress ink before being popped up on foam tape.


The beach grass and flowers were stamped onto the canvases using Jet Black Archival ink and a stamp from Wendy Vecchi's Art Comforts set...love that set! The two flowers were coloured in with Spiced Marmalade and Barn Door Distress markers. Enamel candy was added to the centers and a few of the leaves were darkened and emphasized with the Black Soot Distress marker. Two torn scraps of green paper were adhered to the bottom of the canvases and edged with Green Tea gelato. Some Mudd Puddles Mini Beach pieces were adhered to the sand with Glossy Accents.


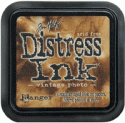
The sun was punched from more spritzed left over scraps but these have some Gold Tattered Angels sprayed on which creates quite a shimmer IRL.. The purple whad been sprayed onto a stencil and then cleaned off on this same piece which is why it's not crisp...I love that. I layered the two circles with black ones to create more dimension and contrast and then cut triangle rays to tuck underneath the larger circle layer. The clouds were die cut from vintage music paper, edged in Vintage Photo Distress ink, and popped up on foam with a little scrap of cheesecloth tucked behind them.

That's it for my experiment. These would be cute hung on a wall with spaces between or stacked on a shelf without the spaces. I would definitely do this again. It was fun! Hope you enjoyed it, too.

Thanks for visiting.
Bonnie

Here are links to the eP store for some of the products I used.