Photobucket Photobucket Photobucket Photobucket Photobucket Photobucket
Showing posts with label The Twinery. Show all posts

Wednesday, May 14, 2014

A Tag For All Seasons

Hi everyone, Steph Ackerman here with my second post as the guest designer for eP for the month of May. 

Today, I'm showcasing my tags for all seasons.  I used the same products for each tag, just changed up the colors for each season.


I used the new Prima Marketing stamp - Warm Wishes as the focal image.  She is dressed for winter, but change the colors and you can get away with using her for any season.  Each image was colored with assorted Copic Markers in keeping with the season.

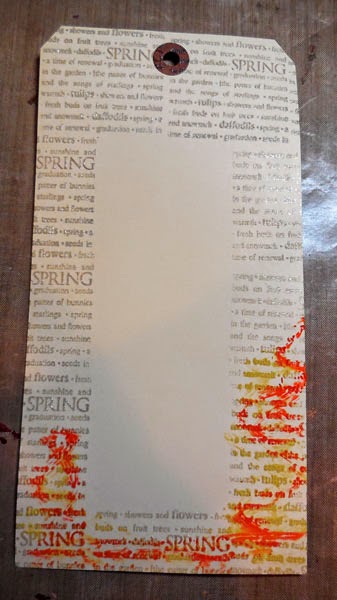
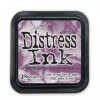
To begin, I stamped each tag with an older Hero Arts stamp set I've had forever.  Using VersaMark Ink, I stamped one season repeatedly on each tag, then added Clear Embossing Powder and heat set each tag. 


Here are the details of each tag:

Spring Tag


I used Faber Castell Gelatos in Yellows, mixing the colors with water until I had the look I wanted. 


I added some Gold Metallic Gelatos around the edges and used a paper towel to remove some of the color.


Summer Tag


I used Faber Castell Gelatos in Reds, mixing the colors then removing some of the color.


Fall Tag


I used Faber Castell Gelatos in Neutrals and Metallics.  Loving the earthy feel of this tag.


Winter Tag


I used Faber Castell Gelatos in Blues and Metallics.  I love the included purples and how the metallic colors make the tag shine.


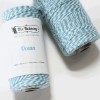
Once the tags dried, assorted twine from The Twinery - Charcoal, Gunmetal, Blossom, Strawberry, Cantaloupe, Honeydew, Buttercream, and Cappucchino was tied around each tag and through the hole.

Using assorted papers from 7 Dots Studio's Nature Walk - wonderful earth toned papers with imbedded images - I cut them into 3" x 6" panels.  Each panel was inked with the same Gelatos that were used on it's coordinating tag, then matted with black cardstock.

Using additional papers from Nature Walk, I die cut 2 sizes of ovals and placed them on the panels.    Glue Dots were placed behind the panels for dimension, allowing them to pop.

Each stamped image was fussy cut and added to the oval with Glue Dots for a little dimension.

Please stop by the eP Store and pick up all the wonderful products I used in this week's project.

Thanks for stopping by this week.
 

Steph


Tuesday, March 18, 2014

Happy Birthday!!

Hello friends!! Giovana here today sharing with you a fun Birthday card I made for my daughter, today is her birthday and she is turning 10!! She told me before going to bed, I will enjoy the last few minutes of being 9 until I wake up tomorrow, LOL. She is excited to be part of the two-digit age, what she hasn't figured out yet is that is going to last for long time, hehehe.

So, here are the details  for this project:


  • Your piece will look like this :)
 
  • Using a Mini Mister, mist your piece with water to give it a more watercolor look. 


Hope you like it!!
Have a great day!!

Monday, March 17, 2014

Water-colored Happy Birthday card

Hi, everyone!  It's Broni and I'm your hostess today!  I wanted to share with you a water-colored Happy Birthday card that I made.

It seems that water-coloring has become quite the rage lately.  That makes me happy since I've been in love with the look for a very long time!


I started by stenciling my water-color paper using the Well Rounded stencil, some large sponge daubers, and some Distress ink in Peacock Feathers, Salty Ocean, and Seedless Preserves.


Next I used my mini-mister of water to generously spray the inked paper.  You can see how wet the paper is.
I picked up the paper and let the ink run in different directions, and even blotted my inky craft sheet with the paper to pick up as much of the ink as possible.  This is what it looked like after it dried:


I ended up flipping it so that the stenciled pattern was at the top, because I didn't want to hide all the inky goodness when I attached the "happy" and stamped the "birthday".

I finished off the card by adding some enamel dots and by tying some Ocean twine around the card front.


That's it for me today.  Don't forget you've got all month (until March 26) to play along in our ePlay - Push Your Boundaries challenge to alter a book.  How fun!

Thanks for stopping in to have a look!


Friday, February 28, 2014

"Love" always and forever

Hello friends! Giovana here today bringing you a cute card, haven't made for eP in awhile, so I decided to make an elegant and simple one for you.

Here are the details:


Close-up of the embossed image, check out the pretty Sunflower Sparkle Mist.

Close-up of the rub-on.
 
 
Hope you like it!
Have a fantastic day.

Saturday, December 14, 2013

The 12 Days of Christmas ~ Day 6

Hello everyone, and welcome to Day 6 of the 12 Days of Christmas celebration at eclectic Paperie!  It's Broni here and I can't wait to show you my project!

First let me tell you that today's super special deal is 20% off on a Gelli plate.  Just use the code 12DAYS6 at checkout.

I had a little snowman that I had colored (with Copic markers) and I needed a special wintery background for him.  So I decided to pull out my Gelli plate. I have to admit that when I get my Gelli plate out I get carried away.  There are so many great ways to use it!  I didn't know if I wanted to keep it simple today or get a little more complicated.  So I just started playing.

First I applied some acrylic masking fluid to a piece of white cardstock (for snow), then brayered on some blue and green paints.  Then I peeled off the masking fluid and added spots of white paint.  I liked it!


My second time around, I played with some blues and purples, using a baby comb to create simple curving hills.  I liked this turned out too.


But I wanted more color.  So I decided to get a tiny bit more complicated.  I used some die cuts from my stash to lay down clouds and a small heart on the Gelli plate.  I brayered on some aqua blue acrylic paint, then used the comb again to create hills.  I peeled off the die cuts from the Gelli plate before I laid my cardstock down onto the plate and rubbed it with my hand to pick up the color.


 I added some small patches of purple and green. As you can see from the photo below, I don't usually clean my Gelli plate in between colors.  You always get an added layer of color and surprise if you just leave it alone and continue to build the colors.


Now that was more color!


But I needed more snow for my little snowman!  So out came the stencils and embossing paste, and then some Star Dust Stickles.


 Now I was happy with my background!  This is what I used for my cute little snowman card.


 Don't forget!  You can get the Gelli plate and other Gelli Arts products at eclectic Paperie!  Today you get 20% off on a Gelli plate.  Use code 12DAYS6 at the checkout.

If you need a jump start on playing with Gelli Arts products, be sure to visit their blog: Printing with Gelli Arts.  There are tons of great videos there!

Thanks so much for stopping in to visit with us today!  Happy crafting!