Photobucket Photobucket Photobucket Photobucket Photobucket Photobucket
Showing posts with label wendy vecchi stencils. Show all posts

Monday, June 29, 2015

Create Your Own Sunshine

Howdy friends! For those of you who don't visit my personal blog, I'm sharing a project that I created last week, 
using embossing powders on a project. Here's my finished card and this is how I created it...

I started with a piece of Mixed Media cardstock, perfect for any kind of ink, spray, or paint. I used Distress 
Markers, a water brush and my non-stick craft sheet to add color to the background (and it appears that I'm still a 
bit obsessed with pink and grey).
I scribbled ink from the marker on the non-stick craft sheet and then picked up the ink with the water brush. 
Then I just swiped the brush over the cardstock.

Next I used some of Wendy's stencils to add some background design, using Watering Can Archival Ink
 (my favorite color ever!)
I also used the oval shape from the Spotlight Frames and Mask set to create a mask on my background, which I
 then traced with a black Fude Ball pen. I then used the oval shape frame to act as a mask for my background so 
that I could stencil the Sunburst shape and keep the burst within the border on my frame. I then stamped the 
sentiment and swirl from the Paper Doll Art stamp set.

My card features spot embossing, meaning that instead of embossing a large area I'm only embossing a portion 
of a larger piece. You can see my Watering Can embossed lines at the top and bottom of my card.
Next, I used the new Tiny Shapes Movers & Shakers dies (aren't they the tiniest, cutest dies ever!) to die cut a 
few embossed butterflies. For quick and easy die cut embossing, I first added some Distress Ink to a scrap piece 
of manila tag and then used clear embossing powder. Then I just die cut the shapes out of the already embossed 
tag!
Next, it was time to assemble! And here is my completed card...
You can see that I embossed the butterflies, my gal's apron, gloves, and lips. This was done by first stamping or 
coloring the image and then using a VersaMark pen to color over the area that was embossed, I used clear 
powder for these areas so that the colors would show through the powder.

Hope you enjoyed today's project!!

Tuesday, October 28, 2014

Thanks for the memories, Steph Ackerman

Hi everyone, Steph Ackerman here today.  By now you know that eclectic Paperie is closing it's doors.  That also means the end of the blog and the design team.

We have had a fabulous run as members of the eclectic Paperie Design Team and wish to thank you all for your interest and support over the years. With the eP blog coming to a close at the end of the month, we all wanted to do something special to celebrate the fabulous friendships, tons of inspiration from other team members, from Kim, and from all those who participated in our challenges. Each of the current DT members is taking a day to post some of her favorite makes from her time on the eclectic Paperie team. We hope you enjoy the look back.

While I've only been on the team a short while,  I have really enjoyed working with this team and have loved the wide variety of products available in the store.

This was the very first project I created for eP and I had so much fun creating it - the stencils, the stamps and assorted Art Anthology paints were so much fun to work with.


This canvas uses a large Prima stencil, some molding paste and Art Anthology paints.


And a fun use of the same stamp to create tags for all seasons with Gelatos.


I loved creating these cards with Art Anthology paints, a Gelli Plate and The Crafter's Workshop stencils. 


And I just wanted to shout out a big thank you to Kim for giving me the opportunity to work with her and this amazing design team.
 
Steph
 

Thursday, April 10, 2014

Art Parts Stencil Book

Hi everyone!  Julia here with my first post as the newbie DT member for eclectic Paperie!  Today I have an Art Parts Stencil Book I made to hold all of my brandy new Wendy Vecchi Stencils!    I recently attended Wendy's Mixed Media Tag Art Journal workshop held at the brick and mortar eclectic Paperie in Exeter, NH. She showed us one of these books that she had made and I thought it was a great way to keep all of my stencils in one place and easily accessible. I have lots of pictures to show how I made my version of the Stencil Book so grab a cuppa and settle back in your chair!
Here's my front cover
 And  my back cover
First I spread Black Embossing Paste over the covers, not quite covering it all.  After it dried, I spread Crackled Texture Paste over the black areas and let that dry.
Next, I sponged over both covers with Peacock Feathers and Mustard Seed Distress Inks
I stenciled the Checkmake stencil with Archival Watering Can Ink on both covers.
Then I focused on the front cover - I sponged with Walnut Stain Distress Ink to tone down the colors - then I stenciled  the Bar Codes Stencil with Black Embossing Paste
I die cut the Tim Holtz mini Flourish out of Clearly for Art Blackout Modeling film.  I spread Metalic Gold and Metalic Silver Embossing paste over it with my finger to give it the look of wrought iron, let it dry and adhered it to the front cover.
I inked an Ideology Key Hole and Ideology Border with Archival Cornflower and Orange Blossom.  I added an Ideology die cut key, a label made with my P-Touch Label maker and drew a square frame with a black Stabilo Pencil
I stamped around the edges with the plaid square of Wendy Vecchi's Large Collage stamp (I cut it into small squares so I could use each one separately). 
I kept the inside covers clean and simple so nothing would catch on the stencils.  I stamped Ornate Dots (I absolutely LOVE this stamp!) on the inside front cover with Archival Watering Can ink and sponged with Mustard Seed, Peacock Feathers and Walnut Stain Distress inks.
For the inside of the back cover - I stamped Wendy Vecchi's From A-Z background stamp and sponged with the same Distress inks as the inside of the front cover (above)
To finish the back cover - I stenciled using Bar Codes, Create a Wreath and Dots and Stripes using Archival Black ink.  I left this cover with the brighter colors and didn't sponge it with Walnut Stain Distress Ink
I added a die cut bird (Tim Holtz Alterations Mini Bird and Cage die), cut out of Clearly for Art Blackout Modeling film and made a label with my name with my P-Touch Label Maker. (so no one could say 'Hey - who's book is this??!)
And here's a look at the stencils stored inside!
I hope I have inspired you with my little stencil book -  isn't it nice to keep our supplies in artsy little books rather than just in their store packaging?!!  Thanks so much for stopping by the eclectic Paperie blog today!

Stamps:  Ornate Dots, Large Collage Stamp, From A-Z Background - Studio 490 Wendy Vecchi
Inks:  Ranger Distress Peacock Feathers, Mustard Seed and Walnut Stain, Archival Watering Can, Cornflower  and Orange Blossom
Accessories: Art Parts Stencil BinderBlack Embossing Paste, Metalic Gold Embossing Paste, Metalic Silver Embossing Paste, Crackled Texture Paste, Clearly for Art Blackout Modeling Film, Mini Lock and Key, Mini Flourish, Mini Bird and Cage - Tim Holtz Alterations Repositionable Magnetic Dies, Brothers P-Touch Label Maker - Staples, Stabilo Black Pencil, Ranger Ideology Borders, Glue N Seal - Ranger,  Wendy Vecchi Stencils - Create a Wreath, Bar Codes, Dots and Stripes, Checkmake.

Thursday, February 20, 2014

e Picks Challenge 'Do something with a Bag'


Welcome to another e Team Picks Challenge. It's Toni here to take the stage and introduce you to the latest challenge and I'm asking you all to 'do something with a bag' and that means that you can choose any kind of bag, be it paper, plastic, leather or even that old Louis Vuitton case you don't use any more!  (and if you've got one of these, I'll give you my address later ! ) You can use any technique or medium you wish and in the true spirit of the eclectic Paperie challenges, just let your imagination fly ! I've chosen a canvas tote bag I've had knocking around for years. It was actually a magazine freebie. I've given it a fresh new look with lot's of Studio Paint and applied stamped tissue. I must say, I love the new look. Here's how I got started on the transformation.......


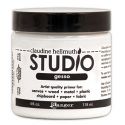
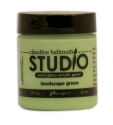
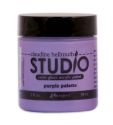
The first picture shows the rather sad, old bag I started with. I gave it a coat of Studio Gesso, all over including the handles, and already it was looking possible. Being somewhat impatient, I dried it with my heat tool, and then waded in with the paints. I chose, landscape Green, Purple Palette and Painterly Pink and applied them with a broad flat paint brush, in overlapping patches. Once dry, I repeated painting of the other side, varying the layout of the colours slightly.


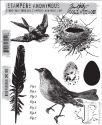
I then chose some of the fabulous stencils I've received in in my DT packages from Kim. Here you can see Wendy Vecchi's Dots and Stripes, Crafter's Workshop Mini Harlequin and a Donna Downey Flower stencil. I used Antique Linen Distress paint and positioned the stencils in places where the colours butted up against each other. I think this helps to 'meld' it all together. I quite liked it at this point but .... why leave it there when I was having so much fun? I love the technique of stamping on tissue and layering it onto canvas, so I decided to use this on the the surface of the bag. As the bag has lovely spring  like colours, I thought it would be fitting to break out the new Tim Holtz Bird Feather stamps. I also delved into my stamp collection and found a selection of other botanical stamps. I stamped onto several tissues, using black Archival ink.


I cut around each shape and layed them on the surface of the bag. Once I was happy with the layout, I separated the two layers of  stamped tissue and adhered each image to the bag using Studio Matte Multri Medium. If you have never tried this, you really MUST have a go ! It's easy to do and if it goes wrong you can scrape it off whilst its still wet and try again. It's amazing, you really can't see the tissue once it's dry Here a close up..... 


To finish off, I added a little Maya Road wooden tag which I first painted white and then stuck on a little bird charm I made by stamping onto a piece of Polyshrink and heating to shrink the image. Just gives it a classy finish! 

I hope this project inspires you 'to do something with a bag' Remember it can be any kind of bag, as simple or as complex as you like just go ahead and have some fun ! x

 All of those who play along with our challenge will be entered into a prize drawing for a $15.00 gift certificate to the eclectic Paperie store.
So grab your supplies and play along! 
 Here are a few things to keep in mind for this challenge…
 -You do not have to use products sold in the eP store…but we do love it when you do!
-Share a direct link to your creation, not just your blog, using the Linky Tools feature at the end of this post.  If, for any reason, the Linky Tools doesn’t cooperate, please add a link in the Comments section of the blog.
-When uploading to any online galleries, please use any of the following keywords; eP, eclectic Paperie or eTeam Pick Challenge.  Link your creations to the eP blog.
-If you’d like to be considered as one of our featured projects and be entered into our prize drawing, please be sure to add your link. Winner will be announced on the first Thursday of the month. 
Here are some of the supplies available from the eclectic Paperie Shop, which I've used on my project. Good Luck !


Saturday, December 28, 2013

Be Fearless...


Hi folks!  Happy Saturday!  My apologizes for the delay is posting today...I confess that I totally forgot.  I think the holidays have created a sleepy brain...LOL!

Today I'm sharing a project that I created during a recent class with Dina Wakley.  The focus of the class was on understanding color, which is definitely an area where I struggle with when it comes to art journaling, which makes me giggle since I have no issues with this when it comes to card making.  I think much of has to do with me being so darn excited about creating journal pages that I grab way too much stuff and struggle with knowing when to stop applying color, design, and layers!  WooHoo!

During the class, Dina talked about the color wheel and using colors that complimented each others and those that were on opposite sides of the color wheel (if you don't have a color wheel, get one, it's really a helpful tool!)  We created a bunch of color combinations in the beginning of the class before we started working on the journal pages.  We created two pages and this one has become one of my favorites...I love the background color and contrast of the deep blue.  Hey, I did it...two color families and a neutral!  Yippee!

We started by using deli paper (get some of this stuff, it's awesome!), paint, and stencils to create a sheet of patterned paper.  Once that was dry, we cut out random shapes; since I'm a fan of circles, that's what I went with.  Then we created the background of the journal page, using a contrasting color.  (Orange and blue are on opposite sides of the color wheel).  I used only colors next to each other on the color wheel to create the background colors (yellow, red, orange).  Once the color was dry on the page, then I added the deep blue/purple circles (again, colors that are next to each other on the color wheel).  Then it was time to add additional designs and neutral colors.  Black is my favorite neutral as it really pops on a page.  I used paint in a bottle with a pointed tip to draw the fern image and write the words "be fearless" and a watercolor pencil to draw around the circles.  I then cut out text paper to fill in the leaves.  Lastly, I just added some stenciling.  Again, using black and my background orange color.  (Oh, and I added some tiny white dots 'cause I like dots!)

This was a really fun project...learning to play with color is great stuff!  Grab a color wheel, art journal, stencils, and some paint and experiment...be fearless!  (Product supply below)

Supplies:
Dylusions Art Journal
Adirondack Acrylic Paint
Classic Words Stencil (from Wendy Vecchi)
Various Crafters Workshop Stencils

Monday, October 7, 2013

Create Art

Today's post is about being inspired by art wherever you find it!  My kids belong to a monthly subscription plan from Kiwi Crate (if you have kids, check it out...great stuff) and last month's projects were all about modern art. 

One of the projects was to create a Mondrian painting.  About half way through the project, I realized I could create the same look in my journal!  I love how it turned out...so different than the free form of many art journal pages but it's great to have a different look gracing my journal pages.
 
 I started by painting two pages with gesso.  You'll always want to prep your pages with gesso whenever paint is involved.  (Using Dylusions Ink Sprays, don't gesso!)  I then used low tack tape (you could use washi or tissue tape) to create my boxes.  I actually used a Configurations Box for the design!
 Then I got busy with paint!  I chose four colors that worked well together and then added two neutrals, black and cream.
 Once the paint was dry, I decided to decorate the boxes.  Now I would normally use Archival Inks with stencils but I adore Wendy's new ink colors and they were the perfect match for my paint colors as I wanted more of a watermark look.  I used a bunch of new Wendy stencils as well as a few of Catherine's new stamps.  (See supply list links at the end of this post).  I kept the tape on when I was stenciling.

 Once all of my boxes were decorated, I removed the tape!  WooHoo!!  I was so excited by the final look...so different than what I normally create but it was so much fun!  (I need to go back and clean up a few of my lines...makes me twitch that I had a little paint sneak under the tape!)
 Here's the full journal spread.  Super fun and quick project...what have you been inspired by this week?

Supplies: