Photobucket Photobucket Photobucket Photobucket Photobucket Photobucket

Friday, February 28, 2014

"Love" always and forever

Hello friends! Giovana here today bringing you a cute card, haven't made for eP in awhile, so I decided to make an elegant and simple one for you.

Here are the details:


Close-up of the embossed image, check out the pretty Sunflower Sparkle Mist.

Close-up of the rub-on.
 
 
Hope you like it!
Have a fantastic day.

Thursday, February 27, 2014

The Bag Lady

Hi there ePers!  Today I (Erin) am showing you my bag that I made for the eP Picks Challenge hosted by the always lovely Ms. Toni!

When I first learned about this challenge, I was racking my brain on what medium to use!  Paper? Seed sack?  Lace handkerchiefs?  Redecorate a gift bag?  Use a brown lunch bag?
I decided to use up some of my seed sacks that I bought from my cousin's yard sale last summer!  She wanted to get rid of them, and I knew that I could find something useful to do with them sometime!  Well, that time came now!

Seed sacks are kind of like the old laundry bags from college, but without a flat bottom.  If that makes any sense!  It's tough, hard, stiff canvas.


Throughout this whole process, I did not measure.  I eyeballed all of the sides, and roughly eyeballed the handles.

I went through and cut the sides into actual panels, and prepped them all with gesso.  Once that was dry, it was ready to paint!  I used my Acrylic Glaze paints mainly because I wanted something vibrant and I wanted it to stand out.  I don't have too many other options in the paint department, so the Acrylics worked beautifully!  (I think so anyway!  ;D)

The first panel was my face.  Which, it's not MY face!  My 4 yr. old daughter and I had a discussion about this face!  She asked who it was a picture of and I responded no one.  She said, "No Mom, really, who is it?"  I replied again, now a bit agitated, "It's no one, ok?!"  She came back with, "Jeez Mom, you don't have to be mean about it!"  LOL!
So, the face just kind of drew itself.  I used black gesso and a paint brush.

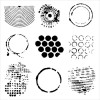
To create the background, I just used different stencils and more Acrylic Paint colors and more gesso!

I pretty much did the same thing for all of the sides.

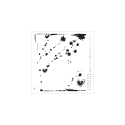
The difference for the back/front panel w/ the words 'My Craft Bag', are that those are sprays with different stencils and black gesso for the tiny circles stencil.

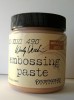
The difference for the rose panel is that I used white embossing paste, which I mixed a color into and using the edge/end of my palette knife, laid down the paste in the form of a rose.

I did have help on this, in the sewing it together portion!  I only sew on paper!  I NEVER sew fabric!  Hey, I'd actually have to measure something!  YIKES!

Anyway, I did the handles, and was successful at attaching 2 panels together, and then my sewing machine decided not to work right.  So, I handed my project over to my mother to sew the rest of it together.  I had strict instructions on how I wanted it done.  And she is such a darling and finished it for me so that I could post it here on my day!


I hope that you have been inspired by my bag and want to try out for our challenge!  This is a perfect opportunity to think outside the box!!!!

Erin

Links:
white & black gesso
white embossing paste
Antique Bronze Distress Paint
Faber-Castell Big Brush Pen (black and white)
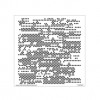
Stencils: Mini Reverse Chicken Wire, Mini Tiny Circles, Distressed Honeycomb, Bubbly
Silks Acrylic Glazes Honey Amber, Pink Anthurium, Bolivian Blue, Love Struck, Olive Vine,
                                    Apricot Nectar

Dylusions: Pure Sunshine, Funky Fuschia, London Blue, Cut Grass, & Melted Chocolate

Wednesday, February 26, 2014

Harbingers of Spring


The Sweet Sentiments Paper Pad by Graphic 45 has some great Valentine and Easter/Spring designs.  As soon as I saw it, I just knew I had the perfect use for the images in the pad.  I had this pair of crib shoes that I picked up several years ago at a thrift store.


I photographed the unaltered shoe on pieces of the beautiful G45 paper pad to show you my inspiration for my colors and embellishments.  


Above is a close-up of embellishments I added to images from the paper pad.  The 2-ply butterflies were cut with a die from the set of Spellbinders Circle Butterflies.  The tiny purple flowers were cut from vellum with a Punch Bunch flower punch.  To add dimension I cupped the flowers by using an embossing stylus and a mousepad.  I added centers to the flowers with a metallic gold gel pen.  The large pink flower was punched and formed in the same way.  A bit of rose colored organza ribbon was also added to her hat.  These G45 elements were all fussy cut with my go-to favorite Cutter Bee Scissors.  All the edges of these pieces were distressed with an Inkssentials Blending Foam Replacement Pad and Tim Holtz Distress Ink---Old Paper.  The 3 images on the slipper on the right were matted on coral paper to tie in with the color of the girl's dress in the slipper on the left and also with the large paper butterflies.


The ivory colored flower sprigs that form the background and act as anchors for the G45 elements are from the Botanica Collection by Petaloo.  I attached the G45 elements to the sprigs with Mini-Glue Dots.  The paper butterflies are from the Petaloo Printed Darjeeling series in a color called "paprika."  They were also attached with the Glue Dots.  The flowers nestled inside the slippers are a mixture of floral bridal embellishments and paper roses from my stash.

It has been fun being guest eP designer for the month of February.  As the month of February ends, I hope that just like the robin, my project this week is a Harbinger of Spring!

Thanks for stopping by, Paulette Akagi


Tuesday, February 25, 2014

An Altered Canvas Bag with Broni

Hello, everyone, and happy Tuesday!

It's Broni here and I'm using my turn as hostess here on the eP blog to show you my entry in Toni's Altered Bag ePicks challenge.

Here's what my altered bag looks like:


Now I'll walk you through the steps I followed to get there, with a few photos along the way.

1- used a piece of heavy cardboard inside the bag to protect the other side and to give me a firmer surface to work on

2- painted on watered down Gesso
3- airbrushed the whole front lightly with Copic BG53
4- airbrushed using Copic BG57 and the TCW Well Rounded stencil
5- applied Studio 490 Metallic Gold embossing paste with the same stencil


This embossing paste is so beautiful.  The stencils turned out looking like jewels! 

6- attached flowers and beads using Ranger Glossy Accents


7- reapplied some Gesso in order to have a better base to add my sentiment
8- applied Brilliance Galaxy Gold ink using a large sponge dauber and the Rays stencil
9- applied Distress Black Soot ink with the Tiny Circles stencil
10- stamped sentiment (from Technique Junkies) in Archival Jet Black ink; used a fine tip Sharpie to smooth out some of the lines


11- laid a scrap die cut over the sentiment and airbrushed again using the Copic BG53


12 - traced around the die cut using the Sharpie; drew another line around to form a frame
13- misted with some gold spray ink
14- added some washi tape here and there (may need to adhere it better with some of my Glossy Accents)


Oops!  I almost forgot to show you the back....airbrushed with my Copic BG57 and my Studio 490 Barcodes stencil.


 So there you have it!  I think this would make a great bag to carry craft supplies in.  Or maybe some wine.  Or maybe both!!

I hope you'll play along in the challenge with us!  You could win a prize and most likely have loads of fun along the way!

Thanks so much for stopping in today!  Until next time....Happy crafting!


Monday, February 24, 2014

It's Good to Be Queen


Hello everyone! It's Bonnie Irvine here today...a little late but I had to wait until daylight to take photos. My time is not quite my own these days. I created a twofer for today's post. It's a page in my bee altered board book as well as a response to our latest eTeam Picks Challenge: do something to a bag.


I began the background by adding torn chunks of masking tape to cover the pages. Next I used a piece of cut n dry foam  to apply two colours of yellow paint, a medium yellow and a golden yellow.


When that dried I combined Golden's Quinacridone Nickel Azo Gold with glazing medium and brushed the glaze over the pages removing some with a baby wipe. That helped define the overlaps and torn edges of tape. Vintage Photo Distress ink was applied to the dried pages through TCW's Mini Punchinella stencil. White gesso was applied through a graduated circles stencil, and black gesso through TCW's Confetti stencil and TH's Measured Stencil.


The images were fussy cut with a narrow white border and the bee clock and large bee images were also matted in black. All of the bee images came from Etsy shops. The large bee in costume was popped up on foam tape, had her wings sparkled with Goldenrod Stickles, and was given a length of ribbon to ground her.


The lettering for "It's good to be queen" is a combination of Idea-ology Alpha Parts and Alpha Tiles, Doodlebug alphabet tiles, and recycled Scrabble letters from a travel game...love the smaller size of these. All were adhered to the pages with Glossy Accents. White paint pen dots accent many of them. Bits of lace, more ribbon, some punched circles. and washi tape added more interest and balance to the pages. A tiny bee charm and doodling finished the background.


The paper bag began life as a 4.6 x 8.6 inch kraft bag. I folded it so that the open end tucked under the bottom flap so it would serve as the closure. Inside the bag, I used glue to seal the it below this fold so that my tags would stay in the first compartment.


A leftover piece of kraft paper which had been stencilled with TCW's Chevron and Confetti stencils and gesso was applied to the outer section over a rectangle of black cardstock. Black Soot DI was used around the edges of the kraft. A wooden crown button was threaded with narrow black ribbon and adhered to the stencilled rectangle. The bottom of the bag has vintage music paper, matted in black and coloured with Vintage Photo DI as the background to the Queen Bee clock, also colourized with Vintage Photo.


The inside of the folded bag was stencilled with Vintage Photo through TCW's Mini Punchinella stencil and black gesso through the Confetti stencil. The large matted and fussy cut bee was popped up on foam tape and adhered to the left side with a metal crown charm from my stash. The middle panel has a quote from Oprah which was cut out with TH Mini Baroque die and matted in black.


Inside the paper bag, I placed three kraft tags which had been collaged with scrap papers, images, and a leftover Create with TLC sentiment. Lots of doodling was done on these simple tags. The backs are plain for me to add journaling or more quotes as I find them.

That's it for my twofer post. I hope you found a little inspiration in all of this. I thoroughly enjoyed the process and am delighted that you are here to share it with me. We would love it if you joined in with Toni's Altered Bag Challenge.

Bonnie
Here are links to the eclectic Paperie store for some of the products I used: