Photobucket Photobucket Photobucket Photobucket Photobucket Photobucket
Showing posts with label Tim Holtz Stencil. Show all posts

Saturday, July 26, 2014

Reused, Repurposed, and Personalized Notebook

Hi everyone, Steph Ackerman here today and as the summer starts to wind down it's time to think about school restarting.  It's always fun to send the kids off that first day with something new, useful, and fun, as well as practical.  I think it kind of takes away the edge of starting anew.

This notebook was not only fun to create, but also very practical.  Add your child's name to the cover and she'll have something to show off to her friends.


I started with a notebook that desperately needed some revamping.


Using Walnut Stain Distress Ink, I first inked the front cover, then cut white cardstock to fit the front of the notebook, and also inked it with Walnut Stain Distress Ink.


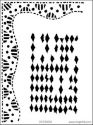
I cut blue cardstock slightly smaller than the front cover.  Placing Tim Holtz Splatters stencil on the cardstock, I used Aloha Velvet Art Anthology paint.  To get paint into the small spaces, I used my fingers then moved the stencil around the cardstock until I had the look I wanted.  Once it dried, Walnut Stain Distress Ink was added around the edges and the panel was adhered to the front cover.


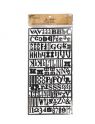
The letters were cut from Grungeboard and painted with Aloha Velvet Art Anthology paint .  Using a stencil with Art Anthology's Honolulu Blue Sorbet paint, additional dimension was added to the letters.


The letters were then inked with Walnut Stain Distress Ink.  To grunge up the cover some more, I used Blending Foam to add Walnut Stain Distress Ink over the painted splatters.


I think Emi will be happy with her new notebook, don't you? 


Thanks for stopping by today.
 
Steph


Thursday, May 29, 2014

Pinterest Inspiration

Today my post will be a tad bit different. Today my post is based on Pinterest inspiration.

"Whatchu talkin' bout Willis?"

Ok...so how much time do we spend on Pinterest? Ok now add 3 hours a day to make it in real time right? 

You in the back stop glaring like you don't know what I'm talking about.

We are constantly browsing through Pinterest for ideas and inspiration for whatever we do in our lives right? Where would we be without Pinterest?!
*ahead on housecleaning and caught up on laundry*
but seriously gals. This is a wonderful resource for numerous aspects of our lives...including...mixed media art. 

So as an example, today I'm going to show you how I took this image from Pinterest


as inspiration to alter some wood pieces I had lying around.


Here's a quick little video on how I made this lovely piece


I also wanted to share with you the new Cold Country Line from 7Dots


I just adore these papers!!! I also used flowers from the cartographer line and used my Tim Holtz stencil for some of the background. I adore the cool colors of this line and can't wait to use more.
  

Until next time...
{{hugs}}
Andiepants

Tuesday, February 4, 2014

Let a Smile Be Your Umbrella


Hello everyone. It's Bonnie Irvine here today with the U pages in my altered dictionary. The poor thing is getting so thick, I'll soon need a bungee cord to keep it closed! I started the two page spread by gessoing the pages I wanted, keeping the word and definition gesso-free. The two pages were adhered to the adjacent pages with Matte Medium to give them strength so they could better hold up to wet media. Next I took my water brush and watercolour palette and applied some greens, oranges, and blues to the background.


Mowed Lawn Distress ink was applied through the Dylusions Diamond of a Border stencil to frame the bottom and sides of the spread and provide an outline for the images. I chose this stencil because the shapes in the border look like umbrellas to me. Doodling with a black pen above and below the stencilling emphasized the curvy shape. Lime, Tangerine, and Metallic Blueberry gelato were placed next to the inside black line and blended with a dry finger.


The drips at the top and the raindrops were created by applying Salty Ocean Distress ink through another stencil and then outlining them with black pen. Using TCW's Well Rounded stencil, gesso was applied through one of the patterns. Rocket Red Gold ink was applied through another pattern from the same stencil. Memento Peanut Brittle ink was sponged through TH Burlap layering stencil and some text stamping was done with Memento Bamboo Leaves ink.


The sweet little girl is a Mo Manning image, coloured with Prismacolor pencils, fussy cut with a narrow white border and again with a narrow black border. She was popped up on foam tape for dimension.The words to an old Bing Crosby song my mom used to sing were penned in around the frame line repeatedly. The other sentiments were computer generated and matted with black cardstock to give them more visual weight. The two umbrellas were cut freehand from old book text and given a smear of white gesso to fade the printed words. Doodling with black pen, edging with Black Soot Distress ink, and toothpick handles finished them off.


One of the finishing touches on the page was to colour in the outside edges with Black Big Brush pen and add white dots. This keeps the eye inside the pages where before it wanted to drift off. Black gesso was slightly watered down and rings were created by dipping a bottle lid into the gesso before twisting it onto the page. The letter U, a Random Alpha Part letter, was adhered to the top left corner of the spread and black spatter dots were added with a TH stamp and Jet Black Archival ink.

Thanks for stopping by the eclectic Paperie blog today. We always appreciate your fine company and kind comments. I hope you find a little time to play and get inky soon.

Bonnie

Here are links to the products I used from the eP store:

Monday, November 11, 2013

Follow your dreams Canvas

Hello friends! Giovana here today, I want to show you the canvas I made few days ago, I used different mediums for this project and I hope you like it.

I started my project with an 8" x 8" Stretched Canvas, covered it with Gesso a couple of times. Then I added Lettuce and Pool Acrylic Paint, and set to dry. While my canvas was drying I stamped the pretty Prima stamp Riley Doll to a piece of Watercolor Paper in Jet Black Archival Ink, colored it with Inktense Pencils and cut it out.

After my canvas got dried, I added embossing paste over my Summer Garden stencil, then I added more Lettuce Paint to add some color, I color the flowers with Red pepper Acrylic paint, but at the end I covered one with the pretty Petallo's  flowers, I added a bit of color to the edges with Red pepper paint as well.

Then I took the Mini Chicken wire stencil and Metallic Copper paint and added it in random spots. Finally I took my favorite stencil (for now) Rays by Tim Holtz and Amber Gold Ferro Paint and added it to the left corner. The doll was added after the paint dried.


This is the final look, I worte the sentiment with a black marker.
 
Hope you like it!
Have a great day.