Photobucket Photobucket Photobucket Photobucket Photobucket Photobucket
Showing posts with label dylusions ink sprays. Show all posts

Wednesday, April 29, 2015

Becoming...

Hi friends!  Let's face it...I stink at consistently posting on the eP blog...LOL!  So...starting next week we're going to have a guest designer who will post a project each week!  Yeah!  Can't wait!  We're booked with guest designers through June, but if anyone is interested in posting from July throughout the rest of 2015, drop me an email at kim@eclecticpaperie.com. And now...on to my project! This was a canvas project that I created for a mixed media challenge, posted a few months ago.  Let's get going!

Since I can't imagine any canvas without texture, I started by applying embossing paste through a stencil.  
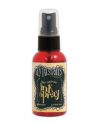
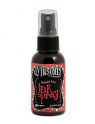
Notice that I didn't cover the entire canvas with paste...just a few areas.  Once the paste was dry, I used Dylusions Ink Sprays to add color.  The ink sprays are fabulous for creating drips!
  With this canvas I also opted to embrace the white space...a practice that I find difficult.  I love white and I love color, but boy do I have a hard time doing either option half way!  (What does that say about my personality?  Yup, it's all true! LOL!)

Next I added a bit more design using another stencil and more ink spray.  See that tiny bit of bright pink...I love it...
Now it was time for a contrast color.  Nothing makes me happier than a burst of color from the opposite side of the color wheel!  I opted for a turquoise color from PaperArtsy.  Now...what do you think happened when I added wet paint on top of Dylusions Ink Sprays?  Yup...the water from the paint activated the ink sprays and I got a decent amount of brown.  No worries...I waited for the paint to dry and applied more paint to intensify the turquoise color.
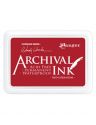
More drips...oh how I love the drips!  At this point, I broke out my stamps!  Nothing finishes off a piece like adding a neutral.  I used a few Dina Wakley stamps and black Archival Ink to add another design element.  (I love that crosshatch design!)
And since I can't live without text circles, I added a few and then used a Stabilo pencil to draw circles around the text.  Using a waterbrush activates the Stabilo pencil, allowing me to broaden the lines.  Once the pencil is dry...it's permanent.
I wanted butterflies to live in my text circles so I stamped a butterfly from Dina Wakley's Scribbly Insects stamp set three times on watercolor paper.  I used Peerless watercolors (have you tried these?  If not, you need them!) to paint each butterfly and then I used the She Script stamp from Christy Tomlinson to stamp, in white paint, on top of the butterflies.  I adore the white script across each butterfly...divine!
Each butterfly was fussy cut and attached with a glue dot.  I folded up all of the wings for great movement and dimension.  The last bit was the addition of the sentiment (also stamped and cut apart) and date stamp (ala Donna Downey...I love adding dates!)  And here is the completed canvas...
I hope you enjoyed today's project and stay tuned for a new project next week!!

Monday, September 22, 2014

We're all mad here!


Hi everyone. It's Bonnie here today with a fun mixed media piece I created to help me blow off a little frustration. I don't know about you but, for me, this works every time...have a little play, get a little messy, make myself smile, and feel a lot better! I began with a mop up page covered with Dylusions sprays in Postbox Red and Pure Sunshine. I keep a pad of  6x8 inch mixed media paper beside my work space and when I have leftover ink or paint on my craft sheet, I use a piece to mop up the extra. Then I'm not wasting and it provides a jump off point for another project.


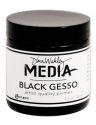
I loved the mix of the colours and the bits of white peeking through but there was a large uncoloured chunk at the bottom so I tore off a piece of Authentique's dotty Classique Elegant 12 paper and added it to the bottom. The piece that I trimmed off of that became the strip I added to the top edge. Using Wendy Vecchi's Red Geranium Archival ink and a mini ink blender, I stencilled TCW's Art Is pattern here and there. I also pounced black gesso through TCW's Mini Texturized stencil. More black gesso was used to create the bottle top rings as well.


In order to add some sparkle and shine that would catch the light without detracting from the background, I scraped Art Anthology Frost Sorbet Dimensional paint through TCW's Netting stencil, First time I used it and it is gorgeous and will likely live on my desk, an honour reserved for only my favourite products that I use all the time. It picked up a little of the Dylusions ink and was a dream to spread giving me crisp stencilling.


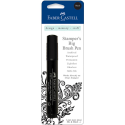
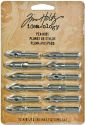
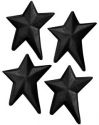
The rabbit and clock images, purchased on Etsy, were fussy cut and then edged with Black Big Brush pen. Both were adhered to the background with Gel Medium. Once dry, the hoop and stick were outlined with silver metallic gel pen. Two Idea-ology pen nibs were adhered to the clock face with Glossy Accents. Two other embellies, Wendy Vecchi's Blossom Bucket Stars, were added to the top left corner to give a little more visual weight there.


The sentiment was computer generated, printed on white cardstock, and matted in black. The word MAD was coloured with Prismacolor pencils. All words were popped up on foam tape for dimension and to create shadow. To finish off the piece, Black Soot Distress ink and Black Big Brush pen were used around the outside edges.

Thanks for joining Ms. March Hare and me today. We do appreciate your fine company and hope that you gained a little inspiration to get messy!

Bonnie


Thursday, September 11, 2014

Be Strong

Good morning ePeeps!  Micki here with a colorful art journal spread using those wonderful, bright and vivid Dylusions Spray Inks AND Dina Wakley's new stencils.

I've been neglecting my art journal lately but when I got my latest eP package, I decided that it was the perfect opportunity to pull it out and play.  And play I did!  Considering I had no clear idea for the end result, I am really happy how it turned out:

I simply started by spraying Dylusions Ink Sprays in Fresh Lime and London Blue onto the pages.  Letting the ink sit for a few minutes, then mopping up any excess with a paper towel roll.

Next I grabbed an arm load of stencils.  First I used my Water Mister spray bottle and squirted some water over the inky goodness on the pages.  Waited a minute and rolled the paper towel roll over it.  Then I laid down Dina Wakley's Tracks stencil and sprayed Dylusions Vibrant Turqoise and Polished Jade through it, making sure to clean the stencil on the same page I was working on, which gave me the 'negative' stencil image: 

Next I decided to add Dina Wakley Heavy Body Acrylic Paints through Dina's Mosaic Swirl and Spinners stencils.  I have to tell you guys that I absolutely LOVE Dina's brushes.  I used the 1" Stiff Bristle brush to pounce the paints through the stencils.  I usually use a sponge because I never had any good results using a brush, even a stencil brush.  But these brushes - awesome.


At this point I knew I wanted to use Dina's Stenciled Queenie stencil, I just needed to frame the pages.  I love Dina's Mod Mask and using the negative, created a border around the pages.  (Actually, I was too lazy to get up to walk across the room to get more stencils, :-) )  Again, using Dina's 1" Stiff Bristle brush and Lapis Heavy Body Acrylic, I painted through the stencil.  I did not worry about seepage and used paint strokes instead of pouncing the paint: 

By this time, I was in the "zone".  I grabbed bottle caps and started to add these to the border and randomly throughout the spread.  For some reason, adding those bottle cap circles was soooo therapeutic and fun.  Now it wouldn't be me if I didn't have a little goof-up, right?  Can you see it?

I do not know what I was thinking when I did the blob of paint. Definitely helped me decide where to place the Stenciled Queenie, right?

Before adding the Stenciled Queenie, I randomly stamped Dylusions Basic Backgrounds and Dina Wakley's Texture stamps using Wendy Vecchi's Archival Ink in Forget Me Not and Leaf Green on both pages:


Next came the Stenciled Queenie.  Using Dina's Black Gesso (love the thickness of it) and the 1" Stiff Bristle brush,  Queenie was added to the left page, making sure to cover my blue blob.  Once she was dry, I added journaling with a white gel pen.

Final step was to add my title on the right side using Dina's You Can stencil.  I stenciled the words first in Ruby acrylic paint, then offsetting the stencil a little, in Black Gesso.  I used the back of my paint brush to add red dots in each bottle cap circle around the edge to help tie in the red of the title.


It's so much fun to use a stencil and create different images.  Here I just turned the stencil upside down which created an overlapping X, perfect for bottle cap circles.


So much fun and I had a really, really hard time stopping.  I kept wanting to add more doodling with the white gel pen.


Inks, paints and stencils - a no fail end result, don't you think?  I hope you enjoyed my inky journey and most of all, I hope it inspired you to get inky!


Supplies used: