Photobucket Photobucket Photobucket Photobucket Photobucket Photobucket

Monday, June 30, 2014

Dreaming with Faber Castell

Hi everyone, Steph  here and I am so excited to be a part of this fabulous design team.

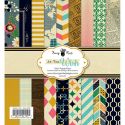
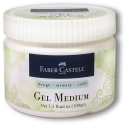
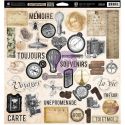
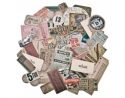
Do you ever have a day where you just want to play?  A day where you have no idea what you are going to create?  A day where you just want to have fun and see where the fun takes you?  This was my day to play with resist papers and Faber Castell Gelatos.  These are amazing coloring mediums and I know there so many things you can do if only you had the time to play.   I picked up this Heidi swap paper pad recently and because of the cool resist nature of the papers, they really lend themselves perfectly to Gelatos.

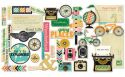
Not totally sure what I was going to do, I cut apart many of the papers and started adding color with Gelatos.  Eventually this project morphed into a mini book.

I cut chipboard into 6" x 6" pieces, planning to use them as my covers.  But once I started playing with Gelatos, I decided to add covers to my covers! 


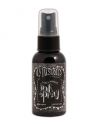
I created Gelato spritzers by cutting pieces of Gelatos and mixing them with water in a spray bottle.  After a few minutes of shaking, they dissolve and you get this amazing color spritzer.  I wish I had a bottle for each color I created!   I then used the spritzers to spritz the background of the cover pieces.  They didn't take long to dry so I was able to continuing working.


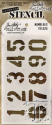
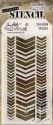
Then I decided to play with all kinds of mediums on the cover.  I used a Crafter's Workshop stencil on the right side and added Embossing Paste through the stencil with a palette knife.  Once dry, I added color with Gelatos and a Tim Holtz Water Brush.  I love how it gives the cover some nice dimension.  Next, a small branch as well as script stamps were stamped with Ranger Jet Black Archival Ink.  Since I knew I was going to add additional colors, I needed to use a permanent ink.  I then rubbed purple Gelato all around the edges of the cover using both a water brush and my finger as I wanted a blended (not streaked) look, but also something slightly imperfect.


I have a very delicate die that I wanted to use, so I colored white cardstock with coral, pink, yellow and green Gelatos - blending them with water.  Once dry, I placed the die on top and ran it through my die cut machine.  The resulting die cut is very pretty.


Cutting assorted interior pages 5 1/2" x 5 1/2", I used Gelatos to scribble color on the pages then used a water brush to smooth out the colors.

Purples -


Yellows and Gold -


Blues  and Greens


Yellows and Pink -


Using a paper towel helps buff the colors.
 
I punched holes in all the pages and tied the book together with May Arts ribbon.  Then, finding a stamp I liked, I stamped it on a scrap of resist paper in Archival Ink, tore the edges and added more Gelatos.  Once I placed in on the cover, I used a Faber Castell White Stampers Brush to draw some dash lines around it. 
 
Now this little book has become my little book of dreams.  It is just waiting for me to add some little poems and quotes that I find along my journey.  I hope you like it and I hope I've inspired you to pull out your supplies and find some time to just play!!!  

Thanks for stopping by today.

Steph

Saturday, June 28, 2014

New Bike - June's ePlay Challenge: Fabric

Mary-Ann here to share with you my take on June's ePlay Challenge: Fabric with Andiepants.  
Btw the deadline is June 30th!  You could win a prize!  

I have to tell you that I not much of a sewer and don't have scraps of fabric hanging around.  My mom does but she lives four hours away.  So, I called my gal pal and asked her to scrounge up a handful of scraps that I might incorporate into my layout.  

I realize that you have seen some pretty serious fabric play this month, but I am going to bring it to you simple style.  My style.  Scrapbook style.  

I swear to you, there is fabric on this layout!!  I used it as I would paper.  Cut blocks, tucked them in, and applied a strip on the bottom.  Nothing earth shattering but still fun and fabric adds a bit of texture to my layout.


I hope you have been inspired to add fabric to a regular ole' scrapbooking layout.  
Until next time.....


Friday, June 27, 2014

June ePlay Challenge Project

Hi everyone! Debbie here with you today for my first post as a designer for the Eclectic Paperie! I thought I'd play along with the June Challenge and share my Father's Day project with you.  Although my father is no longer with us he is always on my mind, so in his honor I created this layout.  I incorporated some Burlap as my fabric.I'll share the layout with you and then I'd like to share a short video on how I made it.
A few details for you.

The supplies I used for this are available in the Electic Paperie Store. Here's a few links for you for some of the product used on this layout.
Prima- Cartographer collection
Distress Ink - Shabby Shutters, Vintage Photo and Rusty Hinge
Tim Holtz Patterned Paper Pads
Tim Holtz Layering Templates
Splash of Color Silks -
Prima Cartographer 12x12 Paper - Chipboard Self-Adhesive Pieces

The remainder of the products used on this layout are from my personal stash.

Thanks for stopping by the Eclectic Paperie today!!!

Debbie
    

Thursday, June 26, 2014

Cigar Box Purse + Marion Smith Paper = Love!!

Hi EPeeps!! Karen here today with a really fun alter of a cigar box purse!!  I love cigar boxes, in fact, if I see one at Goodwill or any thrift store, I pretty much have to buy it!!  And when I saw the Marion Smith Motley Paper, I just KNEW it was perfect for my latest cigar box find!!!  This paper is A-MAZING!! Seriously, it almost went into the 'don't cut that paper because it is too awesome pile' that I have, but I put on my big girl panties and cut and ripped right into it - and I am so glad I did!


 Now I have the cutest little travel box for my watercolors!!  I actually carried them up to the pool with me this weekend in my 'new' box!!  Just perfect!


This is how it started, it already had the cool bead handle - I can't take credit for that!!


 I cut up the paper and distressed it with Wendy Vecchi Dandelion and regular brown Archival Ink.


I glued and sealed the paper with my new Dina Wakely Gel Medium!! (Love that it comes in a tube because it was SUPER easy to squeeze on where I wanted it to go!!)  I added some more distressing to the edges and stencils with ink and then I was done!! I really wanted to add more, because I always do, but I kept it simple!! And I love it!!

I hope you enjoyed my project!  Make sure to check out the Marion Smith paper - so beautiful!!!


Wednesday, June 25, 2014

Our Time File Folder Mini Album

This guest design month has 
certainly flown by for me. I want to thank Kim and Bonnie for having me in to share a few projects with you. It's been a real treat, and I hope you'll come visit me at my blog sometime soon. 


Today I have a mini album 
made from file folders and featuring Tim Holtz beautiful Wallflower papers. There are a huge amount of photos, so I'll try to keep my explanation simple and short.


I started with three full size
file folders, not the minis that are out there.


Cut to 6 1/2" wide.
Trim off the tab making it 17 1/2". Cut three of these pieces.


Fold in each side to
form a W. The left side that had the tab will be about 1/4" longer.


Add 1/4" Scor Tape to
three sides as shown above. Remove backing and adhere to section to the left. This will form a pocket. Your W is now glued together in the center. The shorter flap will be your cover... the longer flap will now be adhered to your next W....


like this. Apply the Scor
Tape to form a side pocket when adhering the sections together.


When you have all three sections
put together, it will look like this. You should have three top pockets and two side pockets.


I inked all the edges with
Walnut Stain Distress Ink then gave it a vintage look by flicking on some water drops. I inked a piece of Idea-ology white seam binding with the Walnut Stain, Bundled Sage, Vintage Photo DI... and glued it around the book in the center to form my closure.


I did some machine stitching 
to my front cover sheet and adhered it to the book.


For the spine I used a
piece of Canvas Corp natural canvas and some lace from my stash.


I added Tim's papers to
the pages along with some stenciling (Burlap Layering Stencil)... both Distress ink to some and gesso to others...


as well as the tags I made 
from the file folder scraps and Alterations File Tabs die for the five pockets.  These I topped with Idea-ology Chit Chat stickers.


For the first page I made a 
pocket using a scrap from the 7 Dots Studio Nature Walk collection. The wood icons are Prima's Time Traveler. I cut a tag from more of the FF scraps. I folded it at about 1 1/2" and tucked it under the patterned paper. The fly chipboard piece is from Prima's Cartographer.


The birds were cut with
Alterations Birds in Flight Decorative Strip, the foliage with their Spring Greenery. The gems are Prima Say It In Crystals.


Die cuts from Tim's Expedition Ephemera.


Stamping with Tim's Nature Walk.
The butterflies were cut with Alteration's Mini Butterflies.


Idea-ology Pen Nib.


I embellished the cover
with a Prima TT wood icon, some flowers from my stash, more Spring Greenery foliage, and a bit of green Spanish Moss tucked in for more texture.


The back cover is just kraft
cardstock with stamping covered in a coat of gel medium for protection.
I know I tried to squeeze in a 
lot of info here, so if you have any questions, please ask away.
Thanks so much again,
ladies, for the opportunity to share some projects with you. It's been a delight.

Thanks for stopping by!
Linda