Photobucket Photobucket Photobucket Photobucket Photobucket Photobucket
Showing posts with label Claudine Hellmuth Paints. Show all posts

Thursday, February 6, 2014

Get Altered Challenge - Altered Playing Cards


Hello there, everyone!  It's Broni here today with this month's eP Get Altered Challenge.  This month I'd like for us all to play with~
Altered Playing Cards


I'm sad to say I haven't tried this before, but after this fun little adventure I'm sure I'll be going back to pull from my deck again and again!

Since it's February, the month of Valentines, I decided to make Valentine altered playing cards for all my grandchildren.   There are 8 altogether between George and myself.  Whew!  So it literally took days for this all to come together.

I'm going to try to take you through a few of the steps….the ones I can remember and that I photographed!  The first thing I did was sand all my cards using a sanding grip block.

 I used my Gelli plate to apply some aqua and lime acrylic paints to the cards, then I added some purple dots.  Instead of using a brayer, I just used a paint brush.  It gave more texture to the surface of the cards.  It also took longer to dry between layers.  I did this with 4 of the cards.


 I painted over them with white acrylic paint and then wiped it off with a baby wipe.  This helped the texture of the paint to show up better.  I cut a heart from a scrap of paper and used it to draw hearts onto the cards.  Then I painted them with red acrylic paint.

 For the other 4 cards, I decided to try painting directly on the cards as opposed to using the Gelli plate.  I used the same colors and also painted on the purple dots.  I spread some Studio 490 white embossing paste on 2 of the cards and let it dry to add some texture.


Then I put on some more embossing paste using my Mini Hexagons stencil and my palette knife.  After it dried, I sprayed on several different bright Dylusions ink sprays.  When they dried I sprayed just a little of the White Linen ink spray.


I sprayed the first 4 altered playing cards with White Linen ink spray as well.


Here are all the cards.  (You can see I experimented a little with the bottom right one.)

I used both pieces of my cut-out heart (the positive and the negative) as masks to stamp either onto the hearts or around the hearts.

I did some more stamping on the cards using the Catherine Scanlon Random Shapes images and Archival jet black ink.  This second photo is taken from a different angle so that you can see the texture even under the Glossy Accents that I added to all the hearts.


And here are some closeups:

Ok then!  That's my take on Altered Playing Cards.  I hope you'll decide to play along with us for a chance to win a $15 gift certificate to the eclectic Paperie store!  Be sure to link up below so we can all check out what you come up with!

Thanks for visiting!


Saturday, December 21, 2013

12 Days of Christmas ~ Day 12 ~ Fun with Catalyst Tools and Glazing Medium

Today is it, the 12th day of eclectic Paperie's awesome 12 Days of Christmas sale.  Today's featured products are the Catalyst Tools and Liquitex Glazing Medium!  


Definitely two must have products.
Buy a Catalyst tool, get the Glazing Medium for $6.99
 Use the code: 12DAYS12 when checking out to get this great deal.  And remember that this code is good today only until midnight EST.
I had a lot of fun playing with the Catalyst tools.  I knew that these handy, ergonomically designed "wedges" have been around for a while.  Clay artists have been using these for achieving texture and shape when molding clay or plaster.  These little tools have also been around in the food industries, especially in creating cakes.
Playing around with these nifty little gadgets, I made a quick video showing me playing around and attempting to show just how versatile these Catalyst tools are.  Then I went on to show how you can use Liquitex Glazing Medium, and finally my attempted project using a re purposed mini canvas.
I apologize in advance for the poor cinematography.  (Definitely had a "what can go wrong - does" day).  I'll recap after the video.


Here's a link in case the video doesn't play: http://youtu.be/xDS2MxjGk_w
Catalyst tools:
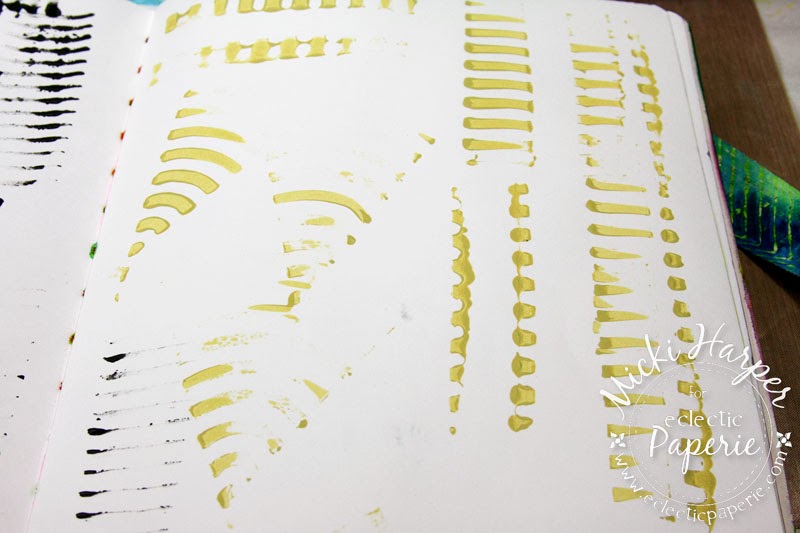
  •  Perfect tool to add design on your Gelli Plate
  • Can be used as a stamp
  • Works great with Embossing Paste
  • Also great with heavy body paints (acrylic, oil, etc.)
  • Use as an applicator to apply paints, glues, mediums, etc.
  • Heat resistant which makes them ideal for encaustic art.
  • Easy to clean up and are ergonomically designed.
Now to Liquitex Glazing Medium, this medium is a must have. Watch the video to see why this medium should be a part of your art tools:
  • Mix it with your paint to achieve longer "open time" - meaning your paint will stay wet longer.  
  • Makes a glaze - will turn your opaque paint into a translucent paint.***
  • Thins your paint but unlike adding water which will break up the paint, thinning your paint with glazing medium maintains the color.
  • Use it as a base or mix it with translucent colors to create wonderful color depth and jewel like finish.
  • Wonderful brushing and leveling qualities - will "grap" edges, textures, gaps. ***
  • Non-yellowing and water proof once dry.
  • Makes your paint last longer since you are using less.
***If you follow Donna Downey, you'll know this technique!  Mix your paint with the glazing medium, apply to your project, let sit for a minute or two and then take a damp cloth and wipe off.  

 I only did the right hand side of the piece to show you the difference.  I could have removed/lightened it even more if I had continued to wipe.
 NOTE of warning:  don't use cheap baby wipes because the lint from the wipe will come off on your project and I couldn't get it off.

The video or the pictures do not do this medium justice.  It's hard to show what it does but once you play with it, you will not want to do without.

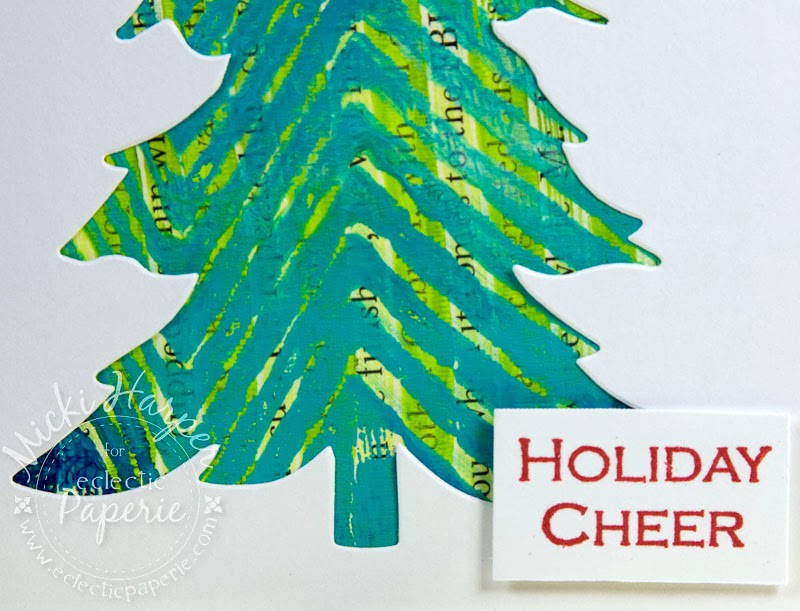
And are you wondering just what I created with all those gelli plate samples?  Well, I copied Broni's idea and created ....what else, as I'm awfully behind.... several Christmas Tree cards:


And the canvas?  Well, that ended up like this:


I hope you were inspired to create and try some new tools and mediums and enjoyed the video.  Did you notice all my blunders and indecision trying to create the canvas?  Don't let that stop you from getting some art time, especially during this hectic time.

And don't forget to head over to the eP Shop to take advantage of today's 
special - you have until midnight!!!!!

Supplies Used: