Photobucket Photobucket Photobucket Photobucket Photobucket Photobucket
Showing posts with label The Crafter's Workshop. Show all posts

Wednesday, July 8, 2015

Happy Cards

Hi everyone,  Steph Ackerman here.  It's Wednesday and I'm so sorry for this late post.  Seems I scheduled it for PM and not AM!!!

But I'd love to show you my newest projects this week.


Supplies:

Tim Holtz Stencil - Blossom
Tim Holtz Distress Stain - Abandoned Coral
Tim Holtz Roses - Heirloom Roses
Dina Wakely Metallic Paint - Sterling
The Crafter's Workshop Stencil - Word Association
Bo Bunny Paper Pack - Gabrielle Collection
Bo Bunny Stickers - Gabrielle Collection

Create a 5 1/2" square card from Bo Bunny cardstock.
Cut striped paper slightly smaller and adhere.
Cut Bo Bunny cardstock slightly smaller, then cut watercolor paper to fit.
Place stencil on watercolor paper and paint with Sterling Paint.
Once dry, place Blossom Stencil on top and ink.
Adhere panel to card and embellish with a sticker matted with kraft cardstock.


My second card uses a premade card, and I cut Bo Bunny cardstock to fit.
Cut striped paper slightly smaller and adhere.
Embellish with a sticker matted with 2 layers of cardstock.
Tear a strip of brown to fit across card.
Adhere sticker.


 I inked the Roses with Clearsnap Ink, then dabbed Coral Stain on top for a little more color.

 
Adhere the roses to the card.  Since they are lightweight, they add very little weight to the card.
 
 
Thanks for stopping by today.

Steph

Wednesday, June 24, 2015

Crazy Birds ATCs

Hello Everyone,
Shilpa here,

Today I would like to share with you my last post as a Guest Designer.
I've created ATCs with Tim Holtz Birds Crazy stamp set and Gelli Plate printing.


I love my Gelli plate... love to create prints with them. I use them in my Art Journals, to make mixed media canvas, cards...but today I wanted to use them to make ATCs.


Let's see the process..


I got prints on papers with Gelli plate, Acrylic Paints and Crafters Workshop Stencils.


Cut them into ATC size.
 For more layers in the background, I stamped on them with text and texture stamps.
Adhered butterflies,Tim's tissue tape and Trellis diecut pieces. Splattered distress stain colors.

Next I stamped Crazy Birds and colored them with Distress Inks. Fussy cut them and adhered on ATCs.


And here are my four ATCs .....aren't they cute?
Hope you liked them...


Thank you so much Kim for this opportunity to write at this wonderful blog.
I am grateful to you all readers as well for love and support.
You can see more posts at my blog - Neon Diary

Products used from Eclectic Paperie:
Gelli Plate
Acrylic Paints
 Crafters Workshop Stencils
Texture Stamps
Distress Inks
Archival Ink
Tim Holtz Birds Crazy Stamps


Thursday, October 9, 2014

Up on the Rooftop

Ok, you are probably thinking.... What?????? Christmas already?????  What is she thinking??

Steph Ackerman here to let you know that Christmas is only  76 days away.  I can hardly believe it myself!!!
 
But I will confess, this project did not start out with a Christmas theme.  Actually, it started because I wanted to use The Crafter's Workshop Brick Stencil.


I placed the stencil on a canvas panel and added  Art Anthology's Brick Stone Effects paint.  When I removed the stencil, I found I had created a chimney.  So my project morphed from there.


I spritzed Art Anthology's Colorations in Lark around the canvas to give a hint of the night sky.

 
Using The Crafter's Workshop Mini North Star stencil with Art Anthology's Sorbet Dazzle paint, I added stars to the canvas.  When dry, I spritzed the canvas again with Art Anthology's Glorious Colorations for a dazzling night sky look.

 
I painted green cardstock with Art Anthology's Velvet Paint in Basil.   Once dry (either wait till it's dry or heat set it), die cut with Spellbinders Holly Wreath die twice. 


Assemble 2 layers of the die cut and embossed wreaths, adding a red bow to the top.  Add to the chimney with foam adhesives for dimension.  Using Art Anthology Dimensional Crystals in Red Corvette, create the berries on the wreath.


Die cut letters using Cricut Expression from red and black cardstock (or use stickers).  Die cut Santa and his reindeer using the Stamp Doctor die with red and brown cardstock, adding them to the canvas with foam adhesives for dimension.  Using the Inkssentials Blending Tool with  Ranger's Vintage Photo Distress Ink, I added just a touch of color around the edges of the canvas.


So, have I put you in the Christmas mood  yet?

Thanks for stopping by today.

Steph


Monday, September 22, 2014

We're all mad here!


Hi everyone. It's Bonnie here today with a fun mixed media piece I created to help me blow off a little frustration. I don't know about you but, for me, this works every time...have a little play, get a little messy, make myself smile, and feel a lot better! I began with a mop up page covered with Dylusions sprays in Postbox Red and Pure Sunshine. I keep a pad of  6x8 inch mixed media paper beside my work space and when I have leftover ink or paint on my craft sheet, I use a piece to mop up the extra. Then I'm not wasting and it provides a jump off point for another project.
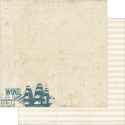

I loved the mix of the colours and the bits of white peeking through but there was a large uncoloured chunk at the bottom so I tore off a piece of Authentique's dotty Classique Elegant 12 paper and added it to the bottom. The piece that I trimmed off of that became the strip I added to the top edge. Using Wendy Vecchi's Red Geranium Archival ink and a mini ink blender, I stencilled TCW's Art Is pattern here and there. I also pounced black gesso through TCW's Mini Texturized stencil. More black gesso was used to create the bottle top rings as well.


In order to add some sparkle and shine that would catch the light without detracting from the background, I scraped Art Anthology Frost Sorbet Dimensional paint through TCW's Netting stencil, First time I used it and it is gorgeous and will likely live on my desk, an honour reserved for only my favourite products that I use all the time. It picked up a little of the Dylusions ink and was a dream to spread giving me crisp stencilling.


The rabbit and clock images, purchased on Etsy, were fussy cut and then edged with Black Big Brush pen. Both were adhered to the background with Gel Medium. Once dry, the hoop and stick were outlined with silver metallic gel pen. Two Idea-ology pen nibs were adhered to the clock face with Glossy Accents. Two other embellies, Wendy Vecchi's Blossom Bucket Stars, were added to the top left corner to give a little more visual weight there.


The sentiment was computer generated, printed on white cardstock, and matted in black. The word MAD was coloured with Prismacolor pencils. All words were popped up on foam tape for dimension and to create shadow. To finish off the piece, Black Soot Distress ink and Black Big Brush pen were used around the outside edges.

Thanks for joining Ms. March Hare and me today. We do appreciate your fine company and hope that you gained a little inspiration to get messy!

Bonnie


Tuesday, September 2, 2014

Mosaic Canvas


Hi everyone! It's Bonnie here today to share a little 5x7 inch board canvas I altered. A while ago, through Pinterest, I saw these fabulous mosaic canvases created by Linda Iverson and found the idea really inspired me. It's a wonderful way to use of scraps of papers and chipboard and I love the results so I decided to have a go.


I started by applying black gesso to the canvas board and allowing it to dry. Next I cut up some chipboard scraps and laid out a pattern that pleased me. I wanted a few of the "tiles" to be thicker so I cut an extra layer for two and three layers for the center rectangle. These I glued together and then used my Black Big Brush Pen to blacken the edges of all tiles.


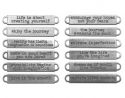
The next step was to choose stamps and stencils as well as papers to feature on some of the tiles. The gold embossed quote as well as the black embossed squares stamp come from the TH Classics 16 set. The paper under the squares stamp is a piece of Authentique Anchored Sailing paper. There is a very faint map printed on it which fits the journey theme and a small resin hand was added to point to the quote.. Directly above the square tiles stamped tile is an Idea-ology Word Band which says Live in the Moment. Gold nailhead stickers were attached to the band with Glossy Accents to resemble brads.


The black starry tile at the top and bottom right were stencilled with TCW's Mini Random Stars and Studio 490 Gold Embossing Paste onto black cardstock. This was then adhered to the chipboard and cut to size. The B is a Scrabble tile adhered to a scrap of gold striped paper using Beacon 3-in-1 glue which was also used to adhere all of the tiles to the canvas. This same striped paper formed the background on a narrow tile which housed the Idea-ology pen nib.


Two scraps of music paper from Michelle Hill's Vintage Ephemera Bundles were used to cover two more tiles. I was able to center the lyric "What a life" onto the one tile which continues with the message of the canvas. These papers as well as the Authentique one were edged in Black Soot Distress ink to better connect them to the rest of the project.


Scraps of black cardstock embossed with TH Riveted Metal Texture Fades embossing folder were rubbed with various colours of Inka Gold to highlight or accentuate the embossed design. These were then adhered to two tiles and trimmed to fit.

I love how this turned out and am already planning more canvases in different sizes. I think a big one would be super fun to do and have several more of the same size started in my head. I'd love to see what you do with Linda's fabulous idea. Thanks for the inspiration, Linda.

Bonnie