Photobucket Photobucket Photobucket Photobucket Photobucket Photobucket
Showing posts with label Zip Dry. Show all posts

Wednesday, February 19, 2014

The Story of Millie and Molly's Trip to Paris


It's Paulette here today with my creations for Week Three as Guest Designer.  I've written a short scenario to accompany my projects today.
  The story begins in 1922 when our two fashionistas, Molly and Millie, see this poster in their local hat shop.


The ladies are always fashion trendsetters and decide to attend the Spring Millinery Show in Paris on February 15, 1923.  They buy two tickets for the fashion show.  For all the shopping they intend to do, the ladies are taking a BIG purse full of money.  This little altered purse I created memorializes their epic shopping adventure.


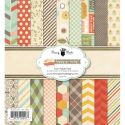
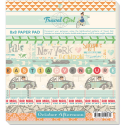
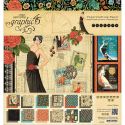
And now to explain my creative process:  The project was inspired by a Graphic 45 8x8 paper pad called "Couture" and by this mini purse I picked up for $1 at a local thrift store.  

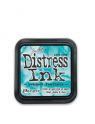
I fussy cut all the ladies, the tickets and sentiments from the G45 paper with my Cutter Bee scissors and darkened the edges with a black Pitt pen.  The two fans were cut from the G45 paper with a Die-namics rosette die.  Behind the three ladies on the right is a blue scalloped oval cut from the G45 paper pack with a Spellbinders die.  Before the paper was released from the die, I darkened the edges on the inner rim of the die with Tim Holtz Peacock Feathers Distress Ink using an Inkssentials Foam Replacement Pad.  The black satin bow with rhinestone button is a repurposed shoe bow.  The Eiffel Tower is a repurposed earring.  Molly, fashionista on the left, is wearing gold rhinestone earrings.  The other three embellishments are by Recollections.  

The poster I created is actually an ATC for a Pick-a-Theme Swap over on Splitcoaststampers.  My swapmate requested Vintage Hats as her theme.  This ATC also uses papers from the beautiful "Couture" paper pad.  Background paper is a red dotted swiss by Bazzill.  The ticket was fussy cut and its edges were darkened with a black Pitt pen.  I fashioned the flower on the hat with a Punch Bunch hydrangea flower punch.  I added dimension using a mousepad and an embossing stylus.  The center is a gold rhinestone star.  Red rhinestones were added to the hat, dress, and used as earrings.  Tiny gold corner stickers and a strip of red metal trim resembling the metal fabric mesh used in Whiting and Davis purses complete the design.

Thanks for stopping by...Paulette


Monday, October 28, 2013

Fall Swim


Hi, Mary-Ann here! With watercolor being an up and coming challenge here at Eclectic Paperie, I decided I'd try my hand at watercoloring on this swimming layout.  Fitting don't you think? WATERcolor with swimming!!  Anyway, I also tried a new technique.   


I laid out my non-stick craft sheet and lightly sprayed color mists directly on the sheet and then diluted this by spray by spraying water directly on top.  This helped thin my colors.  It is hard to see in this photo but look closely!


I then turned my paper face down onto the wet puddles of spray.  When I lifted and turned my paper over, I could see where the colors mixed on my paper.


Once I decided where my photo and papers were going to be, I got out my Tim Holtz Stars Layering Stencil and with a gray watercolor pencil, I traced where I wanted random stars.  With a blender pen or water brush, I lightly went over the pencil marks to make them blend like watercolor.


See the stars?  I then took the same colored pencil and drew light lines and lightened those with the same blender pen.  


Layered on my tags, ephemera embellishments and resin flowers.


This Fancy Pants line, Happy Go Lucky, was PERFECT for the colors in my photo.  I must say, I have tons of product left that would create a completely different style layout.  After this layout was complete I trickled droplets of gold spray in various places and used gold thread to sew.  This time, the sewing helped keep my tile and small embellishments in place.  

You can find the items from this layout here in the shop or on the links below.


Tuesday, October 8, 2013

US

Ever have those times when you start and finish a project and what you had in mind does not translate to paper?  Then, you tear it apart and start all over again?  That happened to me on this layout.  Sometimes things come naturally, other times, its forced.  Well, you should have see the "dirty" part of my layout before.  NOT pretty!  This rendition is much better and I would love to share it with you.  So, it's Mary-Ann here, about to share my labor intensive layout:o)


I sprayed three different color inks to get my desired look on my cardstock base.


Then I totally stole an idea from a fellow blogger Ashli Oliver and spread Gesso over my patterned paper at the bottom of my layout.  It helped soften the darker colors.  I hand drew in some of the arrows that I wanted to stand out.  


Layered my October Afternoon papers, stickers, A Flair for Buttons flair, My Mind's Eye enamels and October Afternoon brads.  You will see below on the completed layout that I used the same spray ink to add color to my title from Fancy Pants and wood veneers from Basic Grey.


This end result is a much more pulled together layout than the last!  Blue, gray and pink make me happy when they are together.  This photo is celebrating my 8th Mother's day because of that beautiful boy with me.  I am blessed.

Thank you for stopping in.  Below you will find a link to all the items you can purchase over at Eclectic Paperie.