Photobucket Photobucket Photobucket Photobucket Photobucket Photobucket
Showing posts with label Distress Watercolor Cardstock. Show all posts

Wednesday, July 1, 2015

Stained and Stencilled Tags

Hi everyone, Steph Ackerman here and I am thrilled to be the Guest Designer this month for Eclectic Paperie.  Thanks so much Kim.

I received some wonderful products to work with this month and I used the same products to create 3 different tags.  I hate to waste ink, stain, or paint and I try to find ways to use up all the color on a stencil rather than wiping it off. 

Supplies:

Tim Holtz Stencil - Blossom
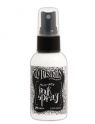
Tim Holtz Distress Stain - Abandoned Coral
Gelli Arts Rubber Brayer
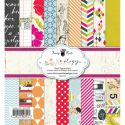
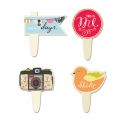
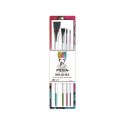
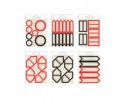
Bo Bunny Stickers - Gabrielle Collection
Ribbon


Tag #1
Create a tag from watercolor paper
Place Blossom Stencil on top and ink with Abandoned Coral Stain
Ink edges of tag with Abandoned Coral Stain, then mat with cardstock
Wrap with ribbon
Adhere to Coral cardstock
Select stickers, mat with cardstock and add to tag


Tag #2
Flip stencil over onto another piece of watercolor paper
Using a brayer, roll over stencil to release the left over stain
Ink edges of tag with Abandoned Coral Stain, then mat with cardstock
Wrap with ribbon
Adhere to Coral cardstock
Select stickers, mat with cardstock and add to tag


Tag #3
Create a tag from watercolor paper
Place stencil on top and rub over it with a baby wipe releasing the remaining stain (you get a nice subtle design)
Ink edges of tag with Abandoned Coral Stain, then mat with cardstock
Wrap with ribbon
Adhere to coral cardstock
Select stickers, mat with cardstock and add to tag


 So what do you think?  Do you use all the color off your stencils?

Please stop by my blog to see more of my projects.

Thanks for stopping by today.

Steph


Saturday, August 23, 2014

Turning 43

Guess how old I turned this year?  
Mary-Ann here, divulging information that should totally be kept a secret:o)  This year was hard for me.  If I am 43 then my boy is turning 10, I am full of gray hair and I just noticed wrinkles.  Lots of them.  So, I refuse to celebrate any more birthdays until next year.  hehe

I decided, for a change, to focus on a "me" layout.  I am hardly in the photos we take unless I insist on a "groupie" picture.  Even then, one of us is usually making an inappropriate face and the entire event becomes a battle.  I'm yelling, telling them to pretend to have fun, or "take another, my hair didn't look good" or "you can see my waddle!" 
I promise, I did have fun creating this layout and I hope you enjoy the journey with me. 
 I promise not to get all weepy.


FYI, this entire layout, except the white base is made from a 6x6 paper pad.  No 12x12 paper was harmed in the making of this page:0)  After I decided on my colors, I decided to spray paint a couple wood veneer numbers that I had on hand.  (A great big fat reminder of how old I am!) You could color these with Dylusions.  A paint brush will do the trick or even just spraying.  


The white base you see, is actually a little creamy once I started taking pictures, it is a big piece of watercolor paper.  I sprayed Dylusions ink (red, small amounts of black, and white) onto my craft sheet.  I added a few squirts of water from my Ranger Mister bottle and squished my paper face down on my craft sheet.  When I lifted it, this is what I got.  


I started layering Fancy Pants Me-ology papers under my photo.  Painted a clothespin with the same black Dylusions spray.  I also tucked some of the banner buttons under my papers, clumped coordinating Me-ology buttons to the side with matching enamel dots.


You can see here that I utilized some Tim Holtz Index labels.  Just so happens, they come in black and red!  Perfect for this layout.  I wanted them to be a little sturdier, so I took the packaging from the Fancy Pants Buttons and backed the stickers.  See photo below.


Added a cool title, more enamels and my journaling, which is neatly tucked inside one of the Fancy Pants Library Card envelopes.  I didn't want my journaling card to stick out too far, so I trimmed down the existing library card and turned it over to utilize the white side.


It is pretty simple.  Just some fun coloring and painting, paper layering and story telling.  I hope you have enjoyed my layout today.  Keep checking back  daily for more design team inspiration.

Supplies used:  


Monday, August 11, 2014

ePlay Embossing Challenge ~ hello friend

Hi, it's Sue Lelli here today to show you a card I made using my FAV Wendy Vecchi Studio 490 embossing pastes!
 
WARNING ~ LOTS of photos!
This is my first card.  The base is TH Distress Watercolor Cardstock.  LOVE this product!  It's heavyweight paper card sized and great for any product you put on it, holding up incredibly well to all the paints and waters and gel medium and embossing pastes I used.  Did I say LOVE?!!!

Here is a close up so you can see the leaves stenciled with Wendy Vecchi's Translucent embossing paste and painted with Dina Wakely's heavy body paint and TH Distress paint.  The flower is from Prima's Seashore Collection.  I ripped the top layers of the flower off and added that Beautiful face from Prima's Cartographer Collection.  I thought she looked pretty with the ADORNit wood frame and the hello friend sentiment which is a Tim Holtz Remnant Rub.  It fit perfectly on the frame.
 
Then I HAD to do it!  When I first started thinking about this card, I had green and pink in mind but the creative process took me elsewhere.  So I took the cream flower off and added this Beautiful Prima flower with some green highlights!
I not sure which one I like the best!  Do YOU have a FAV?

In this close up you can see the gold speckles I added with the Prima Floral Rose stencil and Metallic Gold Wendy Vecchi Studio 490 Embossing Paste.  I could use these two on everything I make!
 
Now for some process and product info:
I used Dina Wakely's Gel Medium to attach the tissue.


Close up of painted BG and leaves once the embossing paste dried completely
 
 The two paints I used ~ TH Distress Paint in mowed lawn and Dina Wakely's Heavy Body Acryllic paint in Lime.
 
 On a piece of white paper, I made more leaves with the WV translucent embossing paste which I then painted and cut out to add to the flowers.

I outlined the leaves with a black stabilo pencil to create some definition.  The frame is from ADORNit wood shapes and the sentiment is a Tim Holtz remnant rub.  You can really see the WV metallic gold embossing paste in this photo.
 
That's it!  I hope you like my cards and I also hope you come play with us at the ePlay Embossing Challenge!


Tuesday, March 18, 2014

Happy Birthday!!

Hello friends!! Giovana here today sharing with you a fun Birthday card I made for my daughter, today is her birthday and she is turning 10!! She told me before going to bed, I will enjoy the last few minutes of being 9 until I wake up tomorrow, LOL. She is excited to be part of the two-digit age, what she hasn't figured out yet is that is going to last for long time, hehehe.

So, here are the details  for this project:


  • Your piece will look like this :)
 
  • Using a Mini Mister, mist your piece with water to give it a more watercolor look. 


Hope you like it!!
Have a great day!!