Photobucket Photobucket Photobucket Photobucket Photobucket Photobucket
Showing posts with label Chipboard. Show all posts

Tuesday, September 2, 2014

Mosaic Canvas


Hi everyone! It's Bonnie here today to share a little 5x7 inch board canvas I altered. A while ago, through Pinterest, I saw these fabulous mosaic canvases created by Linda Iverson and found the idea really inspired me. It's a wonderful way to use of scraps of papers and chipboard and I love the results so I decided to have a go.


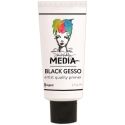
I started by applying black gesso to the canvas board and allowing it to dry. Next I cut up some chipboard scraps and laid out a pattern that pleased me. I wanted a few of the "tiles" to be thicker so I cut an extra layer for two and three layers for the center rectangle. These I glued together and then used my Black Big Brush Pen to blacken the edges of all tiles.


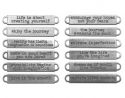
The next step was to choose stamps and stencils as well as papers to feature on some of the tiles. The gold embossed quote as well as the black embossed squares stamp come from the TH Classics 16 set. The paper under the squares stamp is a piece of Authentique Anchored Sailing paper. There is a very faint map printed on it which fits the journey theme and a small resin hand was added to point to the quote.. Directly above the square tiles stamped tile is an Idea-ology Word Band which says Live in the Moment. Gold nailhead stickers were attached to the band with Glossy Accents to resemble brads.


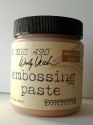
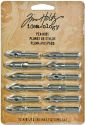
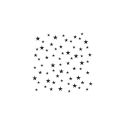
The black starry tile at the top and bottom right were stencilled with TCW's Mini Random Stars and Studio 490 Gold Embossing Paste onto black cardstock. This was then adhered to the chipboard and cut to size. The B is a Scrabble tile adhered to a scrap of gold striped paper using Beacon 3-in-1 glue which was also used to adhere all of the tiles to the canvas. This same striped paper formed the background on a narrow tile which housed the Idea-ology pen nib.


Two scraps of music paper from Michelle Hill's Vintage Ephemera Bundles were used to cover two more tiles. I was able to center the lyric "What a life" onto the one tile which continues with the message of the canvas. These papers as well as the Authentique one were edged in Black Soot Distress ink to better connect them to the rest of the project.


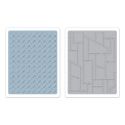
Scraps of black cardstock embossed with TH Riveted Metal Texture Fades embossing folder were rubbed with various colours of Inka Gold to highlight or accentuate the embossed design. These were then adhered to two tiles and trimmed to fit.

I love how this turned out and am already planning more canvases in different sizes. I think a big one would be super fun to do and have several more of the same size started in my head. I'd love to see what you do with Linda's fabulous idea. Thanks for the inspiration, Linda.

Bonnie
Monday, September 2, 2013

Graphic 45 French Country Collection!


Good morning!  Sherry here with you today and I have a tag using Graphic 45 French Country Collection to share.

G45FrenchCountryTag

The base of the tag is chipboard that was die cut with a card creator and the corners were trimmed down by an inch in both directions.  A small circle die was used to create the hole in the center, where the ribbon is attached.

The same die was used for the Graphic 45 paper.  The edges were distressed and then sponged with Memento Toffee Crunch.   Before the paper was glued to the chipboard, Unity Stamp Classified Newsprint was stamped in StazOn Jet Black to cover the chipboard. 

The corner of the paper was rolled down at an angle and a flower (die cut from another sheet of the French Country Collection) was glued in the corner.

G45FrenchCountryTag CloseUPFlower

Another piece of the paper was die cut with a small oval and glued in the hatpin embellishment.  UTEE was melted in a melting pot and then poured into the hatpin.  Sadly, I think I might have had a bit of beeswax in the pan that I didn’t catch; but since I liked the blurred vintage look, I kept it.    The leaves were die cut from watercolor paper and colored with Peeled Paint Distress Stain.

The main image is a panel from the French Country Collection that was mounted on chipboard and then trimmed out.

G45FrenchCountryTagAngle

I love all the dimension achieved by rolling down the corner of the paper. 

That’s all for me today.  Thanks for stopping by and joining me!

eP Signature - Sherry Cheever

Project Supplies:


Thursday, August 15, 2013

Graphic 45 French Country!


Good morning!  Sherry here with you today and I have a chipboard panel that has been altered with Graphic 45 French Country Collection to share with you.

FrenchCountyPanel

The project started with a plain chipboard panel that had been part of an old book.  Coordinating papers from the French Country Collection were glued to the panel, the excess was sanded away, and then the edges were sponged with Tsukineko Memento Toffee Crunch and Peanut Brittle Inks.

The border under the distressed edge, the flower and the frame were all made by die cutting coordinating paper.  The frame was mounted on thin chipboard before die cutting, then the edges were sponged with Peanut Brittle. 

FrenchCountryPanelLeftSide

The image with the rooster was also mounted on chipboard before it was trimmed away.  The rooster was fussy cut from another image in the paper and placed over the top with foam mounting tape to give it some depth.

FrenchCountryPanelSide

The ribbon was some from my stash jar that had been previously dyed with Aged Mahogany Distress Stain.

That’s all for me today.  Thanks for stopping by and joining me!

eP Signature - Sherry Cheever

Project Supplies: