Photobucket Photobucket Photobucket Photobucket Photobucket Photobucket

Wednesday, April 30, 2014

Inspired by Nature


Hello again, it's Lisa S here with my last project as eP's April guest designer. They say time flies when you're having fun and it certainly does. I'm sharing a web passwords book this week that features two of the pretty papers in the Nature Walk collection by 7 Dots Studio. Every week Kim has introduced new products in the online store and I couldn't resist playing with these. Another favorite of mine is the line of Crafty Individuals stamps she offers and I've used one on the front cover. 

Here's how it all came together...


I cut two pieces of black cardstock


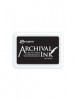
I used Gray Day and Musical Blooms from the Nature Walk collection. It pained me to tear the pretty paper but I wanted both on my cover so I did it. I inked the torn edge with Weathered Wood Distress Stain and stamped Tall Wildflowers in Wendy Vecchi's Cornflower Blue Archival ink.I added a small fancy flourish stamp by Tim Holtz which I stamped in another shade of Wendy's designer series inks, Tree Branch


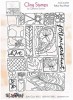
This is such a pretty stamp by Crafty Individuals. They do come unmounted so you will need to use EZ Mount Static Cling Mounting Foam to adhere them to. 


Next up I added some textured script with Wendy's white embossing paste and TCW Mini Art Is 6x6 stencil. I applied it directly to the Gray Day paper and dried it with a heat tool. I rubbed cornflower blue ink over some of the areas to highlight the text and add some color. 


You might can see that I have my letters on a piece of acetate and the reason is I like to be able to see the placement of the letters before I adhere them to the paper. Also, I can alter them without worrying about getting something on my paper that I don't want there. ;) 


 The kraft sticker alpha's were easily altered with Cornflower Blue, Forget-Me-Not and Tree Branch Archival ink plus Snow Cap Adirondack Paint Dabber


For a bright spot I added a fun Blossom Bucket-Bumblebee by Studio 490.


This is a download I purchased but you can easily make your own in Word or another editing program. This book is 8.5" x 11" and as you can see I can store a lot of passwords in it. :) 


It has been fun to be here with all of you as eP's guest designer this month.
I've had a blast!
Thanks again Bonnie and Kim for the invite!!

Have a wonderful day everyone!
Lisa xx   

Tuesday, April 29, 2014

Best Day Ever - Wooden Frame

Hi eclectic Paperie Fans!  Julia here with my 2nd post for the Design Team!  I have 4 adorable grandnephews and nieces (2 of each! ages newborn to 3 1/2) and so a lot of my artwork lately has to do with photos of them.  

Such is the case today - where I took a $1.00 wooden frame from Michaels - and a photo of my brand new Grandniece, Madelyn Margaret (born 4/10/14) that I printed from my computer onto a Claudine Helmuth canvas sheet ........
And morphed it into this:  I chose my color palette from the colors on her sweet little knit hat that the hospital gave her when she was born!
I've got lots of pictures to show you how I got from plain to fancy.  First I painted the frame with 3 coats of Gesso - letting it dry between coats. (Can I just say - it's SO hard for me to let things dry!! I am a very impatient crafter!)
Then I dabbed and brushed on Ranger Distress paints in Scattered Straw, Weathered Wood and Spun Sugar.  I'm still learning how and where to apply inks - so you can see this is kind of random.  I'm getting the feeling that with Mixed Media -  you don't really plan it all out from the beginning - your finished product just sort of 'happens'!?!  So for this Virgo, list making, planner -  it's a learning process to let go!!
Next up -  I stenciled using Studio 490 Wendy Vecchi stencils Check Mate, Create a Wreath and Dots and Stripes using Studio 490 Wendy Vecchi White Embossing Paste.  I also stamped sentiments from Forever Art and Sentimental Art, and the lovely lace from Forever Art using Garden Gate Archival Ink.  I have to say here - that I originally stamped the sentiments directly on the dried Distress paints - and they bled - so I ended up stamping them on some pink Coredinations Ranger Distress card stock and adhering that over the original stampings.  The lace piece stamped ok directly on the painted wood although the edges are a little bleedy(!)
Here are some close ups of each section.  This wooden sentiment is from Fancy Pants.  I inked over it with Worn Lipstick Distress Ink, sprayed it with Perfect Pearl Mist/Perfect Pearl for a little shimmer, colored the edges with my Black Soot Ranger Distress Marker to define the edges, grunged it up a bit by putting some White Adirondack Snow Cap ink on it with my finger - and when it was dry - I sponged Scattered Straw Distress ink over it all.
I added strips of Tim Holtz Ideology Industrious Borders that I inked with Cornflower Archival Reinker - rubbing the ink over the border pieces with my finger and drying it with my heat gun.  I sponged the whole frame with Scattered Straw Distress Ink to tone down the brightness a bit - and that also colored the stencilings.
I added tone to the petals of the Prima flowers using Worn Lipstick, Tumbled Glass and Scattered Straw Distress Stains. I also added some Adirondack Snow Cap Distress Ink to the petals with my finger.
I sponged the edges of the sentiment stampings with Scattered Straw Distress Ink before adhering them to the frame.
I couldn't size the sweet photo of Madelyn Margaret to fit perfectly into the square opening and it left a white border showing - so I sponged some Worn Lipstick Distress ink around the edges up to the photo - then rubbed some Adirondack Snow Cap Distress Paint on the edges as well.
So there we go -  a Plain Jane Frame - turned into a Lovely Madelyn Margaret Frame!
 And since this is a wooden frame - and there is one day left in the ePlay Challenge to use wood - I'm linking it to that challenge!   Be sure to check out the new challenge that will be posted here on May 1st as well!

Here's what I used:  You'll find most of the supplies at eclectic Paperie where I have linked them

Stamps:  Studio 490 Wendy Vecchi - Forever Art, The Beauty of Art, Sentimental Art.
Paper:  Coredinations Ranger Distress Pink,  Sticky Back Canvas - Claudine Helmuth
Ink:  Archival Garden Gate, Ranger Distress Scattered Straw and Worn Lipstick, Archival Cornflower Reinker. Ranger Distress Stains Worn Lipstick, Tumbled Glass and Scattered straw.
Accessories:  Wooden Frame - Michaels, Prima Flowers Princess, Studio 490 Wendy Vecchi White Embossing Paste, Studio 490 Wendy Vecchi Stencils - Check Mate, Create A Wreath, Dots and StripesRanger Distress Paints Scattered Straw, Spun Sugar, Adirondack Snow Cap Distress Paint, Black Soot Ranger Distress Marker, Perfect Pearl Mist/Perfect Pearl, Fancy Pants Best Day Ever Wooden Phrase, Tim Holtz Ideology Industrious Borders, Gesso Liquitex


Monday, April 28, 2014

Creativity is Contagious!

Sometimes it feels like my life never stops being crazy!! I I had a lot of crazy days in the last few weeks and this is totally reflected by these crazy birds ... There were a couple of fun bird doodles in my sketchbook and I just had to get them onto a canvas!!


 I started with a square of scrap wood and some clear gesso.   


I covered the board with tissue paper ....


Then I changed my mind and went with a completely different background!! I covered the whole thing with blue and white paint.  Then I took out a circle stencil and added some texture!


I cut out some practice size/spacing pieces.  I have ruined way too many great pieces of fun paper by cutting the wrong size.  So I really do cut out rough shapes from plain or scrap paper first!!


After I cut out the paper, I painted the birds ...


Doodles, rub-ons and highlights finish off this crazy project!! 


Thank you so much for stopping by the EPaperie blog today!! Make sure you also stop by the EP store and pick up this adorable and fun Echo Park paper that I used for the birds!!  You will just love it!

Karen
http://www.ijustneedmoreglue.blogspot.com

Saturday, April 26, 2014

Love You More Than Bacon mixed media card

Hello, everybody!  It's Broni here with you today and I thought I'd show you another mixed media card that I had a lot of fun creating.

I started by stamping my small hearts background stamp from the Catherine Scanlon Random Shapes stamp set using Versamark ink onto my green cardstock.  Then I heat embossed it with clear embossing powder.  You can see that I did a row at a time.
 Next, I stamped the same image in Archival Jet Black ink onto my panel of watercolor paper.  Then I taped off everything around the LOVE word of the Catherine Scanlon Follow Your Heart stamp using some washi tape.  I inked it with the same black ink and peeled the tape away so that I only got the LOVE when I stamped.
I added the "you more than bacon" from an Avery Elle stamp set, then I adhered some pieces of washi tape and sponged some chevrons on using my Mini Chevrons stencil, Distress Worn Lipstick ink, and a large sponge dauber.
In order to do some water coloring, I smooshed my Worn Lipstick ink pad onto my craft sheet, then spritzed it with water.
I used my water brush to color some of the hearts and to lightly color the background.  I also flicked on some of the green and purple inks with my water brush as well.

Here's the finished card again:

There you have it!  Super easy and super fun!  I just love mixed media cards!

Thanks so much for stopping in today!

Happy crafting!