Andie's challenge to use fabric was the push I needed to finish the back of my canvas tote bag. The front of the bag was created for
eP's February challenge, which called for creating a project using a bag. I wasn't sure what I wanted the other side of the tote to be. Do I attempt to sketch a back view of a person to go with the front? The thought had me a little worried so in the end I decided to go with a simple - but very meaningful - statement I had found on
Pinterest.
Here is the end result:
I'll share a side by side view of both the front and back sides of the tote at the end of the post.
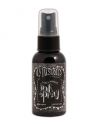
This side started out by spritzing water onto the canvas, followed by
Dylusion Ink Sprays:
I continued to spritz water over the canvas to help the colors spread and to help lighten them up a little.
After the inks had dried, I decided that the colors were still a little too strong. I wanted to keep the overall intensitiy of the colors similiar to the front of the tote. So
gesso was added with a dry
brush, followed by taking a
brayer and pressing hard(er than normal) to distribute the white gesso. While the gesso was still wet, I used the back of the brush to add some scribbles and marks.
Next I grabbed
Dina Wakley's Paints, my
Gelli Plate and
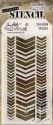
Prima's Art Stencil - Donna Downey's Damask.
I used a plexi glass sheet to put my
Gelli Plate on, this allowed me to use the
Gelli Plate like a stamp:
I could have used paint or sprays over the stencil instead of the
Gelli Plate, but the results is a bit more subtle and you get three different result; the first print, then the 2nd print off the
Gelli Plate and finally, the residue of paint on the stencil.
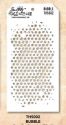
On the rest of the stencils used, I used paint and
Ranger's Cut 'n Dry Foam Pads. To make the seemingly continuous circular dots, I just keept moving the
Prima's Elementals - Spirals to continue another row of dots. I also added the
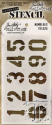
Numbers Collage stencil thinking to create a border, but decided I didn't like the darker blue. Using an old rag, I blotted as much of the still wet paint off and then just used a wet brush to blend any remaining paint into the canvas.
After I made sure everything was dry, I decided that some contrast was in order. This was added using the dark blue paint (
Dina Wakley's Lapis) which I at first didn't think would fit in and
Dylusions Letter Jumble stencil. Next I diluted white
gesso with a little water and
Dylusions White Linen Ink Spray on my
craft mat and using a pipette outlined the circles. Once that was dry, I used
Salty Ocean Distress Paint and some commercial alpha stencils and alpha stamps to add the words:
Since there was only one "E" stencil, I used another letter to make sure I got the width correct, because as you will see, I'm horrible at gauging distance as far as stamping goes.
The word "SHOWING" was stamped using some old alphabet stamps. The paint was dabbed right onto the stamps and because I stamped off-kilter, I used
TCW's Numbers in Arrow stencil to off set that mishap. I mixed a little paint (
Lapis with
Night) with water and again, used the pipette to outline the letters and arrow. This time I added a lot more water to make the paint really fluid.
I was going to add more texture with stamps, but decided against that. It felt finished:
The whole tote received several coats of fixative as well as
Gloss Glue 'n Seal. Because I have such a tendency to get out all my paints and "play" with mixing colors, I knew I wouldn't get the back of the tote to match the colors exactly as on the front, but the overall color theme is there! In hind sight, I should have used all of the same stencils as on the front but I really didn't want to replicate the
exact same background.
Besides, I feel great that I've finished this cool canvas tote, which I will most definitely be using to tote my lunch time art supplies to work and for those moments I need some positive "hang in there girl" vibes!
Sure hope you join us in this months
ePlay Challenge to play with
FABRIC. It's fun and really not that much different than painting on canvas or paper, especially if using ink sprays and stencils. Except drying time, which can be frustrating for those of us who have no patience, lo.
I hope you were inspired! Now go check out all the fabulous inspiration for this fun challenge!!!!!
Supplies Used: