Photobucket Photobucket Photobucket Photobucket Photobucket Photobucket

Wednesday, April 29, 2015

Becoming...

Hi friends!  Let's face it...I stink at consistently posting on the eP blog...LOL!  So...starting next week we're going to have a guest designer who will post a project each week!  Yeah!  Can't wait!  We're booked with guest designers through June, but if anyone is interested in posting from July throughout the rest of 2015, drop me an email at kim@eclecticpaperie.com. And now...on to my project! This was a canvas project that I created for a mixed media challenge, posted a few months ago.  Let's get going!

Since I can't imagine any canvas without texture, I started by applying embossing paste through a stencil.  
Notice that I didn't cover the entire canvas with paste...just a few areas.  Once the paste was dry, I used Dylusions Ink Sprays to add color.  The ink sprays are fabulous for creating drips!
  With this canvas I also opted to embrace the white space...a practice that I find difficult.  I love white and I love color, but boy do I have a hard time doing either option half way!  (What does that say about my personality?  Yup, it's all true! LOL!)

Next I added a bit more design using another stencil and more ink spray.  See that tiny bit of bright pink...I love it...
Now it was time for a contrast color.  Nothing makes me happier than a burst of color from the opposite side of the color wheel!  I opted for a turquoise color from PaperArtsy.  Now...what do you think happened when I added wet paint on top of Dylusions Ink Sprays?  Yup...the water from the paint activated the ink sprays and I got a decent amount of brown.  No worries...I waited for the paint to dry and applied more paint to intensify the turquoise color.
More drips...oh how I love the drips!  At this point, I broke out my stamps!  Nothing finishes off a piece like adding a neutral.  I used a few Dina Wakley stamps and black Archival Ink to add another design element.  (I love that crosshatch design!)
And since I can't live without text circles, I added a few and then used a Stabilo pencil to draw circles around the text.  Using a waterbrush activates the Stabilo pencil, allowing me to broaden the lines.  Once the pencil is dry...it's permanent.
I wanted butterflies to live in my text circles so I stamped a butterfly from Dina Wakley's Scribbly Insects stamp set three times on watercolor paper.  I used Peerless watercolors (have you tried these?  If not, you need them!) to paint each butterfly and then I used the She Script stamp from Christy Tomlinson to stamp, in white paint, on top of the butterflies.  I adore the white script across each butterfly...divine!
Each butterfly was fussy cut and attached with a glue dot.  I folded up all of the wings for great movement and dimension.  The last bit was the addition of the sentiment (also stamped and cut apart) and date stamp (ala Donna Downey...I love adding dates!)  And here is the completed canvas...
I hope you enjoyed today's project and stay tuned for a new project next week!!

Monday, April 20, 2015

Make ART Journal Layout

Morning eP fans!  Today I'm posting an art journal page, featuring lots of fun Wendy Vecchi products!  This is a long post, photo tutorial below, so sit back and enjoy the art! (This was created for this month's Make ART Challenge, which was to use re-inkers in a project.)
These are the products I started with...Specialty Stamping Paper (note, it's important to use this paper when working with re-inkers.  Other paper will instantly absorb the ink and you'll be unable to create the fun backgrounds), a palette knife, rubbing alcohol (in the Fineline bottle), a non-stick craft sheet, Dandelion Archival re-inker, and a fun blending palette from Tombow Markers.  (This is just a plastic coated piece of cardstock)
Put a few drops of re-inker on to the blending palette (you can also do this on your craft sheet), add a few drops of rubbing alcohol, and blend with the palette knife.
Next, smoosh (that's a technical crafting term) the blending palette all over the Specialty Stamping Paper.  I had enough ink to cover both pieces of paper.  Add more rubbing alcohol to get fun patterns. Using the blending palette definitely covered the pages more than dragging the cardstock through ink on the craft sheet. I'm not sure I love this much coverage, but it all worked out in the end, and I got to try out a new technique!
I grabbed the oval shape from Wendy's new Spotlight Frames along with the Sunburst stencil. I centered the oval frame and then layered the Sunburst design over the oval. Use Orange Blossom Archival Ink to fill in the sun. Then I covered the Sunburst with the oval mask and traced around the mask using a Fube Ball marker.  Added a few more design elements and my oval was complete!
Next came the addition of some stamping (Wendy's background stamp, Dots & Dashes) and more stenciling (Add a Stencil and Everyday Words).  Here are my two completed journal pages, minus my sentiment.  Here comes the fun part...
I glued my pages into an art journal and then embedded the pages into the journal pages using Wendy's Crackle Paste (this stuff if the BOMB!) (You can also see my sentiment was added before I glued the pages into the journal). I also added a stamped flower, from The Purpose of Art stamp set.  (The flower was stamped on cardstock and colored with Copics, cut out, and attached with foam tape.)
Check out the dry paste?  Dreamy...I get weak in the knees over all those cracks! And I LOVE Wendy's pastes because they're flexible when dry!  Some others (I won't mention names....LOL!) has a tendency to crack and falls off when dry.
I then I got all jiggy with paint!  This is a combination of Wild Honey and Tea Dye Distress Paint.  And then I added just a hint of Antiqued Bronze Distress Paint...ohhh...check out that Bronze.  Love it!  Below are some other photos of the completed project.  I just added more paint and all of my finishing details...
The Make Art sentiment is from the License Plate Art stamp set.  They were stamped on a manila tag and embossed with black embossing powder.  The date at the top of the page was stamped on the left over part of my manila tag...use all scraps!

The butterfly is from one of Wendy's stencils...I used a blending tool to color in the stencil and then just cut out the butterfly....same goes for the tiny hearts, which have also been embossed with Red Geranium embossing powder.  The arrow is from Idea-ology...and yes, it's crooked...fixed that after I took the photo! LOL!

Oh yeah...the inclusion!  This is a journal from Donna Downey so each page has an inclusion.  I just covered this one with Tissue Wrap, some Antiqued Bronze paint, some stitched stamps from Wendy (this is my favorite stamp ever!), a circle and the number 4 (to represent our sweet family of four.)

Enjoy! And be sure to check out this month's Make ART Challenge...only one more week to enter!

Saturday, April 18, 2015

New Products from Wendy Vecchi


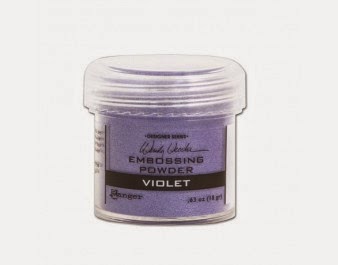
Introducing three new Archival Ink and embossing powder colors from Wendy Vecchi's product line! The three new colors, a beautiful soft pink, Pink Peony, Tiger Lily, a vibrant orange, and Violet, a cool purple, are lovely spring colors that coordinate with Wendy's existing line of inks, powders, and re-inkers.


This week we're offering a bundle deal on the following:
Archival Ink Bundle Deal - This bundle includes the three new Archival Ink pads along with the three new re-inkers. This bundle is available for only $22.76...20% below retail!

Embossing Powder Bundle - This bundle include the three newest embossing powders for only $11.98.


We've also added the latest Ranger releases to the store...
Distress Micro Glaze- Micro Glaze is perfect for use on paper crafting projects, watercolors, and ink jet printing. It dries to a smudge resistant, waterproof finish.

 Distress Refresher - Distress Refresher rehydrates and conditions dry Distress Ink Pads, Markers, and Paints. Distress Refresher also works with other water-based ink and paint products as well.
DIY-Distress It Yourself Ink Pads - Blank palette for you to create your own custom Distress Ink blends with Distress Reinkers. Create your own custom color combinations and ombre effects. Brayer your unique combination onto the lid or with an ink blending tool!

DistressSprayer - The perfect Distress tool for creating spray effects with water. Spray over Distress Ink, Paint, Stain, and more to create water droplets and various sprayer effects. The sprayer locks for convenient storage and travel.


The rest of the Idea-ology release has been added to the store! I can't wait to get my hands on the new Mini Mason Jars and how many projects can be created using the Clip Carousel and Flip Frame?! Swoon! You can find all of the new products can be found at the top of the Idea-ology page.
Also this week, we have some fun new paper packs from Bo Bunny! This are great for the scrapbookers of you out there!
Limited supplies on these kits so grab 'em before they're gone!

Wednesday, April 15, 2015

Be Kind

Hi folks!  I'm back with a project created for a paste Wendy Vecchi Make ART Challenge...using hearts.

I started my card by creating all of the individual pieces....(All of the images are from the My Kind of Art stamp set).  The pitcher is embossed with Cornflower Blue embossing powder; Gathered Twigs has been added to the edges.  The heart is a mix of Dina Wakley acrylic paint and Wendy's Crackle Paste.  (Isn't that crackle delish?!)  The flower was stamped twice and colored with watercolors.  I cut out one entire flower and then a portion of the second flower, to create multiple flower layers.  A button with twine finished the flower.

My card background is a piece of vintage book text, covered with a bit of Gathered Twigs ink and Wendy's tiny cross stencil.  I then layered a piece of designer paper, with an oval die cut, on top of the text paper and then added a black frame, created using two Spellbinder oval dies.  Each little scallop on the frame got a silver dot, thanks to a gel pen.  I also added Gathered Twigs over the edge of the entire card and added some faux stitching, from Wendy's Just Sew Artsy stamp set.  Finally, I added the sentiment and a star (from the Little Bits stencil).  Viola!  Hope you enjoyed today's card and be sure to check out Wendy's monthly Make ART Challenge blog!
PS - In other news...we have some guest designers scheduled to start posting each week in May so stay tuned for more weekly art projects!!

Friday, April 10, 2015

70% Off Sale!

No new bundle deals today, folks, I'm headed to The Collins Group retailer event this weekend!  Yippee!  Two full days for crafting, visiting with other store owners, designers, and my very favorite rep, and seeing new products.  I can't wait!!  

Today, we're announcing that we changed all of our Clearance item prices to a whopping 70% below retail pricing!  There's not much left so shop early!!  Items in the Clearance area will remain at the current price until everything is sold out!

Happy Crafting!

Wednesday, April 8, 2015

Creating with Finnabair

Those of us who live in the northeast had quite a winter to deal with this year...In total, I believe we received over five feet of snow...in about three weeks time!  It was crazy!  At the beginning of those storms, our entire family came down with the flu.  This meant that we didn't leave the house, except one painful grocery store trip, in two weeks.  That left me with not only a lot of time to watch every movie we own, but I also had a lot of time to craft.

I spent one weekend looking through Finnabair's blog, somehow managing to never have done so until a few months ago.  I'm so in awe of her projects and one of them, utilizing black gesso and Inka Gold, really inspired me.


One of the things I think is so much fun is how Finnabair takes all of these different objects, all different colors and textures, and layers them on a canvas.  Then, just using gesso, she creates almost another blank canvas where you can add your color.

I started by applying a layer of Wendy Vecchi's crackle paste to a canvas board.  Once that layer was dry I added black gesso.  I didn't cover the entire canvas, just the area behind all of my embellies, because my plan was to add another layer of gesso over the entire piece once I was done gluing.  This just meant that I wouldn't have to struggle to get gesso into all of the nooks and crannies.  All of the items on my canvas were just random pieces I had laying around my studio...lots of left overs!

I used a hot glue gun to adhere all of the parts as I needed to make sure the pieces wouldn't fall off when I added the gesso.  Next...a good, heavy layer of black gesso went over every single inch of the canvas and baubles.  Covering the flowers and canvas takes some time and patience and may need more than one coat of gesso.
Once the gesso was dry, all I had to do was add a few shades of Inka Gold (this stuff is the bomb!).  I used a dry brush to apply the Inka Gold to the embellishments.  I didn't add much to the background, focusing mostly on the all of the textures.  
I'm giddy over those block letters from Tim Holtz...I also added a photo of my two munchkins to the inside of the metal flower.  (Most of these metal pieces are from Prima)  And here's the finished canvas...
(Check out all of that juicy crackling in the background...oh man, I love it!)  This was a super fun project, although a little time consuming as you need to wait for each layer to dry, but just perfect for a winter snowstorm.  I think I'll start saving up pieces for next winter...

Enjoy!

Monday, April 6, 2015

Bundle Deals - Week of April 2

Egads...I meant to post these details on Friday, but Friday was a crazy day!  I don't think I sat down until it was almost time for sleep...So, without further delay, let me introduce you to this week's bundle deals!

It's time to announce the April addition to the Distress product line...FossilizedAmber!! (In love with this color!) We're kicking off this latest news with a bundle deal that includes all six of the new Distress products; paint, stain, spray, ink pad, re-inker, and marker. With all of our bundle deals...this package is discounted 20% from the retail price. Grab ALL six new products for only $24.36! Follow thislink to shop!

We also have two deals from Bo Bunny...Glitter Paste and Stickable Stencils!

The GlitterPaste comes in 10 beautiful colors, each containing iridescent laser glitters. Apply the paste using a brush or spatula, or apply with stencils. The adhesive dries transparent, only leaving behind a lovely shimmer! These pastes are excellent for emphasizing the patterns of decorated surfaces.

Stickable Stencils (SWOON!) - Not only do these 12x12 stencils work great on most smooth surfaces, but you can also use them on metal, wood, plastic, glass and canvas! They also work well on curved or flat surfaces. These stencils are repositionable so they can be used again and again. Use with sprays, paints, inks and chalks for great results! (With the stickable surface...I'm think I might need to stencil my living room walls!  Eight designs available!
We're offering both of these new products in bundles of 2 and 3...want more? Just order multiples of the 2-pack, for an even number of pastes/stencils, or a combination of 2- and 3-pack bundles for an odd number of pastes/stencils! Customize your bundle!
Bo Bunny has also released two darling wooden alphabet stamp sets (uppercase and lowercase) and I couldn't resist getting them for the store. I have become a huge fan of creating my own quotes in my art journals. I have two alphabet sets, just like these, and they have proven to be invaluable. I no longer have to go searching for the perfect quote...I can write anything! And the tall wooden "handle" makes printing super fast and easy! These are a must have for anyone's studio! (Oh, and these babies store in a cute wooden box!)
These retail for $12.99/set and we're offering them for $10.39.