Photobucket Photobucket Photobucket Photobucket Photobucket Photobucket
Showing posts with label paper crafting. Show all posts

Saturday, September 20, 2014

Graphic 45 Halloween Decor

This year for Autumn my new neighbor bought an adorable wreath to hang on their front door! Of course being the crafty goddess that I am, I thought to myself...I should make something for my front door!

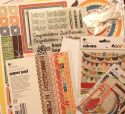
I immediately started digging for inspiration, but when my new G45 paper showed up from the eP store...I KNEW that's what I was using.


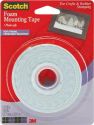
First I started with a 12x12 sheet. Use your favorite punch or deco scissors for the top 2 edges. Crease the bottom corner so it rolls and use score tape along the edge that will be on the outside.


Roll your paper using the inside edge as your working side and slowly roll it into the exposed score tape. Make the roll as tight or as loose as you want. Cut 2 squares of 8x8 from a coordinating paper for the 2 smaller cones along each side and repeat the process. NOTE: I would punch holes and insert my hanging ribbon NOW. I did mine after it was embellished and it was a pain.


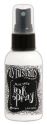
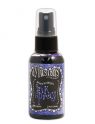
Use an Archival ink to add color to resin pieces. Resin is non porous so distress ink and pigment ink will wash right off. Wendy Vecchi archival ink is perfect for this but since I don't have orange I used my StazOn.

I used Archival ink in Potting Soil to accent the piece and highlight. 


Fussy cut a pice for frame and a few pieces for the cones themselves. Add some dollar store raffia, some pheasant feathers from your hubby's last hunting trip, and embellish with loads of Petaloo!!!


I also used some glossy accents to add rusty hinge distress glitter randomly along the flowers and the paper pieces.


Here's a close up of the completed frame.


So get crafty this Halloween ePeers and make something spooky for your home!!

{{hugs}}

Andiepants

Monday, June 9, 2014

Vroom and Let's Take a Trip - eP KOTM

I may be a little partial but eP has a rocking kit club!  
Are you looking for a kit club that you can meet with each month or have it sent directly to your door?  I'm telling you eP fans, this kit club is loads of fun. Please stop by the store to check it out.   Were only have a couple spots open so go and see if it is good fit for you.....  HERE!!!  
Don't panic when you see $75 that is for a three month subscription of $25 each.  
So here it is below.


Here is what I (Mary-Ann) did with it.  There are no techniques to share with you, just plain ole' scrapbooking, layering, cutting and having fun.


And here is another...


Tuesday, May 20, 2014

eKit - Kit of the month layouts

Howdy, Mary-Ann here with you today to share another layout or two, that I created using this months eKit - Kit of the Month.  I am super excited to say that one of the layouts also fits within the stenciling challenge - May ePlay Challenge sponsored by Erin!  Nothing like killing two birds with one stone:o)


Here is a reminder on what this months kit club looks like.  Remember folks, you don't have to be local to participate, we will mail it straight to you!

Lets get started with my first layout.  


It all started with a MME graph that I had on hand.  I wanted to replicate the circle graph idea but it was a tad too small.  I threw it in my copier and enlarged it a bit.


I cut the pie pieces and numbered them.


Attached them with temporary adhesive to the patterned paper included in the kit.  Also included in the kit was this Heidi Swapp arrow die cut that works perfectly as one of my graph pieces.  Setting this aside, I started on my cardstock base.


This is my first time ever using this Gel Medium and I am going to tell you right now, it will NOT  be my last.  I love how this dries and gives everything a clear texture.  For those of you "dirty" girls out there, I know this all seems elementary, but I do LOVE it and I am excited!


Once the AMAZING gel was dry, I used the negative to the graph to lightly draw where I wanted my circle to be so I wasn't wasting my time on places that would not show.  


Then I started adding some ink stenciling.


Here you can see the different layers of stenciling done with, Gel Medium, white paint and black ink.  I also created droplets with Dylusions and Tim Holtz Brushed Pewter paint.  I colored all of the Heidi Swapp die cuts with Dylusions to soften the white and to tie in my black and gray color scheme.


This is my completed layout.  In addition to the Kit Club product, I added my own labels and used my own inks.  Other than that, it is all included!


For my next layout, I used mostly the blacks and grays that were left in my monthly kit. 


The only additional items on this layout were the flair, tag, twine, stapler and inks.  I did color all of the Heidi Swapp dies with a gray Dylusions ink.  


Head over to the Classroom section and sign up for the club today.  


Products available in the eP store: