Photobucket Photobucket Photobucket Photobucket Photobucket Photobucket
Showing posts with label Anneke. Show all posts

Wednesday, March 27, 2013

Canvas

Hello,  Anneke here.
This is already my last post as a guest designer for the eclectic Paperie blog. 
For today I decorated a burlap canvas with fabric flowers. These canvases are available in the eP shop (click) in different sizes. Mine is 6"x6".

 I covered the burlap with a subtle layer of gesso first.

To decorate the canvas I used 2 kinds of linen fabric, a few paint chip samples and some packaging material that's a little different form corrugated cardboard.

I colored the fabric with Dylusions Ink Sprays.

Glued a strip of the 'cardboard' at the bottom of the canvas. 

Cut two circles out of the fabric for each flower.

For the flower centres I used some linen cord .

Cut the stems and leaves out of paint chip samples.

Supplies from the eP shop


Dylusions Ink Spray

Before saying goodbye I want to thank you all for your visits here and for the nice comments on my work. 
Thank you very much!!!
And a special 'thank you' to Kim for giving me the opportunity to be one of the guest designers. I really enjoyed it!

Wednesday, March 20, 2013

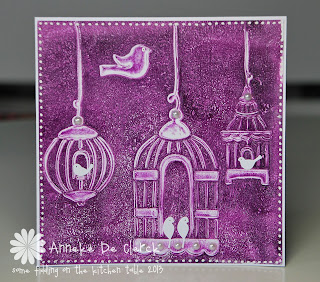
Birds and Birdcages

Hi, Anneke here with another guest designer post.
 I was totally surprised when I discovered a gel printing plate in the package Kim sent me. Such a plate was on my wish list, lucky me :) 
So last week I started monoprinting for the first time. So much fun to do! In no time I had a bunch of backgrounds ready. Such a great technique and super easy to do! 
I used the 6x6" plate, it's available in the eP shop.
There is a step by step video tutorial over there as well.

Today I show you the cards I made with the prints.

Used a masking technique for the birds.
Bird Stamp: Donna Downey by Prima

 'Mini Circle Grid' & 'Mini Art Is'

Here I put some circles in the paint before printing.

Stamped the birds on the back of a gelli print and cut them out.

Here I used the same masking technique as for the first card.

For the following cards I used the Claudine Hellmuth Studio Stencil 

Made 'happy birthday' with a label maker. Used a transparent strip.
The tiny birds were made with the 'Resting Birds' die by Memory Box.

Printing layer over layer adds interest to the backgrounds

For this background I put a stamp in the paint before printing.
'Starburst Lace' by Hero Arts

Here I did some stamping on a gelli print. The stamp at the bottom is from the 'bordering on the edge' set by Dylusions
'Happy' is a Darkroom Door Stamp out of the 'Whimsical Words' set.

Hope you enjoyed it. 
See you next week for my final post!

Wednesday, March 13, 2013

Donna Peony

Hi, it's Anneke again here, with my second guest designer post.
This week I made a spread in my Art Journal with two beautiful flower stamps by Donna Downey. The set is called 'Donna Peony' and it's available in the eP shop

I started with adding torn pieces of paper to the pages with gel medium. Put a layer of yellow paint (Fluid Acrylics by Golden) on top. Because this paint is transparent, the design of the paper underneath is shining through.

After drying the yellow paint I added some green and white acrylic ink. Sprayed over the ink with water and turned the book in all directions to make some drips.

There are 2 stamps in the package. One solid flower and one open flower.

I stamped on water color paper with the solid peony. Used Distress Stains to ink the stamp. 

Stamped with the open flower on the background. Did the stamping with StazOn 'Cactus Green'

Used templates and StazOn Ink 'Cactus Green' and 'Blazing Red' to add dots and numbers.

Made some tabs with washi tape.
Stamped on the edges with a stamp out of the 'Bordering on the edge' set by Dylusions.

Glued some yellow seed beads in the centre of the flowers.

Supplies

Stamps

Templates

Paper 
Basics Manila Paper Pad by Basic Grey

Distress Stains:

'Cactus Green' & 'Blazing Red'

Golden Fluid Acrylics 'Hansa Yellow Medium'
Liquitex Ink Acrylic 'Titanium White' & Light Green

Thanks for watching.
See you next week!

Wednesday, March 6, 2013

Lucille

Hello, 
My name is Anneke. I'm living in Belgium with my HB and daughter.
I'm so happy to be asked as guest designer for March here on the eclectic Paperie Blog.
Thanks Kim!
Today I'll start with some tags I made with the Basic Grey paper pad 'Lucille'. The pack includes the most beautiful papers. Check it out at the eP shop

The patterns on the background were made with molding paste and templates. After drying I colored the background slightly with Distress Ink and....my fingers :)

To make this flower I've die cut 6 circles out of the patterned paper (3 sizes). 

On this tag I attached 3 spiral flowers. In the centre I glued some matching roses by Prima.

For the tag toppers I used matching ribbon.  Therefore I colored white ribbon with Distress Ink.
.
I stamped this flower twice on the patterned paper. After cutting out I stuck them together with a brad. Added some white accents with a Sharpie pen.

Supplies:

Paper

Templates 
The Crafters Workshop: 'Mini Circle Grid'
Prima: Donna Downey Studios Poppies and Peonies Mask

Stamps
Hero Arts: It's Your Day A4981
Stampendous: Fresh Bloom

Ranger Distress Ink

Flowers
Charme Rose Sun Kiss by Prima

Thanks for taking a look! 
I hope to show you an Art Journal page next week.