Photobucket Photobucket Photobucket Photobucket Photobucket Photobucket
Showing posts with label tags. Show all posts

Wednesday, July 1, 2015

Stained and Stencilled Tags

Hi everyone, Steph Ackerman here and I am thrilled to be the Guest Designer this month for Eclectic Paperie.  Thanks so much Kim.

I received some wonderful products to work with this month and I used the same products to create 3 different tags.  I hate to waste ink, stain, or paint and I try to find ways to use up all the color on a stencil rather than wiping it off. 

Supplies:

Tim Holtz Stencil - Blossom
Tim Holtz Distress Stain - Abandoned Coral
Gelli Arts Rubber Brayer
Bo Bunny Stickers - Gabrielle Collection
Ribbon


Tag #1
Create a tag from watercolor paper
Place Blossom Stencil on top and ink with Abandoned Coral Stain
Ink edges of tag with Abandoned Coral Stain, then mat with cardstock
Wrap with ribbon
Adhere to Coral cardstock
Select stickers, mat with cardstock and add to tag


Tag #2
Flip stencil over onto another piece of watercolor paper
Using a brayer, roll over stencil to release the left over stain
Ink edges of tag with Abandoned Coral Stain, then mat with cardstock
Wrap with ribbon
Adhere to Coral cardstock
Select stickers, mat with cardstock and add to tag


Tag #3
Create a tag from watercolor paper
Place stencil on top and rub over it with a baby wipe releasing the remaining stain (you get a nice subtle design)
Ink edges of tag with Abandoned Coral Stain, then mat with cardstock
Wrap with ribbon
Adhere to coral cardstock
Select stickers, mat with cardstock and add to tag


 So what do you think?  Do you use all the color off your stencils?

Please stop by my blog to see more of my projects.

Thanks for stopping by today.

Steph


Tuesday, July 22, 2014

Material Tag !

Hello! It's Sue C here and today I'm sharing a tag that has been created on fabric.


I started by cutting a jumbo tag from mount board and then covered it with fabric that has a tiny pattern on it. I've used Heat 'n' Bond to attach the fabric which you just use an iron to melt it which in turn sticks to the fabric.


I trimmed the fabric to the size of th tag and frayed the edges a little.


Then I used the Wendy Vecchi 2 Fancy Flowers stencil using Chalk Fresco Finish paint.


I then gave the whole tag a wash of watered down Chartreuse Fresco Finish. You can just about see the pattern of the fabric now. It was now that I realised that the stencil brush I used wasn't what you might call clean ! So the stencilled flowers have a slightly blue tinge !


I then used the Mini Retroburtst stencil with Seaweed Fresco Finish paint.


I wanted to add a splash of colour so I used the Mini Paradise stencil with Tango Fresco Finish, decided I didn't like it so I then used the Mini Onion Skin stencil using a mix of Green Olives and Seaweed Fresco Finish paint. Much better !


I then used the Wendy Vecchi Vintage Mesh and Dots and Dashes background stamps and stamped them using Fern Green but without using an acrylic block. I also stencilled across the bottom of the tag using the Wendy Vecchi Dots and Stripes stencil.


I stamped the 2 flourishes from the Wendy Vecchi Daisy Art set in Fern Green Archival ink. I then stamped the daisy from the same set directly on to the tag in black Archival ink. I stamped the flower again onto white card and cut out the flower head and leaves and painted them.


I used the border stamp from The Beauty of Art set and the little bird is from the Licence Plate Art set.


I stamped the text from the Art of Comforts set with black Archival ink, it hasn't shown up as well as I'd hoped sos I may change this. To finish I added a metal embellishment over the hole in the top of the tag.

I hope you've enjoyed today's project !
Sue
x

Wednesday, July 9, 2014

Journey Mixed Media Tags


Hi everyone! It's Bonnie here today. I decided to have a bit of a play with my Art Anthology Coloration Sprays and some #8 manila tags. I love these sprays but hadn't taken the time to play with them very much and see how the colours combined so today was the start of changing that.


I began by spraying each of the 15 colours I have onto ATC sized pieces of cardstock. Once dry, I labelled them, punched and reinforced the holes, and fed them onto a metal ring. This makes it much easier to find the colour I want and to choose combinations. The bigger swatches give a better sense of the colour and I can also use them to help choose gelatos and other inks to combine with them.


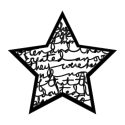
I created many backgrounds but for this post will focus on only three, giving the recipe for each. I started by laying the Balzer Bits Script Star onto the tag and spritzing with Timeless, Paprika, and Cinnamon Toast. I moved the star and repeated until I was satisfied with the coverage.For the second tag, I flipped the star mask which was covered in colour sprays from the last tag onto a plain tag to get a reverse print and then repeated that allowing it to dry.Then I spritzed my craft sheet with a little more of each colour as well as Watermelon,, and dragged my 2nd tag through  the puddles. My third tag was a repeat of this technique except that I added a spritz or two of water to the coloured puddles. Love the different intensities and effects on the three tags. Love, love, love these sprays!

 Journey tag ~  see photo at top of post  (ingredients) 
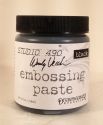
black embossing paste through TCW's Texturized stencil.
TH Washi tape
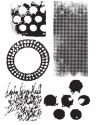
Dina Wakley Textures stamp with Jet Black Archival ink
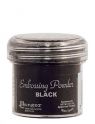
lizard Inkadinkado stamp with Versamark and black embossing powder
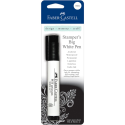
Black Big Brush pen edging
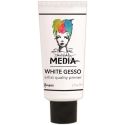
torn piece of corrugated cardboard dry-brushed with white gesso
black enamel dot
black grosgrain ribbon stapled with mini attacher
doodling with black Micron pen


 Fly tag ~ (ingredients)
stencilling with TCW's Mini Punchinella and Red Geranium Archival ink
WV From A to Z Background stamp and Sepia Archival ink
Dina Wakley Textures circles stamp and Jet Black Archival ink
MS punched butterfly with safety pin body
washi tape 
alphabet stickers from stash
corrugated arrow from stash
White Big Brush pen dots
Black Big Brush pen edging
black enamel dots
black grosgrain ribbon stapled with mini attacher
doodling with black Micron pen


The journey that matters tag ~ (ingredients)
 black embossing paste through TCW's Mini Specimens stencil
TH Washi tape
Dina Wakley Textures stamp with Jet Black Archival ink
Tim Holtz Classics 16 sentiment stamp with Jet Black Archival
Black Big Brush pen edging
torn piece of corrugated cardboard dry-brushed with white gesso
black enamel dots
black grosgrain ribbon stapled with mini attacher
doodling with black Micron pen

That's it for the first three tags using these awesome Art Anthology sprays. I had an absolute blast playing with them and completing the tags. I'll be back again with other colour combos. Thanks so much for visiting today!

Bonnie

Here are links to the eP store for many of the products I used:

Wednesday, July 2, 2014

She Flew Mixed Media Tag!

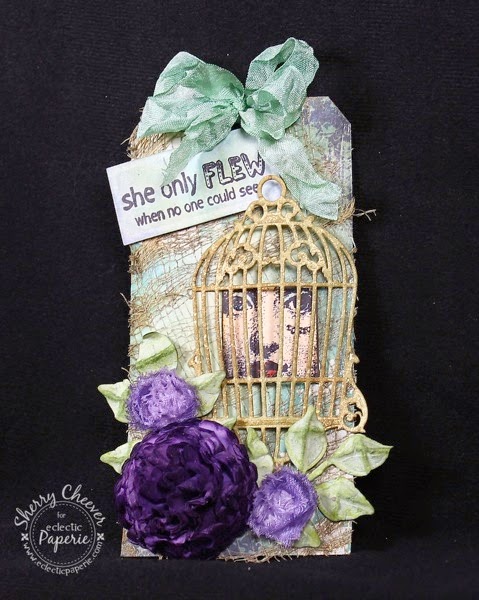
Good morning!  Sherry here with you today and I finally got my fabric entry done for June’s ePlay Challenge . . . but as my luck is running lately, I just noticed that the entry list is already closed.  Well anyhoo, here’s my fabric piece!

SheFlewTag

I started with a manila tag and added gesso using a sponge brush and The TCW 6x6 Stencil, Mini Specimens.  The gesso was added in the upper left and lower right hand corners.  Sadly, I think I covered most of it up by the time I was done.  The Wrinkle-Free Distress technique was used to add color to the tag with Bundled Sage, Shaded Lilac and Tumbled Glass Distress Inks.

For the fabric in my project, I chose to work with a piece of surgery gauze.  The gauze was covered with Glue ’n Seal and draped across the front of the tag.  To keep the gauze in place, another coat of Glue ’n Seal was added over the top.  While still wet, gold perfect pearls were dusted across the gauze.

SheFlewCloseUP

The birdcage was die cut from watercolor paper and colored with Bundled Sage and Vintage Photo Distress Inks. Using the marker spritzing tool, gold leafing was spritzed across the front of the birdcage.  Once dry the birdcage was once again highlighted with Vintage Photo.

The face (inside the cage) and the sentiment are both images from an old Studio 490 stamp set, It’s Face Art.  Both were stamped in Jet Black on another tag, inked and cut out.  If you look closely, you’ll notice rhinestones were added to the face where her tat normally is.

SheFlewTag CloseUPFlowers

The main flower was made by die cutting coffee filters with a scalloped circle die.  The die cuts were assembled using a brad in the center and then the flower was misted with Dusty Concord Distress Ink Refill and water.  As the flower was being dried with the heat gun, the flower was being shaped.  The small flowers are from some old ribbon I found in my stash that was misted with water and then misted with the Dusty Concord/water mixture.

SheFlewTag Angle


I guess that’s all for me today.  Thanks for stopping in and joining me!

SHERRY SIGNATURE


Project Supplies: