Photobucket Photobucket Photobucket Photobucket Photobucket Photobucket
Showing posts with label embossing powder. Show all posts

Monday, June 29, 2015

Create Your Own Sunshine

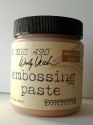
Howdy friends! For those of you who don't visit my personal blog, I'm sharing a project that I created last week, 
using embossing powders on a project. Here's my finished card and this is how I created it...

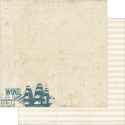
I started with a piece of Mixed Media cardstock, perfect for any kind of ink, spray, or paint. I used Distress 
Markers, a water brush and my non-stick craft sheet to add color to the background (and it appears that I'm still a 
bit obsessed with pink and grey).
I scribbled ink from the marker on the non-stick craft sheet and then picked up the ink with the water brush. 
Then I just swiped the brush over the cardstock.

Next I used some of Wendy's stencils to add some background design, using Watering Can Archival Ink
 (my favorite color ever!)
I also used the oval shape from the Spotlight Frames and Mask set to create a mask on my background, which I
 then traced with a black Fude Ball pen. I then used the oval shape frame to act as a mask for my background so 
that I could stencil the Sunburst shape and keep the burst within the border on my frame. I then stamped the 
sentiment and swirl from the Paper Doll Art stamp set.

My card features spot embossing, meaning that instead of embossing a large area I'm only embossing a portion 
of a larger piece. You can see my Watering Can embossed lines at the top and bottom of my card.
Next, I used the new Tiny Shapes Movers & Shakers dies (aren't they the tiniest, cutest dies ever!) to die cut a 
few embossed butterflies. For quick and easy die cut embossing, I first added some Distress Ink to a scrap piece 
of manila tag and then used clear embossing powder. Then I just die cut the shapes out of the already embossed 
tag!
Next, it was time to assemble! And here is my completed card...
You can see that I embossed the butterflies, my gal's apron, gloves, and lips. This was done by first stamping or 
coloring the image and then using a VersaMark pen to color over the area that was embossed, I used clear 
powder for these areas so that the colors would show through the powder.

Hope you enjoyed today's project!!

Tuesday, September 2, 2014

Mosaic Canvas


Hi everyone! It's Bonnie here today to share a little 5x7 inch board canvas I altered. A while ago, through Pinterest, I saw these fabulous mosaic canvases created by Linda Iverson and found the idea really inspired me. It's a wonderful way to use of scraps of papers and chipboard and I love the results so I decided to have a go.


I started by applying black gesso to the canvas board and allowing it to dry. Next I cut up some chipboard scraps and laid out a pattern that pleased me. I wanted a few of the "tiles" to be thicker so I cut an extra layer for two and three layers for the center rectangle. These I glued together and then used my Black Big Brush Pen to blacken the edges of all tiles.


The next step was to choose stamps and stencils as well as papers to feature on some of the tiles. The gold embossed quote as well as the black embossed squares stamp come from the TH Classics 16 set. The paper under the squares stamp is a piece of Authentique Anchored Sailing paper. There is a very faint map printed on it which fits the journey theme and a small resin hand was added to point to the quote.. Directly above the square tiles stamped tile is an Idea-ology Word Band which says Live in the Moment. Gold nailhead stickers were attached to the band with Glossy Accents to resemble brads.


The black starry tile at the top and bottom right were stencilled with TCW's Mini Random Stars and Studio 490 Gold Embossing Paste onto black cardstock. This was then adhered to the chipboard and cut to size. The B is a Scrabble tile adhered to a scrap of gold striped paper using Beacon 3-in-1 glue which was also used to adhere all of the tiles to the canvas. This same striped paper formed the background on a narrow tile which housed the Idea-ology pen nib.


Two scraps of music paper from Michelle Hill's Vintage Ephemera Bundles were used to cover two more tiles. I was able to center the lyric "What a life" onto the one tile which continues with the message of the canvas. These papers as well as the Authentique one were edged in Black Soot Distress ink to better connect them to the rest of the project.


Scraps of black cardstock embossed with TH Riveted Metal Texture Fades embossing folder were rubbed with various colours of Inka Gold to highlight or accentuate the embossed design. These were then adhered to two tiles and trimmed to fit.

I love how this turned out and am already planning more canvases in different sizes. I think a big one would be super fun to do and have several more of the same size started in my head. I'd love to see what you do with Linda's fabulous idea. Thanks for the inspiration, Linda.

Bonnie