Photobucket Photobucket Photobucket Photobucket Photobucket Photobucket
Showing posts with label Mini Album. Show all posts

Monday, October 20, 2014

Thanks for the Memories - Mary-Ann

I think that by now, you have the understanding that eP is coming to an end.  We, as design team members at eclectic Paperie, have our hearts filled with sadness and understanding.  We all also feel honored to work along side such talented ladies over the last few years.  There is a time to move on for all of us.  Kim has made an incredibly important decision for her family that everyone can completely understand.  I will miss the daily activity on this blog, but each of the talented designers have other avenues to display their work.  If you have continually been inspired by one or all of the girls on the team, head to their blogs and follow them on their next adventure.
Kim Schofield (owner)

Here are a couple of my favorite projects I created over my time here at eP.  As a well known, "clean" girl, I did attempt getting dirty a couple of times.  But very lightly!


Thank you for all the encouraging messages you have left for me over the years.  I will miss eP, the DT girls and the eP friends.  May God bless you all and may you continue to create.


Tuesday, August 5, 2014

Family Mini album part deux!

Remember this guy?  
I submitted it a few months back for the Get Altered - altered book challenge that eP held.  
Go here to see what I mean!  
Mary-Ann here, to share the rest of this mini with you today.  I seriously finished this guy while my family was camping in the deep woods of Maine.  Due to a recent surgery, I stayed back while my family hiked deep into bear country.  Making the most of my time, I brought along some super fun stuff to work on.  This mini included!  Hang on while I take you through this photo heavy journey of 2013 family selfies!  I believe if you click on each photo separately, it will make it larger for you to read my journaling.  Only if you are interested:o)  
If you go here, I linked the original submission for the cover and first page.


Staying with the original concept, I keep things light and simple throughout the entire album.  I collected only the things that I was going to use.  Tags, labels, a few small chipboard pieces (from Studio Calico), ephemera (Tim Holtz) and paper only from Prima's 6x6 Princess pad.   I also used the coordinating flowers, and paperclips. 
Of course, I couldn't take a sewing machine attached to a generator into the woods with me, but don't think the thought didn't cross my mind!!!  So, I had to finish the detail work when I got back to civilization.  


Yup, some smudging did occur.  I should really fix that.


Look what a couple of enamel dots can do to the whole look.  
This could be paint splatters if you are not crafting in the woods!


There you have it, my completed selfie mini book from 2013!  
Listed below are the items you will need to replicate this idea or for you to get started on your own mini.
Thanks for stopping by eP today.  Stop back by tomorrow for more inspiring work.


PS:  Here is PROOF that I scrapped in the woods.


Supplies used:


Wednesday, June 25, 2014

Our Time File Folder Mini Album

This guest design month has 
certainly flown by for me. I want to thank Kim and Bonnie for having me in to share a few projects with you. It's been a real treat, and I hope you'll come visit me at my blog sometime soon. 


Today I have a mini album 
made from file folders and featuring Tim Holtz beautiful Wallflower papers. There are a huge amount of photos, so I'll try to keep my explanation simple and short.


I started with three full size
file folders, not the minis that are out there.


Cut to 6 1/2" wide.
Trim off the tab making it 17 1/2". Cut three of these pieces.


Fold in each side to
form a W. The left side that had the tab will be about 1/4" longer.


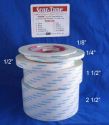
Add 1/4" Scor Tape to
three sides as shown above. Remove backing and adhere to section to the left. This will form a pocket. Your W is now glued together in the center. The shorter flap will be your cover... the longer flap will now be adhered to your next W....


like this. Apply the Scor
Tape to form a side pocket when adhering the sections together.


When you have all three sections
put together, it will look like this. You should have three top pockets and two side pockets.


I inked all the edges with
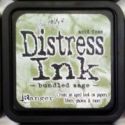
Walnut Stain Distress Ink then gave it a vintage look by flicking on some water drops. I inked a piece of Idea-ology white seam binding with the Walnut Stain, Bundled Sage, Vintage Photo DI... and glued it around the book in the center to form my closure.


I did some machine stitching 
to my front cover sheet and adhered it to the book.


For the spine I used a
piece of Canvas Corp natural canvas and some lace from my stash.


I added Tim's papers to
the pages along with some stenciling (Burlap Layering Stencil)... both Distress ink to some and gesso to others...


as well as the tags I made 
from the file folder scraps and Alterations File Tabs die for the five pockets.  These I topped with Idea-ology Chit Chat stickers.


For the first page I made a 
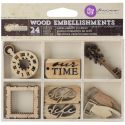
pocket using a scrap from the 7 Dots Studio Nature Walk collection. The wood icons are Prima's Time Traveler. I cut a tag from more of the FF scraps. I folded it at about 1 1/2" and tucked it under the patterned paper. The fly chipboard piece is from Prima's Cartographer.


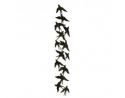
The birds were cut with
Alterations Birds in Flight Decorative Strip, the foliage with their Spring Greenery. The gems are Prima Say It In Crystals.


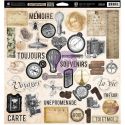
Die cuts from Tim's Expedition Ephemera.


Stamping with Tim's Nature Walk.
The butterflies were cut with Alteration's Mini Butterflies.


Idea-ology Pen Nib.


I embellished the cover
with a Prima TT wood icon, some flowers from my stash, more Spring Greenery foliage, and a bit of green Spanish Moss tucked in for more texture.


The back cover is just kraft
cardstock with stamping covered in a coat of gel medium for protection.
I know I tried to squeeze in a 
lot of info here, so if you have any questions, please ask away.
Thanks so much again,
ladies, for the opportunity to share some projects with you. It's been a delight.

Thanks for stopping by!
Linda