Photobucket Photobucket Photobucket Photobucket Photobucket Photobucket
Showing posts with label Spellbinders. Show all posts

Wednesday, May 21, 2014

Take time for detours

Hi everyone, Steph Ackerman here with my third post as the guest designer for eP for the month of May. 

I found this wood board in my local store and thought it would be fun to work with.  I wasn't sure at the time what I would be doing, but I knew it would come in handy.


Today, I'd love to show you how I turned this plain board into a wall hanging.

Using Art Anthology's Velvet Dimensional Paint in Aloha, I lightly painted the background.   Since I wanted a hint of color, I spritzed the panel with water which allowed the paint to flow.   Then I added in Art Anthology's Sorbet in Honolulu Blue for a bit more color.

                    
I also painted  Art Anthology's Sorbet in Honolulu Blue  on the edges for dimension.


The papers I used are from October Afternoon's Travel Girl collection, which I thought would be perfect for what I had in mind.  I cut the papers to fit the inside area on this plaque, inking the edges with Memento Rich Cocoa Ink and matting with cardstock before adhering.


I cut and tore some wordy travel paper from this collection, matted with some cardstock and placed it so it appeared to be falling off the right edge.  I added a large die cut oval from brown cardstock on top.  Using a Stamping Bella stamp, I colored her with assorted Copic Markers and then fussy cut her, placing her atop the oval with pop dots for dimension.


Since my stamped image appears to be thinking about where she'd love to travel next, I fussy cut assorted words from this pattern paper collection and adhered them around her.

Along the bottom panel, I added a sweet sentiment.

Thanks for stopping by today.

Steph


Wednesday, May 14, 2014

A Tag For All Seasons

Hi everyone, Steph Ackerman here with my second post as the guest designer for eP for the month of May. 

Today, I'm showcasing my tags for all seasons.  I used the same products for each tag, just changed up the colors for each season.


I used the new Prima Marketing stamp - Warm Wishes as the focal image.  She is dressed for winter, but change the colors and you can get away with using her for any season.  Each image was colored with assorted Copic Markers in keeping with the season.

To begin, I stamped each tag with an older Hero Arts stamp set I've had forever.  Using VersaMark Ink, I stamped one season repeatedly on each tag, then added Clear Embossing Powder and heat set each tag. 


Here are the details of each tag:

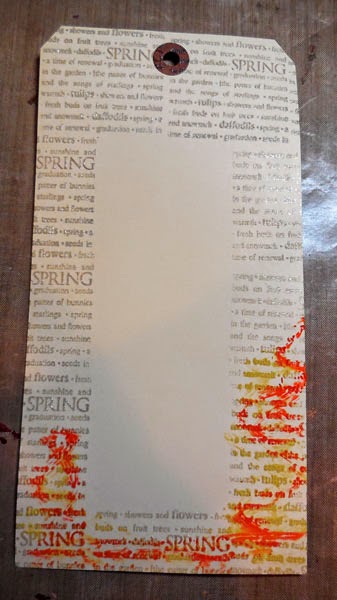
Spring Tag


I used Faber Castell Gelatos in Yellows, mixing the colors with water until I had the look I wanted. 


I added some Gold Metallic Gelatos around the edges and used a paper towel to remove some of the color.


Summer Tag


I used Faber Castell Gelatos in Reds, mixing the colors then removing some of the color.


Fall Tag


I used Faber Castell Gelatos in Neutrals and Metallics.  Loving the earthy feel of this tag.


Winter Tag


I used Faber Castell Gelatos in Blues and Metallics.  I love the included purples and how the metallic colors make the tag shine.


Once the tags dried, assorted twine from The Twinery - Charcoal, Gunmetal, Blossom, Strawberry, Cantaloupe, Honeydew, Buttercream, and Cappucchino was tied around each tag and through the hole.

Using assorted papers from 7 Dots Studio's Nature Walk - wonderful earth toned papers with imbedded images - I cut them into 3" x 6" panels.  Each panel was inked with the same Gelatos that were used on it's coordinating tag, then matted with black cardstock.

Using additional papers from Nature Walk, I die cut 2 sizes of ovals and placed them on the panels.    Glue Dots were placed behind the panels for dimension, allowing them to pop.

Each stamped image was fussy cut and added to the oval with Glue Dots for a little dimension.

Please stop by the eP Store and pick up all the wonderful products I used in this week's project.

Thanks for stopping by this week.
 

Steph


Saturday, September 28, 2013

Mixed Media Scrapbook Layout

Andiepants here and  WOW am I excited to be posting my first blog post for the eP design team!!! eP has some absolutely fantastic products. There is so much that you can do with this stuff. AND I LOVE STUFF!!!! 

I don't know about you but personally...I feel that I have too much stuff.
*GASP*

Yes, I said it. So with that in mind, I have decided it's time to stop holding on to that stuff and to start using up the old stuff. Of course it can be refreshed and renewed with the aid of some new eP stuff;)


I used some of my old paper stash to create this:


So much fun and color! I pulled the paper for the brown but imagine my surprise when I realized that it also contains all my fav go to color combos...teal and lime green...teal and orange...orange and lime green...well...you get the picture. I used the Dylusions spray through my new tiny circles stencil.


I love how you can give your page so much dimension with this idea-ology film strip


Of course my bird cages! Where would I be without them!! This Claudine Helmuth stencil is my new absolute fav. I used liquitex modeling paste which pulls the color from beneath it. I wish I had some Wendi Vecchi white embossing paste. hmmmmmmmm ;)  I colored the cages with the Splash of color silks glazes. It actually worked out fantastic because you could see the teal pulling from beneath. I know right?!


Here is a list of eP products I used to complete this LO. I hope I inspired you to grab some mixed media from eP and use that stash!

{{hugs}}
Andiepants


Wednesday, February 20, 2013

Celebrate the Moments of your Life...

It's Week Three of my Guest designing duties for the Eclectic Paperie and when I opened the goodie box that Kim sent me, I knew that I would make something special with the Echo Park For the Record 2 paper pad! I used one of the fabulous Die D'Lites from Spellbinders Paper Arts™ called Garden Weave for some filigree work on top of my paper. I finished the card with a pretty silk bow and a Wendy Vecchi - Blossom Bucket Polka Dot Butterfly.

Make sure you check out the Special Pricing for Spellbinders at the store!

Happy Crafting ~ Darsie

Wednesday, February 13, 2013

Happy Valentine's Day with Darsie Bruno

It's Week Two of my Guest designing duties for the Eclectic Paperie and in honor of Valentine's day, I have created this pretty card! I don't usually make tall cards, but I just love Authentique's "Lovely" Paper Pad and wanted to show it off. I used one of the fabulous Die D'Lites from Spellbinders Paper Arts™ called Fantastic Flourish Three as my accent piece. I finished the card with a pretty silk bow and a Ruffled flower from Maya Road.

Make sure you check out the Special Pricing for Spellbinders at the store! 


Happy creating ~ Darsie Bruno


Wednesday, February 6, 2013

Guest Designer Darsie Bruno

I'm Darsie Bruno and I am excited to be a Guest Designer for the Eclectic Paperie for the month of February. You'll see projects from me for the next few weeks featuring fabulous products from their store! Kim and I have been friends since my first design team with Sweet 'n Sassy Stamps! A big thank you to her for asking me to play with her products!


For your inspiration today, I created a pretty card using Basic Grey's newest paper pad (which I love, love, love) called True Love with scrumptious colors of teal, pink, red and white! I just love that color palette!

I also dug out some fabulous Spellbinders Paper Arts™ dies to use with this creation! My tissue flower is made using Blossom Five with a delicate pearl center, and my leaves are from the Foliage die set. I stamped a pretty medallion stamp onto Labels One then layered it to Scalloped Labels One. I edged my dies with coordinating Copic Markers.
 
Make sure you check out the Special Pricing for Spellbinders at the store! 
 
Happy Creating ~ Darsie


Thursday, January 24, 2013

Completely In Love

eP011213

Hey there!  I pulled out some new Wplus9 Design Studio stamps and dies from eclectic Paperie earlier this week to create this sweet Valentine!  The stamps are the new Cupid’s Arrow set, and I also used the matching companion die to cut out the cupid on the upper left.  I saw this sample card made by W+9 design team member Jean Martin, and loved how she cut out the little banner at the bottom of the sentiment so it still fit the die-cut heart, so I stole her idea!  :)  I also added a little border at the bottom using the XO Border die… I just think that thing is SO cute!  The papers I used are Echo Park “Love Story”, and my pink ink is Ranger Picked Raspberry distress ink.  The large die cut hearts are from Spellbinders.

Hope this makes you feel all lovey-dovey!

eP Signature - Tammy Hershberger

Monday, January 21, 2013

Spellbinders Die D-Lites and Embossing Paste!


Good morning!  Sherry here today and I have an altered frame to share with you.

SCheeverRulesToLiveByAlteredFrame

I started with one of those $ frames from Michael’s.

BlankFrame

From thin chipboard a stencil was die cut using S2-020 Spellbinders Die D-Lites Medallion Five.

Stencil from Die D-Lite

Using the chipboard stencil and Studio 490 Embossing Paste, medallions were placed randomly around the bare wood frame.  Once the Embossing Paste was dry, the frame was painted black.  Antique Gold Rub ‘n Buff was used to accent the stencils.

SCheeverAlteredFrameTopRightFlower


The flowers, foliage and flairs were all die cut from 140 lb. watercolor paper.   (Video tutorial on the flowers can be found here - - Dimensional Blossom from Watercolor Paper.)  The flowers are S4-370 Blossoms Five, leaves from SS4-328 Foliage and S5-050 Rose Creations, and the flourish is from S5-119 Venetian Motifs.

SCheeverAlteredFrameSentiment

The sentiment is from an older Studio 490 set, Art-Fully Said.    If you don’t have the set and need it, please send Kim an email and she can special order it for you.  It was stamped on watercolor paper that had been misted and splattered with Broken China and Vintage Distress Inks, then die cut and mounted with S4-161 Labels One.

SCheeverRulesToLiveByAlteredFrame

Thanks for stopping by and joining me today!
eP Signature - Sherry Cheever

Project Supplies:

Sunday, January 20, 2013

Be Blessed

Hi everyone!  It's my turn to post on the eP blog today and I have a quick and simple card project for you today!  I was busy crafting all day yesterday but it's not a project I can share yet...ohhh...hate when I have to wait to share!  Be sure to stay tuned to this week's newsletter!  :-)
 
Today's card features the Spellbinders Poppy Patch die, which is one of the new D'Lites dies.  I love the intricate detail of these new dies and I thought all white would be a great way to showcase the detail.  Not much to explain about this card...it's all white, all the time!  However, I do want to share a tip about using the D'Lite dies.  Because of the small details on the dies, it's very difficult to remove the paper (after cutting) unless you use wax paper.  The pieces are just too small to easily remove. 
 
To quickly and easily solve the problem, lay a small piece of wax paper over your die and then lay the paper on top.  Run the die through your cutting machine and voila, the cut paper is easily removed from the die!  Fun stuff!
 
Hope you enjoyed today's very clean and simple card...sometimes you just need a quick project...and be sure to check out all of our D'Lites dies...eP offers special pricing on all D'Lites!
 
Happy Crafting!

Thursday, January 10, 2013

Wild & Crazy Hi Tag!

Hello, everyone!  It's Broni and I'm here to tell you to put your sunglasses on!  I played with some Dylusions ink sprays and it got a little wild!


I told ya!

I started with a #8 manila tag and spritzed it really well with Pure Sunshine ink spray.  Then using the Mini Funky Tags 6x6 template and the Dylusions Dotted Flowers stencil I spritzed with Bubblegum Pink ink spray. I sponged around the edges with an ink blending tool and some Black Soot distress ink.  I also stamped some mini chevrons in Black Soot and sponged a few more dots with the black ink too.


I spritzed some of the pink spray onto some seam binding and stamped it with the mini chevron as well.  Then I cut a gorgeous flower spray using the new Spellbinders D-Lites Fantastic Flourish One and sprayed it too.


By this time, of course, my fingers are all pink as well!  What fun I had!  Next came the embellishments.

I used some stickers from the Everyday Eclectic paper collection, some beautiful decorative pins, a Mango Madness button and some twine in Pink Sorbet and Lemondrop.  Here are a few closeups for you:


And one more time, here's the full tag:


I hope you've enjoyed your little tour into the wild & crazy world of ink sprays!  Try it for yourself and then please be sure to show us what you've done!

Thanks so much for stopping in!


~