Photobucket Photobucket Photobucket Photobucket Photobucket Photobucket
Showing posts with label tim holz. Show all posts

Monday, October 28, 2013

Fall Swim


Hi, Mary-Ann here! With watercolor being an up and coming challenge here at Eclectic Paperie, I decided I'd try my hand at watercoloring on this swimming layout.  Fitting don't you think? WATERcolor with swimming!!  Anyway, I also tried a new technique.   


I laid out my non-stick craft sheet and lightly sprayed color mists directly on the sheet and then diluted this by spray by spraying water directly on top.  This helped thin my colors.  It is hard to see in this photo but look closely!


I then turned my paper face down onto the wet puddles of spray.  When I lifted and turned my paper over, I could see where the colors mixed on my paper.


Once I decided where my photo and papers were going to be, I got out my Tim Holtz Stars Layering Stencil and with a gray watercolor pencil, I traced where I wanted random stars.  With a blender pen or water brush, I lightly went over the pencil marks to make them blend like watercolor.


See the stars?  I then took the same colored pencil and drew light lines and lightened those with the same blender pen.  


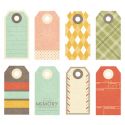
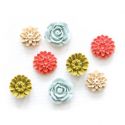
Layered on my tags, ephemera embellishments and resin flowers.


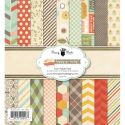
This Fancy Pants line, Happy Go Lucky, was PERFECT for the colors in my photo.  I must say, I have tons of product left that would create a completely different style layout.  After this layout was complete I trickled droplets of gold spray in various places and used gold thread to sew.  This time, the sewing helped keep my tile and small embellishments in place.  

You can find the items from this layout here in the shop or on the links below.


Thursday, April 25, 2013

Gesso Resist & Ranger Day

Hi everyone and welcome to another day of crafting fun and techniques on the eP blog!  Today I'm so excited to share a project that I created after attending a day of Ranger training at The Collins Group show, an event held each year for retailers on the east coast.

What a great opportunity to meet amazing designers, instructors, other store owners, and product manufacturers.  You literally leave with your head swimming with ideas.  I came home, after being gone for three days, and sat down in my office to make something...anything...my husband came downstairs and said, "aren't you all crafted out?"  In all honesty, I was so tired, but also so inspired that I couldn't wait to try out some of what I had learned...even if I was half asleep! LOL!
The technique that I'm sharing today is called gesso resist.  Tim referred to it as speckled gesso resist because of the look that the gesso produces when using a credit or gift card to apply the gesso.  Claudine Hellmuth had produced a number of videos during the winter CHA show, using gesso as a resist so I was familiar with the technique.  Of course Tim added his own unique spin to the technique and then brought in those wonderful Distress products!
And guess what?  I made a quick video demonstrating the gesso resist technique, showing the tag that we created in the Ranger class, and then two other projects (both shown here) that I made using the same technique.  You can see the video here and I'll quickly run through the steps below.

  1. Place a small amount of gesso on a non-stick craft sheet
  2. Use a credit and gift card as an applicator; pick up gesso on one edge of the card
  3. Keeping the card completely level with your stamping surface, very gently slide the card (with gesso) over your paper.  This will allow the gesso to just barely skim the surface of your tag or paper, creating the speckled or aged plaster effect.
  4. Once the gesso is dry, apply Distress Stain, using 1-3 colors, over the paper.  The gesso will resist the stain.
  5. Spritz with water to blend the Distress Stain colors.
  6. Once dry, use stamps to decorate the surface.
 I used the following products on the journal page, shown above.  Distress Stains (Wild Honey & Barn Door), Gathered Twigs Distress Ink (around the edges), Dylusions Journal (I tore a piece of the manila paper out of the journal to create the page...the manila paper is perfect for the stains!), Hollyhocks stamp, sentiment from She Sprouted Wings stamp set, gesso.  
Oh look!  It's Dyan Reaveley!  OK, she doesn't have anything to do with today's project but she was at the Ranger training day and it was the first time I met her or took one of her classes!  WooHoo!  So much fun; I learned a ton from her and can't wait to share some of those details!  She's a delightful instructor and a great artist!
 Here is the tag that we produced in Tim's class and is the project that I demonstrate during my video.
And then...I also made a card using the same technique.  I just used a piece of scrap paper and followed the exact same steps to produce the background...just using different stains.  This is a darling stamp set from Sweet 'n Sassy.

Isn't it great that you can take a simple technique, and just a few products, and then use those same steps to produce multiple projects and designs!  I really wanted to be able to share my ideas that came from that one short demonstration.  I also share a few more ideas in the video!

Super fun and super easy!  Give it a try and then tell us about your experience and share your project on our Facebook page!

Enjoy!

Friday, December 7, 2012

The World of Imagination

 Happy Friday everyone!  I'm so excited to share my project for today...A canvas!  One that I created just for the holiday season and is now hanging right by our front door.  I had such a great time creating this project and it includes a boatload of techniques and products!  Yes, my kitchen table was covered with products for two days...Isn't that the best!?  Let's get started...
 I started with a 12x12 canvas that I had in my stash of crafty goodies, along with a few Claudine Hellmuth paints.  I took a Donna Downey class a few weeks ago and she did this very cool technique with paint, using liquid acrylics, and I wanted to see if I could re-create the look with the Claudine paints.  I'm happy to report that they worked perfectly!

First step (my canvas was already prepped with gesso but this would be your first step if the canvas wasn't prepped) was to apply a layer of Traditional Tan paint.  I then used my heat gun to gently dry the paint.  I then combined a blob (that's a technical term) of Sky Blue and Smidge of Blue paint on a piece of cardboard.  Using a wide brush, I loaded up my brush with paint and dragged the brush across the top edge of the canvas.  Then I got crazy with a water bottle...spraying the blue paint with water, allowing the paint to run down the front of the canvas.  LOVE!  The water also made the tan run a bit and I love the bits of white showing through along with the tan, light, and dark blue.  It has the look of an old plaster wall.
Once my paint layer was dry I grabbed a new stencil from Dylusions, Let is Snow, white embossing paste from Wendy Vecchi and my frosting knife (that's right...I used my cake frosting knife to spread the embossing paste...it works perfectly!) 

I added stars across the top of the canvas and then...I thought about what to do next.  Wendy had posted a project with a snowman last week and she used the paste to create snow banks so I decided to follow suit!  Once the paste was added, I sprinkled extra fine glitter all over the paste.  Fabulous result...super sparkly!

While the paste dried, I got to work on my snowman.  This is a snowman die, designed by Tim, from last year (or maybe two years ago now?) that I cut out from chipboard.  I made the snowman out of four layers of chipboard so he's weighty.  Out of the fifth snowman I cut out the snowman's nose, arms, and hat.  I colored the arms brown with Walnut Stain Distress Ink, the hat was painted with a Pitch Black paint dabber, and the nose was painted with a Sunset Orange paint dabber. 
 
These pieces were set aside to dry while I got to work on the snowman.  He's completely covered with torn pieces of tissue tape.  I used a few different designs on the snowman but you can use any design!  (I'm thinking washi tape could be fun too!)  Once the snowman was fully covered, I went over the entire snowman with the Picket Fence Distress Stain.  The stain helped to tone down the tape and adhere the tape to the chipboard. 
 
Once the paint was dry I glued the arms, hat, and nose onto the main snowman.  I added a few leaf die cuts and red stickles to the hat.  I also added three black (coal) buttons to the front of the snowman, using Enamel Accents.
 
Of course my snowman needed a scarf so I grabbed some Crinkle Ribbon (love that you can buy this in 10 yard packs now) and my Wild Honey Distress Ink pad.  I colored the ribbon with the ink, misted the ribbon with water, crinkled the ribbon, and dried the ribbon with my heat gun.  Love that pop of color on the snowman!  A metal brad finished off the look!
 Here's a closer shot of the sentiment I added, along with a faint swirl under the words.  Both of these stamps are from older Tim Holtz sets.  I love this saying...  And what about those snowflakes in the paste?  Aren't they amazing?  Love them!  Oh, and I added a year date to the edge of the canvas, surrounded by a metal ring.
 My last element was a die cut tree (also from Tim) and this showcases a technique that I learned from Tim during one of his 12 tags of Christmas postos.  The tree was covered with Distress Crackle paint, the trunk with Walnut Stain Distress Ink, and once the tree was dry I used Glossy Accents to add some snow (aka sparkly fluff) to the tree branches.  Then I just added some twine around the trunk and a metal star.

I had so much fun creating my canvas and it was great to just kind of "go with the flow," which isn't a way I typically create.  I'm looking forward to making another canvas (I have one more hidden in my stash!) and creating a video to share the process with you!

Enjoy and tell me...what will you create today?