Photobucket Photobucket Photobucket Photobucket Photobucket Photobucket
Showing posts with label Tiny Attacher. Show all posts

Tuesday, October 8, 2013

US

Ever have those times when you start and finish a project and what you had in mind does not translate to paper?  Then, you tear it apart and start all over again?  That happened to me on this layout.  Sometimes things come naturally, other times, its forced.  Well, you should have see the "dirty" part of my layout before.  NOT pretty!  This rendition is much better and I would love to share it with you.  So, it's Mary-Ann here, about to share my labor intensive layout:o)


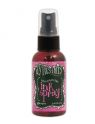
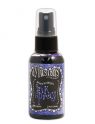
I sprayed three different color inks to get my desired look on my cardstock base.


Then I totally stole an idea from a fellow blogger Ashli Oliver and spread Gesso over my patterned paper at the bottom of my layout.  It helped soften the darker colors.  I hand drew in some of the arrows that I wanted to stand out.  


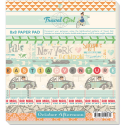
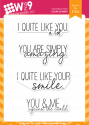
Layered my October Afternoon papers, stickers, A Flair for Buttons flair, My Mind's Eye enamels and October Afternoon brads.  You will see below on the completed layout that I used the same spray ink to add color to my title from Fancy Pants and wood veneers from Basic Grey.


This end result is a much more pulled together layout than the last!  Blue, gray and pink make me happy when they are together.  This photo is celebrating my 8th Mother's day because of that beautiful boy with me.  I am blessed.

Thank you for stopping in.  Below you will find a link to all the items you can purchase over at Eclectic Paperie.  


Monday, September 16, 2013

Read

I (Mary-Ann, in case you weren't sure!) have always believed that reading to my boy is very important.    Since my son was young, we would cuddle in his bed, he would twirl my hair and I would read.  Now that he is 8, he is reading to me.  I must admit that I miss the hair twirling!  Reading is definitely his strength.  (You should see homework time that involves math!)  Except this summer, time has snuck by, summer homework is not complete, and getting him to read in our time crunch is like pulling teeth.  So, on a long trip to Maine last weekend, we rented a couple audio books from the local library and voila, the problem is solved!  He was bored in the car, so listening and flipping pages filled the time gap! (You know if you have ever had an 8 yr old, this was still a struggle.)

For this layout, I knew which photo I wanted and needed a background color to anchor my "302" 6x6 papers from Farmhouse Paper Company.  I layered my papers, metals, tags, stickers, chipboards until I developed a collage that I liked.  Once my papers were glued down, I decided to add  scattered stars using the Stars layering Stencil by Tim Holtz.  This stencil allowed my to place different size stars exactly where I wanted them.  I threw on some yellow punched stars I had on hand and some sequins.  I stapled the sequins on to help bring in more metal for balance.  They were attached with Tim's Tiny Attacher and a long reach stapler from Staples.  I added stitching, foam tape behind items that needed dimension and a title cut from my Silhouette.  


Thank you for taking a peek at my layout.  Hope you are inspired to fill some more pages of your albums!


Here are the items from the shop here at Eclectic Paperie!


Tuesday, August 13, 2013

Say Cheese…..

Good Morning!  Micki here and I’m pretty excited to share a “totally-outside-my-comfort-zone” 12x12 scrapbook layout.  I’m sure you could have heard my knees a-knocking while I was working on it.  I honestly don’t know why I was so “scared”, but my stomach was in knots…….however, I prevailed.
Here it goes……

Seeing Mary-Ann’s beautiful layouts really inspired me, so when I saw the Memories Captured 6x6 Paper Pad by Fancy Pants, I ordered it along with the What a Wonderful Day Decorative Tags and Patterned Envelopes.  And then I was like “now what”.  I headed to Pinterest and took adapted a layout by Laura Whitaker.
I started by taking a 12x12 Graphic 45 paper and scraped a thin layer of gesso on it using the Ranger Inkssentials craft scraper.  While that was drying, I dug out some old clear buttons which were covered with assorted papers from the Memories Captured paper pad using Tombow Multi Liquid Glue.
Once the glue was dry, I sanded the edges using the Sanding Grip Block.  To poke the holes, I used my scissors and lightly sanded the top.
Setting that aside, I had to add a touch of mixed media so I opted to add some black circles using Black Soot Distress Paint and Dylusions Chequered Dots Stencil.  I dabbed the paint onto the gessoed paper, layed the stencil on top and wiped the paint off the circles using a wet wipe.
After that it was just a matter of arranging my pieces.  I did rough up the edges a bit using my fingernail.  I added the painted arrows with a foam applicator with Rusty Hinge Distress Paint and the Layered Tickets stencil.  Once dry I added the Label Letters and then doodled around them with a black pen.
One thing that I found extremely helpful was using a glue stick to glue some of the layers down.  It allowed me to move stuff around without having a wet mess on my hands, yet once dry, the layers are nice and secure.   Plus, I left glue off some of the paper edges and then curled them up a little bit.  To add some depth, the photo and the patterned envelope were popped up using foam mounting tape.  The buttons were given some height with Glue Dots. 
I added a staple to the yellow strip using the Tiny Attacher.  I did this before gluing it down.  I wish they would make a Tiny Attacher with a longer reach because I love using staples to secure layers of papers.
For the title, I added the Alpha Parts Signmaker letters right on top of the envelope.  And for my journaling, which I have yet to do, I added a tag.  As a final ‘pop of color’, I added some splatters with watered down Fired Brick Distress Paint and a very wet brush.

So, what do you think?  I really do like the way it turned out.  I have such a hard time using pastel colors and I tend to worry about the colors matching, such as does this color go with that one, etc…. In the end I just went with the flow and I LOVE it.

I will definitely have to create two more since I have almost identical posed pictures of my other granddaughters.  I hope you enjoyed this layout and it inspired you to step out of your comfort zone to try something new!


Supplies Used: