Photobucket Photobucket Photobucket Photobucket Photobucket Photobucket
Showing posts with label donna downey. Show all posts

Tuesday, September 16, 2014

Inspired by.....

Hello, it's Sue Lelli here today to show you how I was inspired by none other than Donna Downey!  I took a class from her not knowing we would be working with faces ~ NOT my thing!  I spent most of the class frustrated because I couldn't even do the first step which was a new technique (for me) called image transferring.  So what did I do?  I followed all of the rest of her steps, learned as much about technique as I could, ended up with something I was sort of pleased with - but only honestly because Donna was kind enough to help me plus give me encouragement.  That might have been the end of the story but I was determined to try it again.  My artist friend, Maria, drew a face for me to keep and use and I tried the image transfer again.
 
Tah!  Dah!  Here is my canvas ~ inspired by Donna Downey!
Isn't she Pretty?!
 
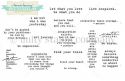
I used words from the TCW mini Art is stencil to create my message.  Wendy Vecchi's black embossing paste did the trick.  "Art is just color and shape, feelings and experiences"
 
 
At the bottom I added "release and surrender" to remind myself to just let go and try new things with my art, even if it's uncomfortable!
 
Some process photos:
This shows the image transfer with the face my friend drew.  You will probably be seeing this face again!
 
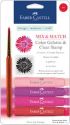
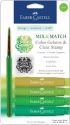
Next I used gelatos in several colors and sprayed it with water from a mini Mister, and then mixed it around with my fingers.    I used gelatos to color her face, neck and hair.  I then added definition with Prisma watercolor pencils.  Thanks, Donna, for literally showing me how to on my class piece!  I colored the eyes and lips with the Prisma pencils as well.
 
Next I made a background using my FAV TCW confetti stencil and Tim Holtz Distress paints in shades of pink, orange and yellow.
 
Then I used the Dina Wakely plastic canvas stencil ~ LOVE ~ to add some more color to the background.  I pounced  Tim Holtz distress ink in mustard seed with the mini ink blending tool.
I rubbed golden paint around the outside edges, added a Prima resin butterfly, a little lace, and considered it done!
I hope you like her!


Saturday, February 22, 2014

Altered bag with Andiepants


Andiepants in the house! 
I figured I would give you more inspiration for Toni's "Do something with a bag". Well...I did something.

Altering a bag? hmmmmmm....I've done this before. Didn't turn out so well, so here was my chance for redemption.

First, I dug out this Master Cam bag that my hubby brought home from a machinist trade show about a decade ago. 


I decided I didn't want 2 handles so I started by using my seam ripper to remove the handles that were sewn on.


To color the handles I soaked them with water first. This allows the mist to spread more evenly over the fabric. Next I sprayed my Dylusions mist in Vibrant Turquoise generously over the handles so they were well covered. You may want to use gloves. I did not :(

In order to cover that gawd awful picture I decided I would cover the thing in gesso. Remember when working with fabric to place a piece of cardboard in between your layers to avoid bleeding and soak through. Here I just used an insert from a 12x12 Prima mask.


Cover generously with gesso. If you feel you need more coats make sure you dry thoroughly in between coats. Honestly I remove the handles and covered in gesso before dying the handles in order to give my bag some additional air-dry time.


Once covered to my liking I then used Distress paint in Broken China to color the background. after that was dry I sprayed some Vibrant Turqoise in order to allow some congruency to the piece. I did this to both sides of the bag.


You will want to do the handle next since you need to reattach it to the bag. Make sure your sewing needle is a large enough gauge to handle the material of the bag. I sewed my to pieces together to make one long handle, sewed a piece of trim down the middle, and then sewed each end to the seams in the bag.


You can see here where I attached it on the inside.

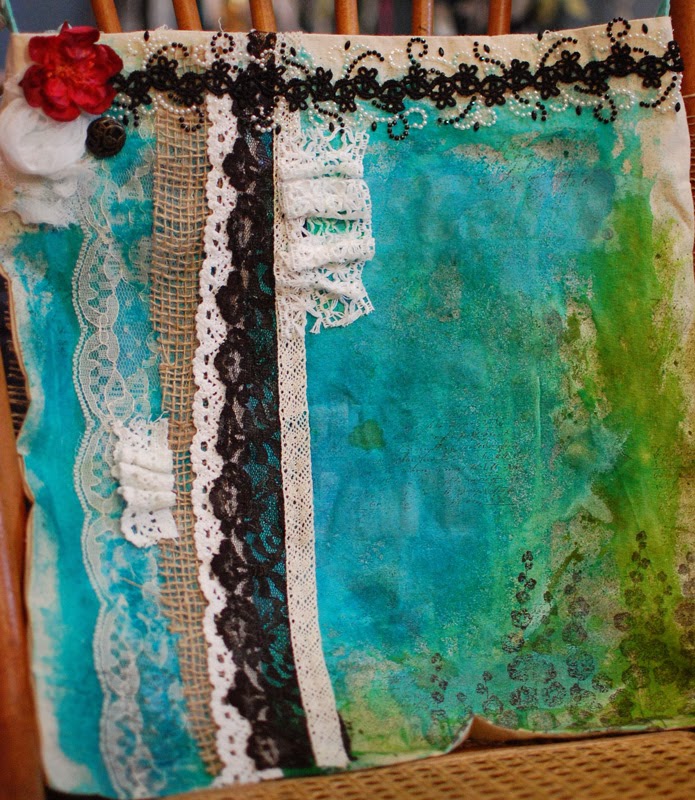
The rest is just like scrapbooking! For the front I adhered a piece of burlap using gloss gel medium in various areas. I adhered the large lace at the top using the same method and allowed that to dry. Arrange your clusters and take photos so that you know where to put them when you're ready.


Next I used Wendy Vecchi embossing paste in black through a Martha Stewart silk screen to attain the large black shape (Above) and the smaller one coming out of the bottom of my cluster. I then adhered the flowers with fabric glue in my hot glue gun and I sewed the small blue Prima baubles  on by hand in the bottom cluster, top cluster and across the lace.


For the back side, I gave a good coating of water and then added more Dylusions in Calypso Teal and Dirty Martini. 


I first added all the lace piece using the gloss gel medium and let them dry. You can add dimension with your lace as I have and the gel medium will allow it to dry stiff and hold it's shape. Next I used the Hollyhocks stamp with Stazon jet black ink


and added a script stamp in Stazon Timber Brown. Notice that I even stamped on the lace. It's subtle but a nice touch.


I used a leftover scrap of cheese cloth to make a rosette with a slight tail, added an altered flower that was leftover on my desk, a random button that was sitting there, and finally added the Prima border. Again I used gloss gel to adhere the Prima border so that it was sure to stay.


I definitely think I've redeemed my prior shame of altering a bag. I quite like this one.

I hope you play along for a chance to win!!

{{hugs}}
Andiepants

Wednesday, January 15, 2014

Mixed Media Canvas (Guest Post from Isha Gupta)

Hello Everyone!!! It's Isha here with my 2nd. post as the guest designer. today.


So for today's post, I decided to create a canvas. I used some wonderful products by Faber-Castell and a stencil from the shop. Sometime I enjoy working with layers of colors and that is what I did today.


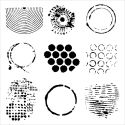
Supplies: Canvas, Gesso, Embossing paste, Gel medium, Faber-Castell Gelatos, Faber-Castell Big Brush pen, Imagine Crafts/ Tsukineko StazOn Gold Ink, Vellum, Sentiment from Unity Stamp Company, Stencil: TCW: Well Rounded Stencils


Thursday, January 2, 2014

HEARTS ~ January Get Altered Challenge!

Hi everyone. Happy New Year! It's Sue Lelli here and I am hosting the January Get Altered Challenge at eclectic Paperie. The eP Get Altered challenge begins the first Thursday of each month and is an opportunity to explore your creative journey, step outside your comfort zone, and experiment with new products and techniques. It's all about having fun while creating altered and mixed media art with a chance of winning a $15 gift certificate to the eclectic Paperie  shop.


I chose to use a Wendy Vecchi - Studio 490 - Art Parts Hearts Love & Stars kit shown at the end of my post to make my heart wall hanging.
I am going to show you heart by heart details and then some of my process at the end. (LOTS of photos!)
This is the largest heart, star, and LOVE word. I used Tim Holtz distress paints, a Prima Donna Downey Damask Stencil, and Wendy Vecchi White embossing paste to make this heart. The pink ribbon is from a Victoria's Secret bag!

Here's a close up photo so you can see the embossing paste better ~ LOVE!


Here are the center stars and beads and gems.


Another close up. The text is a Christmas Tim Holt stamp set. I LOVE the font and it doesn't matter that it's Christmas because you can't read it! LOL!


On my last heart I used Wendy Vecchi's Studio 490 translucent embossing paste. LOVE how it adds texture but you can see the paint colors through it! I also added A Wendy Vecchi Blossom Bucket natural heart that I painted white.

Some Process Photos:

I gessoed the hearts and stars so they would hold the paint.

I applied Tim Holtz Distress Paints to my small craft sheet.

Here they are after I dragged them through the paint ~ LOVE the marbeling effect!

Here is a page in a journal where I wiped my left over paint for a future project ~ NEVER waste this FAB paint!

I stamped text randomly.

and Wendy Vecchi Studio 490 translucent embossing past to my smaller heart. It looks white when first applied but dries clear as I showed you in a previous photo. LOVE!
Here is what the kit looks like when you purchase it with an example of what you could make.

Here is what my desk looked like as I was putting my wall hanging together. You are only limited by your imagination plus I have enough pieces left over to make a couple more things! This kit is FUN and I love how easy it is to make holes in it with the Crop a dile. Cuts like butter!


Now go get out your hearts and alter something! Then link it to the eclectic Paperie's Get Altered Challenge and be entered to win a $15 gift certificate to the EP Shop!

Thursday, December 12, 2013

Mixed Media Canvas with Wendy Vecchi Embossing Paste

Day 4 of the 12 days of Christmas and today we have Wendy Vecchi embossing paste for you 2 for $16.99!! That's right...only 24 hours so grab yours fast.
Use code 12DAYS4 when checking out.


Can I just say how much I adore this stuff?! It has so many uses and give any project that added touch of texture. 

Here is a canvas I made for my brother for Christmas using the white embossing paste. 

Some techniques in addition to the stenciling include stamping with various Prima and Donna Downey stamps, the tree is a Fab scraps piece, Most of the texture is drywall mesh tape, the zipper flowers are Melissa Frances, the paper underneath is Prima's Finnabair Vintage line and the tissue paper is Timmy's tissue paper. Soooooooo much is going on here...don't you love it?!

So this past weekend I had the privilege of chaperoning electronics weekend for my 2 oldest boys' scout troop. Because it's already so cold out we don't have much to do so a few of the other parents and I decided that we would turn it into a mini scrappy getaway. I decided to work on my canvas for Christmas but imagine my shock when I realized I had forgotten my stencils!


Luckily I found this little dollar store rose stencil tucked away in my tool caddy!!! Who's a savvy Andie now;)


Don't you love the way the ink soaks into the embossing paste?! Just lovely.


And here is a photo of some freehand paste that I added to the top of the canvas.

Now remember...I said we were camping sooooo...I wasn't able to take a video of this canvas. But...being Christmas I have a lot of other gifts to make so I shot a quick video of another canvas that I have started using the same techniques.


If you can't view the video try the smaller version here:


Run over to the eP store and purchase your own Wendy embossing paste today!!

Merry Christmas y'all!!!!
{{hugs}}

Andiepants