Photobucket Photobucket Photobucket Photobucket Photobucket Photobucket

Wednesday, July 30, 2014

Specimen 2b ~ Poppy


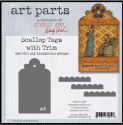
Hi everyone! It's Bonnie here today with a tag I created using Studio 490 Art Parts as the substrate. Art Parts are thick durable paper board designed for altering. They are stronger than chipboard so can stand up to the weight of mixed media layering and wet medium. This tag has such a pretty shape at the top and also comes with scalloped trim which I chose not to use because I wanted a more linear look. I began by painting the tag on both sides with Dina Wakley black gesso and allowed it to dry completely.


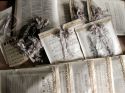
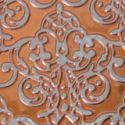
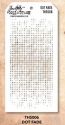
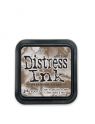
Viva Decor's Mother of Pearl modeliing cream was applied through TCW's  Mini Sketch Grid stencil with a palette knife. Once that was dry, Golden's Iridescent Copper was pounced through TCW's Tiny Circles stencil with a brush. Lovely shimmer from both of those mediums. A piece of dictionary paper from Michelle Hill's Ephemera Bundles was torn into chunks and adhered to the tag with Dina Wakley Gel Medium. Once that was dry, Vintage Photo Distress ink was applied to the edges of the paper.


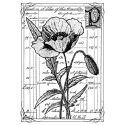
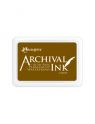
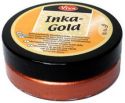
The gorgeous Pretty Poppy stamp from Crafty Individuals was stamped onto kraft paper using Coffee Archival ink. It was then coloured with Prismacolor pencils, trimmed out, and edged with Vintage Photo Distress ink before being popped up on foam tape. A rectangle of black cardstock cut as a mat was embossed and then brushed over with Viva Decor Inka Gold Copper. Another rectangle was cut from an  Add a Little Dazzle Brushed Copper metal sheet and scored near the edges to give it a border. This metal was then offset and adhered to the image and black layers as well as to the tag with Scor tape.


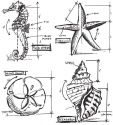
To complete the design, Specimen 2b, from Studio 490's A Form of Art, was inked with Coffee Archival onto kraft paper, edged with Vintage Photo, and matted with black cardstock. It was popped up with a double layer of foam tape on the bottom edge and just Scor tape on the top so it could be partially layered over the image stack. A sheer cream coloured ribbon wrapped and tied with hemp twine became the topper for the tag.

Thanks for popping by today. I appreciate that. Remember that you have only today and tomorrow left to enter our ePlay Altered Bottle Challenge. Wouldn't want you to miss out on a chance to win the $25 prize for the winning entry.

Bonnie

Here are links to the eP store for most of the products used in this project:
Tuesday, July 29, 2014

Paper Bag Album

Hello everyone!  Debbie here with you today to share a fun little travel album that I made with paper lunch bags.  I used the Tim Holtz Paper Stash - Menagerie to create this fun eclectic album.
We'll start with the cover.  I made the cover using pieces of blank12x12 Chipboard from the EP store. I can't tell you how handy it is to have this blank chipboard on hand.  I use it for so many different projects.  It's a must have staple in my stash.
I covered two pieces of chipboard with Tim Hotlz Menagerie papers and the embellished with Prima's Cartographer papers by fussy cutting ballons from the paper. I also added Prima Cartographer 12x12 Paper - Chipboard Self-Adhesive Pieces a few flowers and some embellishments from my stash. To hold the whole album together I created a fun faux leather binder that I made from Kraft paper, an embossing folder and Inka Gold in Copper color.
 Now for the inside of the album. This album was made by adhering paper bags together back to back leaving the flap to create pockets.  It also leaves the paper bag itself open to insert tags or keepsakes.  I will be using this album for a trip I took to Jackson, WY and to Idaho.  Here is what the inside of this album looks like.  It's loaded with tags and pockets, lots of space to keep your souvenirs from your trip.


 You can insert these tags into the opening of the paper bag and use it for photos or journaling.

 opening of the paper bag...can be used for souvenirs.

Prima Cartographer 12x12 Paper - Chipboard Self-Adhesive Pieces

Tim Holtz - Idea-ology - Paper Stash - Menagerie

 I hope you enjoyed this album.  If there is any technique you would like to learn with this album please leave a comment and I'll be happy to help.

 Thanks for stopping by the Eclectic Paperie blog today!

Debbie

Monday, July 28, 2014

'I Must Go Down To The Sea Again....'

Hi everybody ! Toni here to share a layout with you today. A couple of weeks ago 25 members of our family met up for a camping weekend at a place in North Wales called 'Shell Island'. It's a wonderful place and we all have happy memories from the numerous visits we've made there over the years. There were three generations of us for this particular trip and it was great to see all the little ones enjoying the shell covered beaches, rock pools and sand dunes. Needless to say we were all taking photos and I couldn't resist using this one of my beautiful great niece Evie . She is sitting among the rock pools, looking very intently at a tiny pebble caught between her toes. I love her windswept hair !
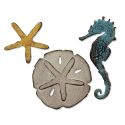
I used Tim Holtz's July Tag as my inspiration for this piece. He showcased some very clever ideas for adding texture to his Sand and Sea die cuts and I was keen to have another go at these techniques. I started this layout with a piece of card board that measures around  7" x 9". I ripped off some of the surface to reveal the corrugations, and painted it with Fresco Paint in a colour called Stone.
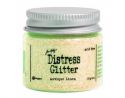
I added a bit of stenciling using a Layering Stencil called Dot Fade and Chipped Sapphire Distress Paint. I then used Tim's idea for making sand, with Distress Embossing Powder, UTEE, and  Distress Glitter all mixed together with a good splodge of Glossy Accents. I applied this all around the edges with a spatula and left it to dry while I worked on the die cuts.
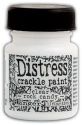
I followed Tim's instructions for adding a crackle finish to the two seahorses with Clear Rock Candy Distress Crackle paint. Once this was dry, I lightly brushed the surfaces with Luminarte Silk Paint. The sand dollar was painted with Antique Linen Distress Paint and then heat embossed with Old Paper Distress Embossing Powder. The starfish were treated similarly but after embossing, I painted them with Victorian velvet Distress Paint.
 I couldn't resist adding this quote which is a rather irreverent parody of John Masefield's beautiful  poem Sea Fever, written by Spike Milligan. It seemed more appropriate for this picture and I think Evie will enjoy it !
For your inspiration, here's a picture of some of the shells the children collected. So now you can see why it's called Shell Island ! x
Here are some of the products I've used that Kim stocks in the wonderful eclectic Paperie Shop. She has also taken delivery of loads of Tim Holtz's newly released products so it's well worth hopping over there, especially if you want to get ahead with your Christmas crafting !