Photobucket Photobucket Photobucket Photobucket Photobucket Photobucket

Saturday, February 22, 2014

Altered bag with Andiepants


Andiepants in the house! 
I figured I would give you more inspiration for Toni's "Do something with a bag". Well...I did something.

Altering a bag? hmmmmmm....I've done this before. Didn't turn out so well, so here was my chance for redemption.

First, I dug out this Master Cam bag that my hubby brought home from a machinist trade show about a decade ago. 


I decided I didn't want 2 handles so I started by using my seam ripper to remove the handles that were sewn on.


To color the handles I soaked them with water first. This allows the mist to spread more evenly over the fabric. Next I sprayed my Dylusions mist in Vibrant Turquoise generously over the handles so they were well covered. You may want to use gloves. I did not :(

In order to cover that gawd awful picture I decided I would cover the thing in gesso. Remember when working with fabric to place a piece of cardboard in between your layers to avoid bleeding and soak through. Here I just used an insert from a 12x12 Prima mask.


Cover generously with gesso. If you feel you need more coats make sure you dry thoroughly in between coats. Honestly I remove the handles and covered in gesso before dying the handles in order to give my bag some additional air-dry time.


Once covered to my liking I then used Distress paint in Broken China to color the background. after that was dry I sprayed some Vibrant Turqoise in order to allow some congruency to the piece. I did this to both sides of the bag.


You will want to do the handle next since you need to reattach it to the bag. Make sure your sewing needle is a large enough gauge to handle the material of the bag. I sewed my to pieces together to make one long handle, sewed a piece of trim down the middle, and then sewed each end to the seams in the bag.


You can see here where I attached it on the inside.

The rest is just like scrapbooking! For the front I adhered a piece of burlap using gloss gel medium in various areas. I adhered the large lace at the top using the same method and allowed that to dry. Arrange your clusters and take photos so that you know where to put them when you're ready.


Next I used Wendy Vecchi embossing paste in black through a Martha Stewart silk screen to attain the large black shape (Above) and the smaller one coming out of the bottom of my cluster. I then adhered the flowers with fabric glue in my hot glue gun and I sewed the small blue Prima baubles  on by hand in the bottom cluster, top cluster and across the lace.


For the back side, I gave a good coating of water and then added more Dylusions in Calypso Teal and Dirty Martini. 
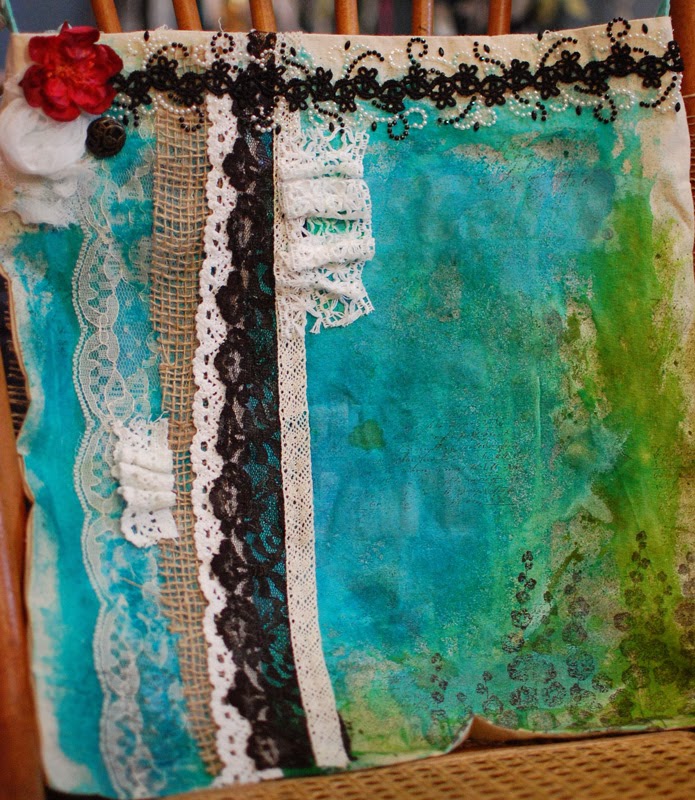

I first added all the lace piece using the gloss gel medium and let them dry. You can add dimension with your lace as I have and the gel medium will allow it to dry stiff and hold it's shape. Next I used the Hollyhocks stamp with Stazon jet black ink


and added a script stamp in Stazon Timber Brown. Notice that I even stamped on the lace. It's subtle but a nice touch.


I used a leftover scrap of cheese cloth to make a rosette with a slight tail, added an altered flower that was leftover on my desk, a random button that was sitting there, and finally added the Prima border. Again I used gloss gel to adhere the Prima border so that it was sure to stay.


I definitely think I've redeemed my prior shame of altering a bag. I quite like this one.

I hope you play along for a chance to win!!

{{hugs}}
Andiepants

Friday, February 21, 2014

Winner of February Get Altered Challenge ~ Altered Playing Cards


A gigantic thank you to all of the participants in our February Get Altered challenge ~ Altered Playing Cards. We were delighted with the variety in and inspiration provided by your responses. So many wonderful ideas and results.

Our winner of the February Get Altered  (Playing Cards) challenge is

Lisa S.
from

Congratulations, Lisa. This mixed media canvas has amazing detail and texture. Love the colour palette  and layers of texture. The distressed playing cards, altered chipboard elements, and beautiful flowers create such lovely flow.

Lisa, please contact Kim at kim@eclecticpaperie.com to claim your $15 gift certificate prize!

Our current challenge , the eTeam Picks Challenge hosted by the oh-so-creative Toni Burrows, is asking us to Do Something With a Bag
. Have a look at the fabulous bag she altered with Studio Paints, gesso, stencils and stamping. Love!
We hope you will join us...can't wait to see what you do.

Unstoppable

Morning folks!  It's Kim here with today's art journal project!  I wish I had step-by-step instructions but I confess that once I got going on this baby...I didn't even think to stop!  However, I'm happy to share some tips on how this was created (and I'm working on some videos too!)

I ended up being able to take Catherine Scanlon's Gelli Plate class, held at our studio, a few weeks ago and let me tell you...it was fabulous!  If we have Catherine back for another round of classes...you need to attend!  She's an amazing artist and a great teacher, we had so much fun!!  Anyway...during the class (which was an all day event) I ended up making 23, yes 23, pages!!  This all served as backgrounds for what will be finished art journal pages.  (We used an inexpensive spiral bound journal book, which we took apart.  Once finished, I'll rebind the journal.)  So the background of this page was created using a Gelli Plate and stencils.  And see that light shine in the upper right hand corner of the photo...metallic paint!  Oh, man it's fabulous!

Once I got my background pages home, I spent many hours just staring at them...my youngest said to me one morning, "Mom, why are you just sitting there starting at those pages?"  LOL!  Seriously, I had a breakdown of creative mojo!  And then, just like that, during dinner one night...an idea popped into my head!  Actually, it was more of a thought that I needed to add a big text circle to this page (this background is one of my favs).  I found some heavy weight text paper that I had in my stash and cut out the circle.  Then I stamped one of Dina's new girlie stamps (links at the end of this post) on to the paper and colored her in with watercolors, which is becoming one of my fav new tools.  I attached the circle to the far right of my page and cut off the excess.  Then I used that "magic pencil"  (yes, I promise I'm getting these for the store!!) around the circle and used a waterbrush to blend the black...a strong black line makes everything better!

Then I remembered that I had one of Dina's text stamps in my stash and the shape of it fit perfectly around my circle...ohhh...journaling love!  I added the sentiment, cut apart of course, from Dina's stamp set and then I found a Blossom Bucket embellie hanging around and lo' and behold, it was the perfect hair accessory!

And there you have it...my very first completed Gelli Plate art journal page.  And I've had so much fun with these backgrounds...that I've made a bunch more pages.  Can't wait to share!  Want to grab some of the products that I used on today's page...See the links below:  Enjoy!

Gelli Plate (8x10)
Adirondack Acrylic Paints
Scribbly Women Stamp Set
Earnest Stamp Set
Antique Buttons (Blossom Bucket)

Thursday, February 20, 2014

e Picks Challenge 'Do something with a Bag'


Welcome to another e Team Picks Challenge. It's Toni here to take the stage and introduce you to the latest challenge and I'm asking you all to 'do something with a bag' and that means that you can choose any kind of bag, be it paper, plastic, leather or even that old Louis Vuitton case you don't use any more!  (and if you've got one of these, I'll give you my address later ! ) You can use any technique or medium you wish and in the true spirit of the eclectic Paperie challenges, just let your imagination fly ! I've chosen a canvas tote bag I've had knocking around for years. It was actually a magazine freebie. I've given it a fresh new look with lot's of Studio Paint and applied stamped tissue. I must say, I love the new look. Here's how I got started on the transformation.......


The first picture shows the rather sad, old bag I started with. I gave it a coat of Studio Gesso, all over including the handles, and already it was looking possible. Being somewhat impatient, I dried it with my heat tool, and then waded in with the paints. I chose, landscape Green, Purple Palette and Painterly Pink and applied them with a broad flat paint brush, in overlapping patches. Once dry, I repeated painting of the other side, varying the layout of the colours slightly.


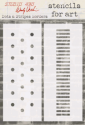
I then chose some of the fabulous stencils I've received in in my DT packages from Kim. Here you can see Wendy Vecchi's Dots and Stripes, Crafter's Workshop Mini Harlequin and a Donna Downey Flower stencil. I used Antique Linen Distress paint and positioned the stencils in places where the colours butted up against each other. I think this helps to 'meld' it all together. I quite liked it at this point but .... why leave it there when I was having so much fun? I love the technique of stamping on tissue and layering it onto canvas, so I decided to use this on the the surface of the bag. As the bag has lovely spring  like colours, I thought it would be fitting to break out the new Tim Holtz Bird Feather stamps. I also delved into my stamp collection and found a selection of other botanical stamps. I stamped onto several tissues, using black Archival ink.


I cut around each shape and layed them on the surface of the bag. Once I was happy with the layout, I separated the two layers of  stamped tissue and adhered each image to the bag using Studio Matte Multri Medium. If you have never tried this, you really MUST have a go ! It's easy to do and if it goes wrong you can scrape it off whilst its still wet and try again. It's amazing, you really can't see the tissue once it's dry Here a close up..... 


To finish off, I added a little Maya Road wooden tag which I first painted white and then stuck on a little bird charm I made by stamping onto a piece of Polyshrink and heating to shrink the image. Just gives it a classy finish! 

I hope this project inspires you 'to do something with a bag' Remember it can be any kind of bag, as simple or as complex as you like just go ahead and have some fun ! x

 All of those who play along with our challenge will be entered into a prize drawing for a $15.00 gift certificate to the eclectic Paperie store.
So grab your supplies and play along! 
 Here are a few things to keep in mind for this challenge…
 -You do not have to use products sold in the eP store…but we do love it when you do!
-Share a direct link to your creation, not just your blog, using the Linky Tools feature at the end of this post.  If, for any reason, the Linky Tools doesn’t cooperate, please add a link in the Comments section of the blog.
-When uploading to any online galleries, please use any of the following keywords; eP, eclectic Paperie or eTeam Pick Challenge.  Link your creations to the eP blog.
-If you’d like to be considered as one of our featured projects and be entered into our prize drawing, please be sure to add your link. Winner will be announced on the first Thursday of the month. 
Here are some of the supplies available from the eclectic Paperie Shop, which I've used on my project. Good Luck !


Wednesday, February 19, 2014

The Story of Millie and Molly's Trip to Paris


It's Paulette here today with my creations for Week Three as Guest Designer.  I've written a short scenario to accompany my projects today.
  The story begins in 1922 when our two fashionistas, Molly and Millie, see this poster in their local hat shop.


The ladies are always fashion trendsetters and decide to attend the Spring Millinery Show in Paris on February 15, 1923.  They buy two tickets for the fashion show.  For all the shopping they intend to do, the ladies are taking a BIG purse full of money.  This little altered purse I created memorializes their epic shopping adventure.


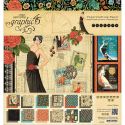
And now to explain my creative process:  The project was inspired by a Graphic 45 8x8 paper pad called "Couture" and by this mini purse I picked up for $1 at a local thrift store.  

I fussy cut all the ladies, the tickets and sentiments from the G45 paper with my Cutter Bee scissors and darkened the edges with a black Pitt pen.  The two fans were cut from the G45 paper with a Die-namics rosette die.  Behind the three ladies on the right is a blue scalloped oval cut from the G45 paper pack with a Spellbinders die.  Before the paper was released from the die, I darkened the edges on the inner rim of the die with Tim Holtz Peacock Feathers Distress Ink using an Inkssentials Foam Replacement Pad.  The black satin bow with rhinestone button is a repurposed shoe bow.  The Eiffel Tower is a repurposed earring.  Molly, fashionista on the left, is wearing gold rhinestone earrings.  The other three embellishments are by Recollections.  

The poster I created is actually an ATC for a Pick-a-Theme Swap over on Splitcoaststampers.  My swapmate requested Vintage Hats as her theme.  This ATC also uses papers from the beautiful "Couture" paper pad.  Background paper is a red dotted swiss by Bazzill.  The ticket was fussy cut and its edges were darkened with a black Pitt pen.  I fashioned the flower on the hat with a Punch Bunch hydrangea flower punch.  I added dimension using a mousepad and an embossing stylus.  The center is a gold rhinestone star.  Red rhinestones were added to the hat, dress, and used as earrings.  Tiny gold corner stickers and a strip of red metal trim resembling the metal fabric mesh used in Whiting and Davis purses complete the design.

Thanks for stopping by...Paulette


Tuesday, February 18, 2014

Love Is Incredible . . .

 Hello sweet friends, Tracy here today and it feels so good to be back and sharing a little of my art with you all!
The lovely Broni is the host for this months
and the theme is
Pssst you still have time to join in the fun!

I scratched my head and hummed and hawed . . . but I kept coming back to home, my boys, Alex and Rosie 
{ she`s the mad wee terrier,lol }
So time to get the old book out and create a journal page!
 A quick coat of Gesso followed by some Stenciling and Paste, Distress Paints & Stains with a touch of Pan Pastels thrown in and it was ready to add the details.
First up, preparing the playing cards, quick rub down with the sanding block followed by a splodge of Gesso.
They make great little houses with the addition of some prrretty scraps of paper.
Time to add some of my doodle doodle doo`s . . .
{ Just saying doodle doodle doo`s makes me happeee }
. . . and it started to look like this.
See the swirling puffs of smoke from the chimneys . . . Gesso dabbed on with my fingers.
 { The words I have had in my stash for a while, sorry but I don`t know who the manufacturer is. }
 Apologies in advance . . . I got really carried away at this point and started to add more doodle doo`s, Paints, Stains, Stamps, more pretty scraps of paper, lace trim, flowers and Distress Rock Candy Glitter to the teeny tiny windows.
I had some lovely red embroidery thread, so out came the needle to add a wee touch of stitching for that homespun feel.
This page is dedicated to my family.
My boys are spreading there wings and starting to fly the nest, but one thing for is for sure . . .
wherever they may be part of my heart will always go with them!

Well that`s all from me today, I hope you enjoyed having a look inside my old tatty book.
Remember you still have time to get creative with playing cards!
Till next time
XOXOXO

List of materials and links to the eP Store -
Tim Holtz Distress Paints
Tim Holtz Distress Stains