Hi there ePers! It's Erin here today on this fabulous Saturday! I have an art journal entry for you today! I've been trying to find time to create in it, and this week I was able to carve out some time to get a page done! Whoo hoo!
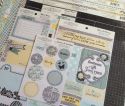
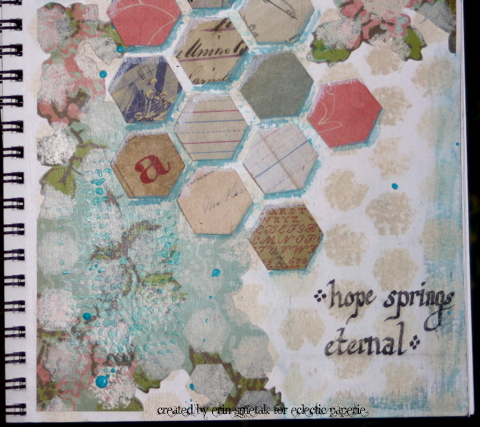
Here we have the complete page. Below, I will break the page down. This is a VERY simple page! I keep looking at it, like I need to add something! Some sort of hardware, but then it would lose the softness!
Ok, so how did I start? Well, I started by flipping through my (now half torn out) Sweet Disposition stack by Cosmo Cricket. I LOVE this stack! It's SO versatile, and the colors blend so nicely together! The theme in this stack is, I don't know, can you tell? HEXAGONS! My favorite shape!
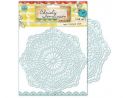
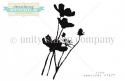
One of the pages is just florals, which I usually turn to. It's my comfort zone. I thought about different layouts, but then I decided, because of the way the paper was created, to cut the paper and create two corner pieces. There are cream scallops with the flowers, so I used those as my guidelines.
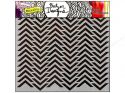
Then, I took my Hexagon Grunge Stencil by Donna Downey, and w/ a paint brush and Titan Buff Golden fluid acrylic paint, I stipple painted the hexagons all over the page. I wanted to create a mask on top of the blue floral paper to kind of hide it, as well as create a subtle background without adding more paper.
After the paint dried, I pulled my Teal Golden Fluid Acrylic Paint and Gel Medium, and mixed them together to create a soft teal gel. Then, I smeared it on my Tattered Chicken Wire stamp like you would butter your bread. The gel gets in all of the nooks and crannies, and when you stamp, some of it's goopy, but when you stamp again w/out re-inking, you get a really cool look!
{One thing I forgot to mention, is that I took pure Teal paint onto my palette knife and flung droplets on the page. That's what the drops of paint are!}
Ok, then, I started cutting out hexagons on one of the pages from the Sweet Dispositions stack. I took plain Gel Medium, and essentially painted the middle of the page. In this fashion, I'm using it as a glue. Then, I arranged the cut hexagons over the Gel Medium and then painted over them to create a finish.
To create the shadows of the hexagons, I took my Acqua Dolce Gelato (found in the 50's Diner Collection), and colored the bottom and 1/2 side of each hexagon. Then, I took my White Gelato and created highlights on the top and opposite 1/2 side of each hexagon. Then, I had to get fancy, and add some calligraphy to finish the page!
I hope that you have a wonderful weekend! Thank you for stopping by!
Don't forget to stop at the eclectic Paperie store and get some new goodies!!!
Erin
Saturday, May 25, 2013
Friday, May 24, 2013
Colorful Transformation
Good Morning Folk
Donna-Marie Here to share a new mixed media altered project.
My favorite pastime is to scour through my local thrift store looking for items that are begging to be reused LOL
I found this painting book and yes the painting idea caught my eye at first but....
I really took a good look at the shape of the book itself
I loved the "window" the front cover had.
This is the inside...I removed the inside book and painting tray
I began painting with Gesso to cover all the color and print. You can see I left the pocket thinking I would use it, but you will see later that it did not work and I removed it. I also traced a square where the window would be positioned when the book is closed.
So here is the book al gessoed and a pencil trace of the window
This past weekend I attended an antique fair and picked up all this loose cool metal antique pieces for pennies...I just had to use them!! I was with my hubby who kept asking why I was buying someone else's "junk"...hahaha he had no idea what I was thinking...but then again he say's my mind is a scary place when I think creatively LOL
anyway I decided to use these metal pieces in the window area of my book. I also added other items I had including lace, Tim's stuff, an old mini spoon, button, screws, chipboard pieces...here is a close up. Everything got glued down with Zip Dry.
I have been really inspired by Finnabair lately and decided to gesso these pieces bringing them altogether as one look. You can see I removed the pocket now.
I really like the way the items sit in the window when the book is closed.
Now for the color Mmmmmm fun stuff!!
I used my Dylusion sprays: Lemon Zest, Post Box Red, Dirty Martini, Vibrant Turquoise. Because the entire area was gessoed the paint took a while to adhere to the texture giving me time to dab it around giving it a watercolor look. Some of the lace was synthetic and would not color...but I like the look!
This is the left side..it looks so Monet...me likey!!!!
Here it is closed...I love the white against the colored portion.
I added more Post Box Red
I chose to leave the front white and add some embellies :-)
I made these pieces in a Splash of Color workshop I attended a few weeks ago with Cheryl Mezzetti
The roses are paper but the chipboard with the text and the wire stencil was created with Ferro in the Gold color as well as the green piece...this is fantastic stuff!! It is embossing paste that has a beautiful sheen and color and yes even glitter!!! Be still my heart *smile*. The butterfly is a Donna Downey Stamp on text paper cut out and layer three times. I also used the 3D Stamp Paint in Moss Green.
I will be finishing the inside soon and will share when I do!
I hope you can get your hand on a piece to alter..it is soooo much FUN :-)
Be sure to check out our new Viva Products like the Ferro and 3D Stamp Paint in our store you will not be disappointed.
Peace Out
Thursday, May 23, 2013
First Gelli Printing Attempt
Hi, everyone! It's Broni here. Recently I've been noticing and admiring all the Gelli Arts prints I've been seeing around blog land and on Pinterest. So I decided to give it a try.
I watched several videos and studied some tutorials and found these two to be most helpful for what I wanted to do:
eclectic Paperie Gelli Arts linked video
Gelli Arts Clearly Gelli-printed video
I followed all the basic steps using the Gelli Plate and rubber brayer along with the Claudine Hellmuth Studio mini acrylic paints, Metropolitan collection. I used Modern Red first, then Dab of Yellow. Next I brayered on some Multi-Medium Matte gel through both the Dylusions Dotted Flowers stencil and the TCW Mini Chevron stencil. Here are couple of close ups before the gel dried.
When the gel was dry, I rubbed on some Distress stain in Brushed Pewter. I let it dry for a minute then wiped the extra off with a damp paper towel.
Doesn't it look cool? The gel acted as a resist to the stain. You can see the shimmer is still there in the photos.
I didn't really want to cover up much of the print, so I made it into a very simple card. As I was editing the photos I thought that this would be cute as a baby girl card. What do you think?
Here's one more close up:
Thanks so much for dropping in to see what I was up to! I think I'm ready to try some more Gelli printing. How about you?
~
Wednesday, May 22, 2013
Farewell......for now!
Howdy Peeps.....
Poppin' in today for my last
Guest Design Team post!
Thank you to Kim, the DT,
and the EP PEEPS!
for such an AMAZING endeavor!
I'm going to be a bit of a tease today....
But you will appreciate it on Friday!!
......any ways!!
I was sooooo excited when I saw
Julies EP Challenge for this month....
GEL MEDIUM!!
(in my world.....Multi Medium)
Can I just tell you.....
I LOVE THAT STUFF!!
Multi Medium is the BEST adhesive every made!
It is also a FABBY sealer.
If you look closely.....
my Birdhouse is covered with a piece of
vintage curtain!
Can you guess what I used for an adhesive?!??!
If you look closely....
you will see where I used the Multi Medium ~ Matte
(it's almost dry!!)
.....when it's dry you will never know it's there!!
.....and those flowers....
adhered in place with big gloops of Multi Medium!?!?!
Well.......you will need to stop by my blog on
Friday Morning to see about those!!
Well.......you will need to stop by my blog on
Friday Morning to see about those!!
Products Used:
Tuesday, May 21, 2013
Poppy Tag
Hello everyone! It's Bonnie Irvine here with a tag to share today. We have had such lovely warm weather that my plants are finally starting to do exciting things in the garden. The Bachelor's Buttons are budding and almost ready to pop and since I love their beautiful blue flowers that makes me very happy. One of my other favourite flowers, the poppies, are gaining in height but will keep me waiting a while longer for the stunning blooms. So...I decided to create my own :)
I started out with a #10 manila tag (4.5 x 8.5") and applied dictionary text paper from the Authentique Renew Collection to the tag. Another piece of dotted paper from the same paper pad was torn and adhered across the bottom after being inked with Vintage Photo Distress ink. Interest was added to these backgrounds by applying Peacock Feathers DI over Christy Tomlinson's Vintage Lace stencil and Black Soot over TCW's Min Chevron stencil. The edges of the text paper were inked with Peacock Feathers DI and Vintage Photo DI was scuffed here and there to grunge up the middle.
Donna Downey's Wild Poppy Silhouette stamp from Unity was stamped twice with Tuxedo Black Memento ink: once on the tag itself and once on another piece of the Renew paper focusing on the flower heads only. The second set of flowers was fussy cut and then sculpted with a large ball stylus to create dimension and shape. The bottom of each flower was glued directly to the stamped tag but the middle and ends of the petals were popped up on several layers of foam dots. White gesso was pounced through the TCW Mini Punchinella stencil with a scruffy brush over the background and onto the poppy silhouettes. White Gelato was used to highlight the tips of the petals.
Now this was one of those mixed media pieces that had to go through Seven Stages of Ugly before I started to like it...you know the ones where you keep eyeing the garbage can and nudging it a little closer with your foot after each step :) A Bo Bunny letter cancellation stamp was applied using Tuxedo Black ink. Blueberry, Cotton Candy, and Grape Gelatos were scuffed here and there and then spread with a wet finger or a wet brush. Black and Brown Big Brush pens were used to outline the edges of the tag and doodling was added with a black Micron pen. Brown shading was applied next to the flowers and stems with an Inktense pencil and then spread with a wet brush.
Not there yet! Hmmm, three short lengths of black and white dotty ribbon were stapled to the sides of the tag with a Tiny Attacher. Maya Road canvas butterflies were sprayed with fresh Lime and Vibrant Turquoise Dylusions inks, dotted with teal paint, and given key bodies. Glossy Accents was applied over each flower and allowed to dry. Getting closer... a black piece of cardstock was adhered to the back of the tag to frame it. A reinforcement was inked with Black Alcohol ink and applied around the hole. And finally, some wired turquoise ribbon was fed through the hole and tied with Idea-ology Tinsel Twine. Phew...I think I like it!
The final step was to add Idea-ology letters spelling out poppy. White paint pen dots were added to the letters both to continue the dot theme and to help them stand out. It also took away from the plain appearance. Cotton Candy Gelato was applied with a wet brush to the inside letter openings. This tag served as a good reminder to me to keep on going even when I wasn't thrilled with the results. Again, it's that ol' "Trust The Process" thing that often happens with mixed media.
Anyway, thanks for the company today. We love it when you visit!
Bonnie
To check out the products I used on this tag, click on the thumbnails below to arrive at the listing at the eclectic Paperie store.

Subscribe to:
Posts (Atom)