Photobucket Photobucket Photobucket Photobucket Photobucket Photobucket

Monday, September 30, 2013

Catching Glimpses Altered Dictionary Spread


Hello everyone. Bonnie Irvine here today to share another two page spread in my altered dictionary. The letter I chose for today is G and the word I've highlighted is giraffe...because giraffes make me smile. I started by applying gesso to the two pages making sure to allow some of the text and all of the definition to show through. The two pages were then adhered to the pages next to them using Matte medium in order to give the pages enough strength to hold up to the mixed media techniques I knew were coming. Over the gesso, I scribbled some browns and yellows in the form of watercolour crayon which I spread with a wet brush. These colours were intensified with Gelatos: Butter Cream, Lemon, and Chocolate. A wet finger blended them into the crayon.


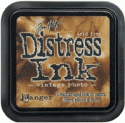
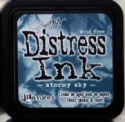
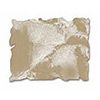
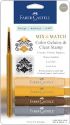
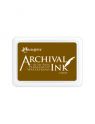
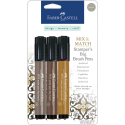
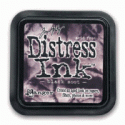
 To add texture to the background, I randomly stamped Unity's Cooped Up Notes using Coffee Archival ink. More of the same ink and later Memento Peanut Brittle ink were sponged through TCW's Spinning Tops stencil using a make-up wedge. Walnut Brown Big Brush pen was used to darken the edges of both pages and then streaked across the pages in places. A wet brush was used over the ink to spread and soften it. A page of giraffe print paper from DCWV's Safari Chic stack was torn into chunks and then edged with the Walnut Big Brush pen. These were adhered to the background.


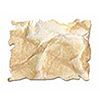
White gesso was pounced through TCW's Mini Punchinella stencil for contrast and to help imbed the giraffe paper into the background by stencilling over both at the same time. A burlap circle was cut and then split so that both halves could be adhered.


Another scrap was glued to the bottom right corner. I chose the burlap because I wanted more texture and natural materials. The burlap and the background were stamped using Coffee Archival ink and a leafy Dylusions branch from the Bits of This set. Again, I wanted texture but also to create a background suggesting the giraffe's natural habitat...leaves and all.


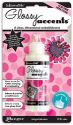
The adorable baby giraffe is from A Day For Daisies and was coloured with Prismacolor pencils. Glossy Accents was layered over the eyes for shine and dimension. Spiced Marmalade Distress Stickles was layered over the flower and bud. I wanted to create the effect that the wee giraffe had burst through the background page so I punched a hole with scissors and then tore the pieces back to enlarge it. They were glued in place and lined around with Black Big Brush pen. The giraffe's neck was placed through the opening popped up with foam dots and a black cardstock circle was adhered behind the hole. Then the little darlin' was given a seam binding bow.


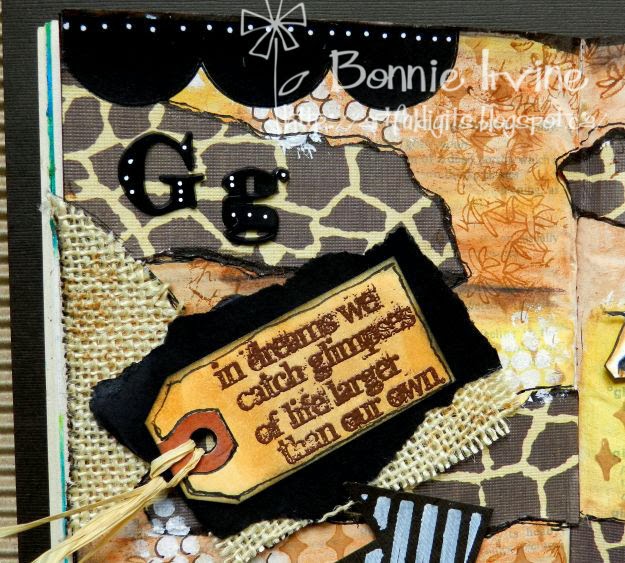
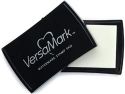
The sentiment, from TH Flights of Fancy set, was stamped onto a small manilla tag with Versamark ink and then embossed with copper  powder which was heat set. More of the Peanut Brittle ink was sponged over the tag along with some doodling. Black Soot Distress ink darkened the tag's edges. It was then placed on a torn piee of black and a remnant of the burlap was adhered to the bottom edge before the whole element was popped up on foam dots. Using an MFT scallop die, black cardstock was cut and placed in three places along the edges of the pages. White dots were added to these borders as well as to the Gg letters which are Idea-ology Alpha Parts. The letters spelling Dream were stickers from my stash.


The final touches were the stencilled arrow and the stacked button, as well as lots more doodling. The arrow was stencilled onto dark brown cardstock using a white Big Brush pen and TCW's Mini Susana's arrows template. It was then fussy cut and popped up on foam dots.


The buttons are from my stash and tied together with raffia. Raffia was also used on the tag as a topper.
That's it for me today. I hope you get a chance to play and get messy soon. Thanks for joining us.
Bonnie

These are some of the products I used today which can be found in the eclectic Paperie store:

Saturday, September 28, 2013

Mixed Media Scrapbook Layout

Andiepants here and  WOW am I excited to be posting my first blog post for the eP design team!!! eP has some absolutely fantastic products. There is so much that you can do with this stuff. AND I LOVE STUFF!!!! 

I don't know about you but personally...I feel that I have too much stuff.
*GASP*

Yes, I said it. So with that in mind, I have decided it's time to stop holding on to that stuff and to start using up the old stuff. Of course it can be refreshed and renewed with the aid of some new eP stuff;)


I used some of my old paper stash to create this:


So much fun and color! I pulled the paper for the brown but imagine my surprise when I realized that it also contains all my fav go to color combos...teal and lime green...teal and orange...orange and lime green...well...you get the picture. I used the Dylusions spray through my new tiny circles stencil.


I love how you can give your page so much dimension with this idea-ology film strip


Of course my bird cages! Where would I be without them!! This Claudine Helmuth stencil is my new absolute fav. I used liquitex modeling paste which pulls the color from beneath it. I wish I had some Wendi Vecchi white embossing paste. hmmmmmmmm ;)  I colored the cages with the Splash of color silks glazes. It actually worked out fantastic because you could see the teal pulling from beneath. I know right?!


Here is a list of eP products I used to complete this LO. I hope I inspired you to grab some mixed media from eP and use that stash!

{{hugs}}
Andiepants


Friday, September 27, 2013

Christmas lights with Authentique . . .

Woohooo Happy Friday everyone, Tracy here today with a little Christmas project . . .
GASP, SHOCK, HORROR
  . . . . shreeeek did I dare to say the " C " word???
 Yeahhhh,
I did and loving it tralalalalalala ...
sorry folks I couldn`t help myself!
But in my defence when the
Authentique Joyous 6x6 paper pad 
popped through my door from the eP Store . . .

  I couldn`t help but think of those long winter nights
when all is dark outside except the twinkling of streetlights and the stars up above
lights peeping through drawn curtains
the Christmas Tree standing proudly in place
decorated with old and new along with
gingerbread hearts tied with ruby red ribbon
snuggled on the couch watching Christmas movies
with a throw to keep us cosy . . . . .
 . . . what`s this I hear you cry . . .
Well, when you are all snuggled up in bed, on those dark and chilly nights 
 you are going to need a little . . . 
Lamp of course at the side of the bed!
I`ve had this little white lamp in my stash in the shed for ages just waiting for that little something.
Soooo, I gathered up a few supplies for the shade -
 . . .  just chop up the papers and fix in place with Gel Medium
followed by a few bits and bobs that I had in my box of goodies
Tim Holtz Adage Tickets
a few washers, buttons, ribbon,
 and for the top and bottom of the shade some
 Idea- ology Tissue Tape - Elements
 The tag was covered up using all the little bits of leftover paper from the shade,
a little wonky tonky stitching,a Smidge Of Distress Stain, a little stroke of Pan Pastel 
a quick dab with a clear Ink pad
and
a sprinkling of Cosmic Shimmer Embossing powder to finish!
Looking at the shade now, I do know that I will at some point give it the same treatment with the distress ink/ Pastels for a more aged look and add a little handstitching along the way to make it a bit more homey . . .it`s just now quite finished yet I feel.
I`ll pop on by and update when I have got a little messy with it!

Pssssst . . .  
I still have a stash of the pretty papers left and  at a later date will be showing you them in my
 December Daily Journal for this year, woohoo!

But for now
Thank you so much for taking the time to look
Till next time
Tracy
xoxox

Materials from the eP Shop -

Thursday, September 26, 2013

Is it Too Early for Halloween ? Mixed Media Canvas

Hi everyone Toni here with another Halloween post. I'm sorry, I know it's a bit early but I found this adorable witch's cat picture and just had to go with it. It also gave me a great excuse to put my new Tim Holtz Dies into action. I started this canvas in a rather back to front way, as I started work on the die cut elements before the background. This is how the background looked before I painted and inked it....
I started by applying some torn book pages, to a 7x9 canvas. I then stamped this brocade pattern onto a 2 ply tissue, using black Archival Ink. The stamp is from an Artemio set I've had in my stash for sometime. I then separated the layers and adhered the stamped layer, using Studio Matte Multi Medium. Once this was completely dry, I set to with Distress Paint in Antique Linen, Frayed Burlap and Vintage Photo. This is the result...
I used a little Black soot Distress Paint around the edges and added some Vintage Photo Distress Stain to blend everything together. I also stamped the sentiment onto a piece of the tissue and adhered it to the surface. I actually really like the way this turned out, I think it looks like a piece of old wallpaper. ( a quick aside: I've got the TV on and there's a programme on about wallpaper, with lots of vintage examples!) I cut the bottles from manila card using Tim's Apothecary Bottles Die. I coloured them with Distress Inks, and followed on with clear embossing powder.
I used the Ornate Frame die and a Movers and Shapers Mini Pocket Watch Die as well. I coloured these with Tarnished Brass Distress Paint, and adhered a piece of acetate to the back before adding the print out of the cat and the stamped watch face. I also stenciled a piece of card to use as a base  for the bottles. Here's a couple of close ups...

Don't you just love that cat! It's actually a digital download from Alpha Stamps. I curved each bottle over a pencil before adhering just the sides of each one. I was thrilled to have an opportunity use one of these fab little metal Skull and Cross Bones charms from the new Ideaology range. They are so detailed! To complete the canvas I added  a die cut number 31, which I coloured with Black Soot Distress Ink and clear embossed. I even managed to get another  of my favourite Donna Downey stamps in on the label around the bottle !!! So that's it for now, This is my second Halloween style project so far, such good fun, I wonder how many more I can do before the end of  October ?
Here's a list of the products I've used which are available from Kim's lovely eclectic Paperie shop. Happy creating folks x