Photobucket Photobucket Photobucket Photobucket Photobucket Photobucket
Showing posts with label Crafty Individuals. Show all posts

Wednesday, July 30, 2014

Specimen 2b ~ Poppy


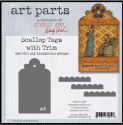
Hi everyone! It's Bonnie here today with a tag I created using Studio 490 Art Parts as the substrate. Art Parts are thick durable paper board designed for altering. They are stronger than chipboard so can stand up to the weight of mixed media layering and wet medium. This tag has such a pretty shape at the top and also comes with scalloped trim which I chose not to use because I wanted a more linear look. I began by painting the tag on both sides with Dina Wakley black gesso and allowed it to dry completely.


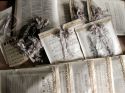
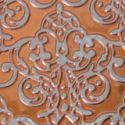
Viva Decor's Mother of Pearl modeliing cream was applied through TCW's  Mini Sketch Grid stencil with a palette knife. Once that was dry, Golden's Iridescent Copper was pounced through TCW's Tiny Circles stencil with a brush. Lovely shimmer from both of those mediums. A piece of dictionary paper from Michelle Hill's Ephemera Bundles was torn into chunks and adhered to the tag with Dina Wakley Gel Medium. Once that was dry, Vintage Photo Distress ink was applied to the edges of the paper.


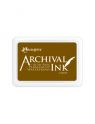
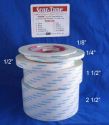
The gorgeous Pretty Poppy stamp from Crafty Individuals was stamped onto kraft paper using Coffee Archival ink. It was then coloured with Prismacolor pencils, trimmed out, and edged with Vintage Photo Distress ink before being popped up on foam tape. A rectangle of black cardstock cut as a mat was embossed and then brushed over with Viva Decor Inka Gold Copper. Another rectangle was cut from an  Add a Little Dazzle Brushed Copper metal sheet and scored near the edges to give it a border. This metal was then offset and adhered to the image and black layers as well as to the tag with Scor tape.


To complete the design, Specimen 2b, from Studio 490's A Form of Art, was inked with Coffee Archival onto kraft paper, edged with Vintage Photo, and matted with black cardstock. It was popped up with a double layer of foam tape on the bottom edge and just Scor tape on the top so it could be partially layered over the image stack. A sheer cream coloured ribbon wrapped and tied with hemp twine became the topper for the tag.

Thanks for popping by today. I appreciate that. Remember that you have only today and tomorrow left to enter our ePlay Altered Bottle Challenge. Wouldn't want you to miss out on a chance to win the $25 prize for the winning entry.

Bonnie

Here are links to the eP store for most of the products used in this project:

Friday, June 13, 2014

Forgotten Frame !

Hello, it's Sue C here and today I'm sharing a project that has long been in the thinking and I've eventually gotten around to it !


 I must have had this papier mache frame for over 12 months and I've picked it up and put it down several times, either because it didn't fit what I had in mind or I just didn't have the time for such a large project. Anyway, this time I picked it up and made sure I had the time and it fit with what was in my head !


I started by adding some texture around all 4 corners using the TCW Paradise stencil and Wendy Vecchi's white Embossing Paste.  When it was dry I then painted the frame with a light, stone coloured acrylic paint. I had other plans for the centre of each panel so no need to paint it entirely.


I then started to build up the layers of acrylic paint, concentrating the colour on the corners.


I wanted the frame to have an aged wood appearance like something long forgotten.


I then started to create the panels that would sit in each quarter. I put various colours of Distress Stain on my craft mat and spritzed them with water then pressed the card into the ink. On the first panel I used the TCW Retrobursts stencil and a babywipe. As the Distress Stains react with water the moisture from the baby wipe bleaches the ink.


On another panel I used the TCW Navaho stencil with Tea Dye Distress Ink to start with. I also did some stamping but didn't take another photo until the end !


My idea was that this frame would have been in a dressmaker's shop advertising the type of outfits on offer.  It's been neglected and forgotten, hence the shabby apprearance ! The first panel is the daytime outfit suitable for pic-nics and days out in the country.

The main image is from the Crafty Individuals CI-211 set, I've masked her off and then used the Wendy Vecchi Fancy Florals background stamp. The large flower and leaves are Prima wooden ones and I've used a Fancy Pants flower for the centre, they've all been painted with Luminarte Silks. The rolled up tape measure is from the Tim Holtz Artful Tools stamp set, I stamped the tape measure background stamp and then cut one piece from it.


The second panel advertises the name of the dressmaker.

I've used the rest of the tape measure stamped image and cut in to it along the bottom and curled the card. The label is from the Crafty Individuals CI-322 set and I've painted some paper roses with Luminarte Silks and when dry rubbed some Vintage Photo Distress Ink over them.


The third quarter is the evening outfit for dining out or going to the social event of the year !

I did some stencilling and used a baby wipe to bleach the ink and also used some acrylic paint. The main image is again from the CI -322 set and I masked her off then stamped over the top with the background stamp from the Tim Holtz Papillon set. The vertical panel has also been stamped using a stamp from the same set. The numbers have been added using the TCW Bingo stencil and Wendy Vecchi's black Embossing Paste.


The final quarter is all about the travelling outfit, practical but stylish ! 

I've used the same techniques for the background piece on the above quarter and the image is from the same Crafty Individuals set. The flower has been painted with Luminarte Silks. The tickets are from the CI-307 set and the typewriter is from the Tim Holtz Merchantile set. 


In the centre of the frame I've added some filigree metal corners nad the flower is made from UTEE and a mold that I made from a plastic flower. I've painted it with Luminarte Silk paint.


This is the finished frame ! To finish it off I rubbed some Treasure Gold around the edges over the textured areas.

I hope you've enjoyed today's project, I certainly enjoyed making it !

Remember there is still plenty of time to join in with the current ePlay challenge which is to use fabric in your projects. 

Sue
x

Wednesday, April 30, 2014

Inspired by Nature


Hello again, it's Lisa S here with my last project as eP's April guest designer. They say time flies when you're having fun and it certainly does. I'm sharing a web passwords book this week that features two of the pretty papers in the Nature Walk collection by 7 Dots Studio. Every week Kim has introduced new products in the online store and I couldn't resist playing with these. Another favorite of mine is the line of Crafty Individuals stamps she offers and I've used one on the front cover. 

Here's how it all came together...


I cut two pieces of black cardstock


I used Gray Day and Musical Blooms from the Nature Walk collection. It pained me to tear the pretty paper but I wanted both on my cover so I did it. I inked the torn edge with Weathered Wood Distress Stain and stamped Tall Wildflowers in Wendy Vecchi's Cornflower Blue Archival ink.I added a small fancy flourish stamp by Tim Holtz which I stamped in another shade of Wendy's designer series inks, Tree Branch


This is such a pretty stamp by Crafty Individuals. They do come unmounted so you will need to use EZ Mount Static Cling Mounting Foam to adhere them to. 


Next up I added some textured script with Wendy's white embossing paste and TCW Mini Art Is 6x6 stencil. I applied it directly to the Gray Day paper and dried it with a heat tool. I rubbed cornflower blue ink over some of the areas to highlight the text and add some color. 


You might can see that I have my letters on a piece of acetate and the reason is I like to be able to see the placement of the letters before I adhere them to the paper. Also, I can alter them without worrying about getting something on my paper that I don't want there. ;) 


 The kraft sticker alpha's were easily altered with Cornflower Blue, Forget-Me-Not and Tree Branch Archival ink plus Snow Cap Adirondack Paint Dabber


For a bright spot I added a fun Blossom Bucket-Bumblebee by Studio 490.


This is a download I purchased but you can easily make your own in Word or another editing program. This book is 8.5" x 11" and as you can see I can store a lot of passwords in it. :) 


It has been fun to be here with all of you as eP's guest designer this month.
I've had a blast!
Thanks again Bonnie and Kim for the invite!!

Have a wonderful day everyone!
Lisa xx   

Tuesday, March 25, 2014

A Butterfly Bouquet!


Good morning!  Sherry here with you today and I have a quick card to share using Crafty Individuals – Butterfly Bouquet

CliftonCardStraight

The image was stamped with Ranger Archival Potting Soil onto watercolor paper, and then water colored with Distress Markers.   The image was trimmed out, the edges were distressed with scissors and then sponged with Antique Linen.

CliftonCardRight

A frame was made by gluing designer paper onto chipboard and then die cutting with two different sizes of a Labels die.    The edges of the frame were also sponged with Antique Linen.

The flower was made by using a spiral die cut and then inking the edges also with Antique Linen.  Heck, the edges of everything were sponged with Antique Linen Distress Ink.

CliftonCard

Instead of taping the paper to the card front, a sewing machine was used to stitch everything down to the base.

That’s all for me today.  Thanks for stopping by and joining me!


eP Signature - Sherry Cheever


Project Supplies: