Hi eclectic Paperie friends!
Julia here with a tag I made using a
delicious technique I saw on Wendy Vecchi's blog
here. First - here is my finished tag.
I used lots of techniques on my tag which I'll describe below but first I want to show you how I used the
delicious technique from Wendy on the
Tim Holtz Apothecary Bottle! (Wendy used the new
trophy die in her tutorial but I don't have that so I looked at all my TH dies to see what I could use instead!). This jar ended up looking like one of those big milk cans dairy farmers use!? But it's actually a vase for my pretty floral!
I started by die cutting the
Apothecary Bottles and then brushing
Studio 490 Metallic Silver Embossing Paste onto the pieces. On some pieces I did thick coats and some I did thin - each will give you a different look. I forgot to take pics of the specific jar I used on my tag but here are other pieces with the Silver Embossing paste on them.
Ok - so now that I have that exciting piece explained - let me tell you how I made the rest of my tag!
So first, I die cut my tag with Tim Holtz Tag and Bookplate die out of a piece of
Ranger Watercolor Cardstock. I stamped just the stem and flower from
Studio 490 Forever Art on the tag and on a scrap of watercolor card stock. I colored them with Barn Door, Spiced Marmelade and Peeled Paint
Ranger Distress Markers then went over the coloring with a
water brush. Next I stamped on the tag using two background stamps from Studio 490 -
From A-Z and
Ornate Dots (LOVE this dots stamp!) with
Archival Watering Can Ink. I held the stamps in my hand so I could control where I stamped on the tag. Then I sponged all over the tag with
Ranger Distress Crushed Olive and around the edges with Vintage Photo. I flicked some water over the tag then blotted it with a paper towel. I cut out some of the blooms from the flower I stamped on the scrap and layered them over the tag stamping with foam dots to make the bloom look a little bigger and dimensional. I added black dots to the centers with the Sakura Black Glaze Pen.

I die cut the wreath from the Tim Holtz Regal Crest die out of Clearly for Art White - stamped it in
Archival Leaf Green (I had this already made from another project and I forget what stamp I used on it!) I heated it to bend the leaves a bit and adhered it under the top of the vase with foam tape. I added the butterfly and words from
Remnant Rubs/Botanicals - making the dots with the Sakura Glaze pen. The flat back
DESTINY is calling button is from
Um Wow Studio Nature Walk - Moon Shine Flaire. I adhered it with
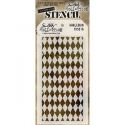
Glossy Accents. I stenciled
Studio 490 Checkmate on the top and bottom with Archival Watering Can ink.
That's finally it from me today! I hope you have been inspired by my tag! Oh - and I put a Swivel Clasp through the hole on the tag!
And since I used a stencil on my tag - I'm also linking it to the May e-play challenge. You have until the end of May to link up your stenciled project. I hope you'll join in!
Stamps: From A-Z, Ornate Dots, Forever Art - Studio 490 Wendy Vecchi
Paper: Vintage Cream - PTI, Water Color Card stock - Ranger
Ink: Archival Orange Blossom, Cornflower Blue, Fern Green, Leaf Green, Watering Can; Ranger Distress Vintage Photo and Crushed Olive.
Accessories: Clearly for Art White, Checkmate Stencil - Studio 490, Apothecary Bottles and Regal Crest Dies - Tim Holtz Alterations, Destiny flat back button - Um Wow Studio Nature Walk Moon Shine Flaire, Industrious Stickers/Frames and Trims - Tim Holtz, Glossy Accents - Ranger, Black Glaze Pen - Sakura, Ranger Distress Markers Barn Door, Spiced Marmalade and Peeled Paint, Swivel Clasp - Tim Holtz Alterations, Chit Chat Stickers - Tim Holtz, Prima Wood Embellishments Stationers Desk, Remnant Rubs/Botanicals - Tim Holtz.