Photobucket Photobucket Photobucket Photobucket Photobucket Photobucket
Showing posts with label Karen Crossen. Show all posts

Thursday, March 6, 2014

ePlay Challenge - Alter a Book!

http://eclecticpaperie.blogspot.com/


Welcome to eclectic Paperie’s ePlay Challenge – Push Your Boundaries!  We’re altering our challenges in 2014, creating one, month-long challenge, increasing the prize drawing, holding a design team blog hop, and including a product discount with each new challenge!  Check out the details below:
 
·         We’ve combined our two challenges into one, announced on the first Thursday of each month.  This gives the design team more flexibility with challenge topics and projects and allows you more time to enter! 
·         We’ll also feature a product each month, and during the first day of the challenge, you’ll receive a discount on the featured product….be sure to check for the special code! 
·         Our prize drawing is increasing from $15.00 to a $25.00 gift certificate and the winner of each challenge will be announced on the last Thursday of each month and will be featured on the eP blog. 
·         Each month we’ll hold a blog hop featuring the beautiful artwork from our design team…just scroll down to the bottom of the post for all of the links!  Talk about inspiration!!
 
Our challenges are about encouraging you to explore your creative journey and inspiring you to step outside of your comfort zone.  When you submit your artwork, share a unique card, scrapbook or journal page, a canvas, home décor project, or anything that you’re excited to share!  We’re looking forward to crafting with you!
 
Today’s special is on Liquitex Gesso and for one day only, you can save 10% on a bottle of gesso…perfect for all of your altered projects!  Simply use code GESSO03 when checking out.
 
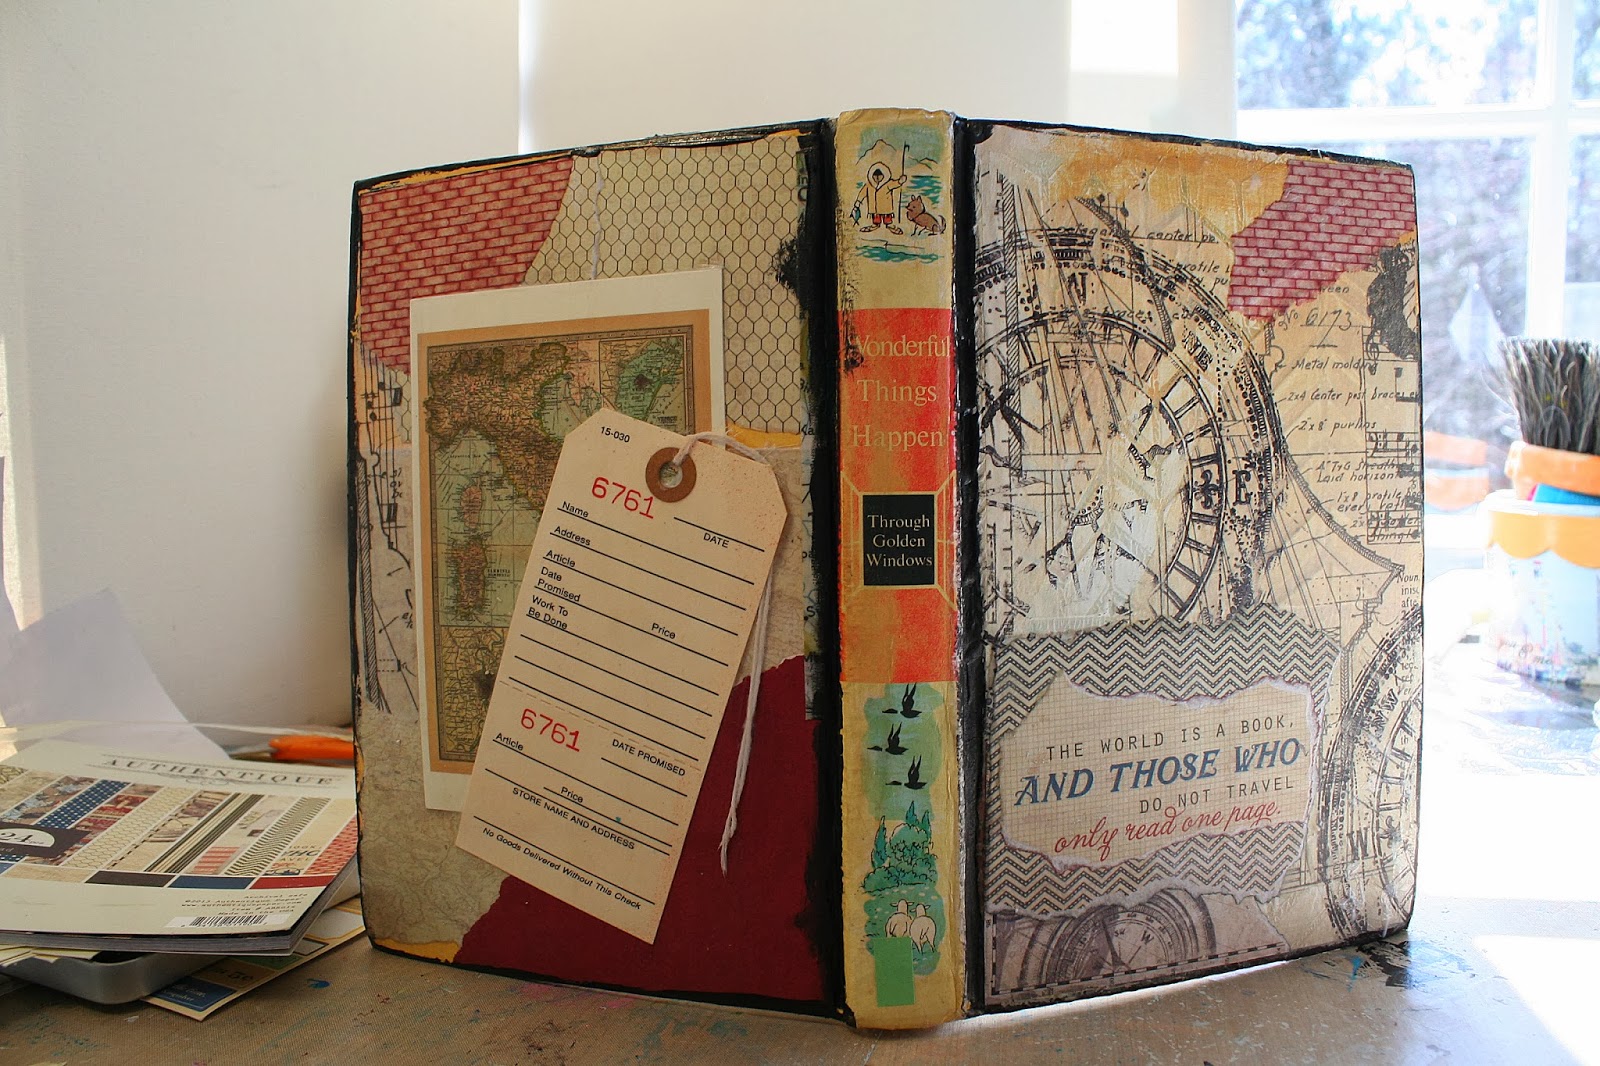
This month’s challenge is Altering a Book!!  Hello EPeeps!! I am so excited to be hosting the first official ePlay Challenge here on the Eclectic Paperie blog!

 I just love altering books and for this project I used an old children's book.  (I think my husband would love it if I never bought another old book ... I could probably go at least a year without having to buy a new one to alter!!)

I started out with Gesso and just brushed it on as a surface primer!

 Then I wanted texture so I put a stencil into the wet gesso and added more gesso into the stencil.  The gesso is thick enough to stand out and create texture in the shape of the stencil!
After the gesso layer was dry, I started with some paint and tissue paper.  I actually glued it all down with clear gesso ... loved using the gesso this way! I also used the gesso to glue down the Authentique Abroad paper (love it!) and also stamped a little!

And I was having so much fun and my fingers were so covered in gesso that I didn't take any pictures, sorry! But here is the finished cover, I just love the way it turned out!

The colors of the back were too bright .  So I mixed water and regular gesso to make a white-wash to cover the color!  Best trick ever to dull down any overly colorful paper or paint!


Voila, the outside is done!  I tried to create a little video for you all to see how I use gesso to get the pages ready! Enjoy the video (it is the first one I have ever made, but I have watched hundreds, so go easy on me!)

 I hope you all play along and alter a book with me this month! I can't wait to see how you alter your book!

Just add your link to the second linky thingy below.
(under the blog hop linky)


Friday, January 24, 2014

Love Owls!!

Hello EPeeps!!  Have you ever started a project or a layout and not been happy with the finished project? That happened to me this week.  I made a long canvas with 5 owls on it but it didn't work for me and I just wanted to paint over it.  However, when I looked at the canvas there were certain elements that I liked . . . the background and two owls.  So I started over.  I took the pieces that I liked and remade them.   And now I LOVE my little Love Owls!! So I really encourage you, if you are working on something that just isn't going right, pick out what works and keep those elements!  You don't have to get it right the first time!  Keep trying!


I started by randomly stamping directly onto the blank canvas.


I used my gelli plate and white tissue paper to create another part of the background. First, I made a print of chevron and then a second layer of hearts on top. 

I used matte medium to put the tissue paper down onto the stamped canvas.  The transparency of the tissue paper lets you see the stamped layer . . .  favorite technique!

Next I cut out my Love Owls from Fancy Pants, Be. Loved. paper pack. If you get any Valentine's Day papers this year, THIS is the one you need!! The patterns, the colors the shapes . . . perfect!!  I LOVE it! And honestly, this paper could be used all year!! I am tempted to get a second pad of paper, just so I can have extras to use again! 

I laid out my pieces, used matte medium to glue them down. (I really like using matte medium, if you didn't know that by now.  I like that matte medium isn't as sticky or gloopy as glue or decoupage).  After the matte medium dries, I used pens and Pitt Pens to highlight and finish off the canvas!! 


 Thank you all for stopping by today!! Click on the eclectic Paperie link as fast as you can and grab the Fancy Pants Be.Loved. Paper - I just can't tell you how much I love it!!  And I hope you all enjoyed my Love Owls and are inspired to keep trying when a page or a project isn't going as planned!!  
 (In fact, if you want to see the 5 owl canvas, I will bravely put it up on my blog, just to show you ... . ... make me feel better though by leaving me a comment on a project you almost gave up on but loved what happened in the end!)  
Karen

Thursday, December 19, 2013

12 Days of Christmas - Day 10 - Creating with Silks Acrylic Glazes!


Oh my goodness EPeeps!! Only 2 more days of the ePaperie 12 Days of Christmas . . . but boy, do I have a fun product today!! 

Silks Acrylic Glazes!!


 I am IN LOVE!!  Colors, shine, and SO super versatile!  I stamped with them, I embossed with them, stenciled with them and just plain painted with them!! 

Make sure you use the code:   12DAYS10 when checking out to get your discount!!  What's the deal today? Silks – Buy 3 for $15.99   What a deal because normally buying 3 is $21 ... I know I will be adding to my collection today!! 


I had so much fun that I ended up with a ton of little experiments that I loved . . . yikes, what to do . . . so I cut them up and sewed them together as my patchwork Christmas quilt canvas!!


So, honestly, I had the flu when I started on this project. I sat in bed and watched a ton of YouTube videos about Silks Acrylic Glazes.  There were SO many ideas out there.  My head was swimming (and full of decongestant) so I just experimented!

I stamped - circles and hearts . . .
I put the Silks Glaze on my craft sheet, dipped my stamp into it and stamped it down! I painted the watercolor paper with one coat of Silks Glazefirst!


 I stenciled with embossing paste too.  First I painted one color of Silk onto the paper and after it dried, the snowflake is painted through a stencil! No bleeding under the stencil! (And the stencil is made from paper) 


I embossed - by mixing the Silks glaze with Wendy Vecchi translucent embossing paste and pushed it through stencils! Love the shine and the texture!! (I think this was one of my favorite techniques!!)


To Create the 'quilt'  I cut up all my little experiments and wrapping paper squares into 2x2 squares.  I glued them down to a piece of cardstock paper and let it dry.  Then I took out my sewing machine, and zig-zag stitched around all the pieces. 


Then I decided the 'quilt' needed a home ... so I got a canvas ready.  I put Christy Tomlinson coffee filter paper around the edges down with matte medium.


I painted the edges of the canvas. The Silks are translucent, so you can see every word from the paper underneath! I also got a little crazy with the embossing technique around the edges too . . . and then I glued it all together!!


This was such a fun project!! I hope you enjoy playing with Silks Acrylic Glazes, I think they might be a new favorite around here!!

HINT HINT!!  Now I was also practicing for my ETeam picks challenge ( using wrapping paper in your project.) So make sure this holiday season that you are keeping scraps of wrapping paper to use in a project with me in the future!!