Photobucket Photobucket Photobucket Photobucket Photobucket Photobucket

Friday, August 31, 2012

Thinking Of You


Hi, everyone, Barbara here with a card for your today. Sadly, I recently needed a sympathy card and this is what I came up with. For my card base I'm using some of my favorite patterned papers, Lost & Found Two – Rosy by MME. I stitched around my base card and then sponged the edges with Antique Linen Distress Ink and my Inkssentials Foam Blending Tool. Then I stamped the typewriter image and sentiment with Memento Tuxedo Black ink and popped it up on foam tape. I added some twine, a button, and some sweet Kaiser Craft self adhesive black rhinestones

OK, that's it for me today. Hope everyone has a happy and safe weekend!

Thursday, August 30, 2012

One Little Scoop

Hi there everyone and welcome to Thursday!  Just one more day until the weekend officially begins and then I can think about ice cream, right?  Seriously, ice cream is a big thing in New England, which is not such a good thing for one's hips!  There's a homemade ice cream joint on just about every street corner and the stores are packed from Memorial Day to Labor Day.  We have a great little place just about a mile from our house and we make the journey for ice cream at least once a week.  Love it!

And I love this sweet ice cream-themed stamp set from Sweet Stamp Shop!  Isn't it the cutest?  This set, Cool Scoop, contains a whole bunch of sweet treat images that can be mixed and matched.  Why you can even create your very own ice cream sundae...how delish! 

For my card, I used fun paper from Authentique, this is from the Lively paper pad.  Great summer colors and I don't care that Labor Day is literally around the corner...I'm not letting go of summer until there's snow on the ground!  (Was this not the fastest summer in history??)  Once my card was assembled, I stamped the ice cream cone on Speciality Stamping Paper (buy a package of this paper, you will not be disappointed!) and colored the image with Copics.  Then I added a smiggin of sprinkles to the top of my cone, which BTW are one of my favorite toppings!  I used foam tape to pop up the image because you simply must have some dimension and then added the fun sentiment, "One little scoop wouldn't hurt anything, right?"  Nah...nothing that a few hours on the treadmill won't take care of...

Enjoy folks and enjoy this last bit of summer!!  Now go out and get some ice cream!!

Wednesday, August 29, 2012

Big Bold Hello!

Hey Y'all!!

Tenia here from Jazzy Paper Designs! Hope all is well and Happy Wednesday!! I have a card to show ya and it goes a lil somethin like this......CHECK IT!!!

So......I had tons of fun creating this super fun card!! I used the new Market Street Stamps set Great Big Greetings and I had so much fun with the Everyday Eclectic Echo Park papers. I hope you likey and have a great day!!!

-t


Card Recipe for Big Bold Hello Card
Stamps: Great Big Greetings(Market Street Stamps)
Paper: White(Bazzill), Kraft Cardstock(Wassau), Kraft DP, Chevron DP(Echo Park Everyday Eclectic line), Paper Doily(Party City)
Ink: Cottage Ivy(Tsukineko)
Accessories: Ribbon(Michaels)
Tools: Nestibilities(Spellbinders), Scissors

Tuesday, August 28, 2012

Product Spotlight - Echo Park

Do you love Echo Park?  Ohhh...I do, I do!  I have yet to be disappointed in their releases and I'm happy to announce that we have two new 6x6 paper pads in stock this week!

Documented
Tailored

Since I'm a sucka for new paper, I couldn't wait to dive in to using one of the new pads.  I opted for the Documented pad, which contains more blues, greens, and yellows.  (The Tailored pad has more pinks)  And since I wanted to let this beautiful paper shine through, I decided to make a 5"x5" card with a whole lotta layers and not a lot of images.  Swoon...don't you just love those colors together with the pop of the black numbers?  Beautiful stuff!

I used a new stamp set from Market Street Stamps, Great Big Greetings, for the front of my card.  (Great greetings in this set and they are indeed...big!)  To finish off the card I simply added a bit of bling from my stash.  You can grab your own bling, from Prima, here

Enjoy today's card and be sure to check out all of our Echo Park paper pads.  For only $5.99 per pad...they're cheap enough to pick up a whole basket full of new paper!


Monday, August 27, 2012

A Grandmother’s Love

Hello eP fans!  Happy Monday and welcome to my turn to share with you here on the eclectic Paperie blog!  My card today uses some of the lovely new My Mind’s Eye “Tangerine” 6x6 paper from the Sweetest Thing line.
eP082312 Orange has always been one of my most favorite colors, so I just love this paper line!  I kept the stamping very simple and let the papers do all the work for me, stamping the sentiment on a piece from the paper pad and cutting it out with a Labels One Nestabilities die.  I used Brilliance Graphite Black ink to stamp the sentiment, and embossed with clear embossing powder.   I added a Maya Road mini canvas butterfly to my design, and made it yellow/orange by spritzing it with some Dried Marigold Ranger distress reinker and water mixed in a Mini-Mister.  I embellished the butterfly with some Kaisercraft pearls, and embellished the upper left of my card with some Graphic 45 Metal Brads.
I’ll probably save this card for a time when one of my daughters need to send a thank you note to their grandma!  :)
That’s all for me today!  Happy stamping!
signature 3

Saturday, August 25, 2012

A Happy Haunting!

Sherry here and today it’s my turn to post a project for you.  With September just around the corner and acorns already falling on the deck, I’m starting to get in the fall/Halloween decorating mood.   Because I like to add a couple of new decorations to the mix every year, I decided to start earlier this year and make a Chunky ATC using Graphic 45 Happy Haunting Collection.  

This is what I started with, a piece of pine stud cut to 2.5 x 3.5”.

Plain Chunky ATC

To show you the difference between a Chunky ATC (which is cut to the actual size of an ATC (3.5 x 2.5”) and a Chunky Tag (which is cut the size of a manila tag at 6”), I decided to take this picture of them side by side.

Chunky Tag and ATC

A 2x4 wall stud is really only 3.5” wide, so in order to cut ATCs from the stud, you would need to cut pieces 2.5” wide.  
  
Here’s one side of my Chunky ATC.

HappyHauntingChunkyATC ClockSide

All four sides were covered with the same paper from Happy Haunting, the edges sanded and then sponged with Vintage Photo Distress Ink

The flowers were die cut from Spellbinders Blossom Five Die Template, assembled and then covered with Ranger Matte Glue n’ Seal sprinkled with glitter.

Here’s a side view of the flower so you can see all the dimension.

HappyHauntingChunkyATC SideView

From this photo, you can also see the different layers of the image on this side of the Chunky ATC.  The images were adhered to chipboard with the Ranger Matte Glue n’ Seal, then trimmed out and layered with foam mounting tape.
The other side of the Chunky ATC.

HappyHauntingChunkyATC TagSide

The leaves die cut from GrungePaper with Spellbinders Foliage, were painted with Peeled Paint Distress Stain, and then the edges were sponged with Forest Moss Distress Ink.  

While I’m thinking of it, another little trick I’ve been using lately instead of using the ink blending tool, is simply cutting small squares of Ranger Cut n’ Dry Stamp Pad Foam and using it by itself  for all my sponging.  This lets me get into small areas and manipulate the sponge much easier.

You’ll notice there are two shelves attached to the wider sides of the Chunky ATC.  They are made from some hobby trim, painted black and then highlighted with Antique Gold Rub ‘n Buff.  The knob on the top is a drawer pull I purchased on clearance from Michael’s.    The feet are some old beads from a necklace that were glued to the bottom.  To keep the beads from tearing away from the paper, I hammered a small flat-head nail down through the hole in the center for more support.

That’s all for me today.  Thanks for stopping by!
SHERRY SIGNATURE

Friday, August 24, 2012

Sassy Attitude


TGIF, eP friends! 
Micki here to share a little card project, which was a lot of fun creating.  Those of you that have followed my crafting adventures, know that I tend to get carried away when playing with new ‘toys’ or techniques.  Definitely not a bad thing, it’s just that I tend to have lots of “extras” that I try to incorporate into my cards or projects.  Now, that may not sound like a big deal to some but for me - who never really has a clear vision in her head when starting a project – it can be a major mojo killer J.
The one thing I knew for sure as I started was that I definitely wanted to use papers from My Mind’s Eye - Lost & Found 2 Breeze 6x6 paper pack (love the blue/greens), TCW’s - Mini Leaf Grid template and Maya Road’s Mini Triangle Banner.

And this is what I came up with:


Taking my color cue from MME’s Lost & Found 2 Breeze papers, I grabbed a #5 Manila Tag placed the Mini Leaf Grid on top and then applied Salty Ocean and Mowed Lawn Summer Seasonal Distress Ink with my Foam Blending Tool.  And because it is after all …. me….I had to trim the top of the tag to hide a boo-boo J.
Next I got out my - Squeezed Orange  & Fresh Lime Dylusions Ink Spray and spritzed the Mini Triangle Banners in Fresh Lime.  The trick is to really soak the canvas and making sure every part is soaked, I basically use the banners like a rag wiping up any excess ink.  After my fingers were really ( and I mean) really ink covered I remembered to use a sandwich baggie, which works just as well.


I did the same thing to apiece of old cotton lace (found in my quilting stash I forgot I had) with the - Squeezed Orange  Dylusions Ink Spray.  I had some left over paper flowers (made from old book pages), which got the same treatment as the cotton lace, only I lightened the color a bit by spritzing with water.   


Don’t laugh, but what I am really excited about is the Mini Triangle Bannerthat make PERFECT leaves!  Adding a Dot N’ Go – Memory Book Glue Dots to the center of the canvas banner and then squeezing the sides together helped create the leaf shape.


While that was drying, I stamped the leaves from Dylusions-Further Around the Edge onto the stenciled tag and colored each leaf with a colored pencil and blender pen.   The sentiment from Dylusions-Further Around the Edge was stamped directly onto MME’s Lost & Found 2 Breeze paper.  

I used 2 of the scalloped edge dies from Spellbinders Banner Basics One set, a Buttons Galore - Tangerine Tango button along with some Cantaloupe twine from The Twinery and I was really, really happy with the end result.


Lots of fun incorporating new and some old supplies and I hope this inspired you to get inky!  Be sure to stop by the eP shop – new product arriving daily!

Supplies Used:
Stamps:  Dylusions-Further Around the EdgeStudio 490 - A Form of Art InksDylusions Ink Spray - Squeezed Orange  & Fresh LimeDistress Ink Pad - Summer Seasonal,Tsukineko Memento - Rich Cocoa
PaperMy Mind’s Eye - Lost & Found 2 BreezeInkssentials Surfaces #5 Manila Tags 
EmbellishmentsButtons Galore - Tangerine TangoThe Twinery - CantaloupeMaya Road – Mini Triangle BannerAccessoriesThe Crafter’s Workshop 6x6 Template - Mini Leaf GridSpellbinders - Banner Basics OneScotch Foam Mounting TapeDot N’ Go – Memory Book Glue DotsScor-PalCutter Bee Scissors
 , Inkssentials Foam Blending Tool

Thursday, August 23, 2012

He loves me, he loves me not...

Hi!  Michelle here to show you a little project I created for you today. 
I'm not much of a card maker anymore but I still am completely and utterly in love with paper!
So how fitting for me to use My Mind's Eye Love Me paper. 
 
I also have this thing with flowers, daisies mostly because they are just so sweet.  I got out my scissors and paper and decided to build myself a flower from scratch. 
Okay, so it's not EXACTLY a daisy, but pretty close if you use your imagination.
Seriously, check out the petals!  Don't they look like tattered fabric?
I just HAD to add some "stitches" with my Copics. 
 
Each of the petals were created seperately on their own wire which gave them a nice little form once I was done.   I did use the Inkssentials Glue N' Seal which is some amazing stuff!  I had been using Mod Podge for the longest time until I started using this stuff.  It's great because it doesn't leave layers of glue all over my hands so papercrafting is so much more enjoyable.  I also added a second layer to my paper flower and a leaf with vintage book pages which just make me happy.  For the center I used some buttons that I airbrushed with my Copic markers.  Then I used a little Charcoal Twinery to keep the button stack together. 
 
For the little charm, I used more of the Love Me paper for the background and vintage book words.  Adhering them with Scor-Tape.
 
Hope you enjoyed my little project for today.  Be sure to come back tomorrow for another fun creation from another eP Designer. 

Wednesday, August 22, 2012

Pretty in Pink!


Hi everyone! It's my turn (Kim Teasdale) to show you my creation for today's post and boy, have I used a lot of wonderful goodies for this one :D When I first sat down to start this card I had the idea in mind to use bright colours because I adore bright, bold colours...but this card had a mind of it's own and voila...a shabby and distressed card instead ;)


I started with The Crafter's Workshop 6x6 Mini Mix and Match Hearts Template and then attacked it with some pink ink as well as some Ranger Distress Antique Linen and Vintage Photo inks onto My Mind's Eye Lost and Found Rosy paper to shabby it up a bit :) This turned out to be the starting point for my card :)

What goes better with a shabby style then, pearls, buttons, twine and seam binding? Maya Rd Canvas Butterflies and Pearl Trinket Pins of course! I did dress up my canvas butterfly with my Adirondack Acrylic Paint Dabber in Shell Pink. It's such a pretty shade and I couldn't resist!

I then finished off my card with a coordinating sentiment stamped with Memento Rich Cocoa, half pearl embellishments and loads of distressed edges. This isn't normally the style of card that I create but once in a while like to step out of my box and try something new :D I hope that you like it and thanks for coming by today! Oh, before I forget, did you notice that Kim put on a sale on Market St. Stamps yesterday? No? Well then, let me tell you a little bit about it :D

Yesterday we released four new Market St. Stamps setsPurchase any regularly priced set and take 25% off of one of the Market Street Stamps background sets, regularly priced at $12.50.  What a great way to grab a combo set for less!  When checking out be sure to enter code MSS0812 to receive your discount.  This sale will run from 8/21/12 through 8/25/12.

Card Recipe:

Stamps: There She Goes - Side by Side
Paper: Gina K, Suede, My Mind's Eye Lost and Found Rosy, K&Co
Ink: Memento Rich Cocoa, Ranger Distress Antique Linen and Vintage Photo, Pink Pirouette
Accessories: Sewing Machine, Adirondack Acrylic Paint Dabber in Shell Pink, Maya Rd. Canvas Butterflies, Maya Rd Trinket Pins in Vintage Pearl,The Crafter's Workshop 6x6 Mini Mix and Match Hearts Template , Button, Twine, Seam Binding, Spellbinders Border Die, Cuttlebug, Tombow Multi, Corner Chomper, Sponge Daubers, Distress Tool

Tuesday, August 21, 2012

Product Spotlight - Market Street Stamps


I love all kinds of crafting and especially like to try new techniques, but in my heart of hearts I'm a stamper.  I adore the art of card making and am always excited to try out new stamps so I was pleased to recently be introduced to Market Street Stamps and their eclectic (I think you know how I feel about anything eclectic) design offering. 

Market Street Stamps are focused are delivering great design, high quality crafting products to their customers and having used their products I can testify that they do deliver upon their commitment.

The one small difference about Market Street Stamps?  Their peach tint! Why are they peach-tinted? Market Street uses trade-quality photopolymer, which means they only use substrate that professional printers use. And the peach? Well, that’s added by our manufacturer so you’ll always know when you have the best clear stamps on the market today.  And it's a fun color, isn't it?

The second thing people remark is how well Market Street Stamps stamp! The softer polymer allows the impression a bit of cushion, just like a wood-mounted red rubber stamp, which provides you with a cleaner stamped image….every time. All of the stamps are self-cling and if they attract any lint or dust, simply rinsing them through lukewarm water will allow them to regain their cling – just like new!

Today we released four new sets along with a sale!  Purchase any regularly priced set and take 25% off of one of the Market Street Stamps background sets, regularly priced at $12.50.  What a great way to grab a combo set for less!  When checking out be sure to enter code MSS0812 to receive your discount.  This sale will run from 8/21/12 through 8/25/12.

On today's card I used the new Growth set (I'm a sucka for nature inspired images) and paired the set with paper from Authentique (yes, that's from their Enchanted paper line but hey, it can work for fall cards too!), and Kiwi Fruit buttons from Buttons Galore.  My image was colored with Copics and I added a tiny bit of highlight with a white gel pen.

Enjoy today's card and go get shopping and take advantage of that sale!! :-)

Monday, August 20, 2012

Vintage Welcome!

Good morning eP friends! It's my turn (Julie) to post some fresh inspiration for you and let me just say how much FUN I had with this card!  It's sooooo not my usual style but it's really fun to step outside your comfy zone sometimes right?!


I had a bit of fun using a beautiful stencil from Crafter's Workshop, this one is Mini Flower Piercing.  I used the stencil on a piece of kraft cardstock and used 2 different Distress inks.  I started with Old Paper in the center and then gradually changed to Picked Raspberry (from the Summer Seasonal set). 

Once I had that I played around with some fun Envelope Tags from Graphic 45. Since they are so vintage and, well . . .eclectic (LOL!) I went with a vintage-y theme.  During a recent clean-out I came across a bag of vintage photographs bought from an antique store several years ago.  There were several pictures of this adorable baby (isn't it sad that someone lost their family's photos?!) so I die cut the face, added a wash of pink with the Picked Raspberry ink and layered it on to a flattened bottle cap and rosette made with paper from Authentique's Lively 6x6 pad.


What a fun baby card for an antique-loving friend!  Thanks for checking out eP today, I've linked up the products used below. Have a great day!


Saturday, August 18, 2012

Sending a Cuppa Love

Well, hello, everyone!  Broni here, and I'm your host today!  I've got a neat little card to show you, so let's get to it!

I was playing around with my #5 manila tags the other day and decided to use Sherry's Wrinkle-Free Distress technique with my new Ranger Distress Summer 2012 colors.  Love that "picked raspberry"!

Well, as I was drying the tag after dipping it into the ink, I decided I wanted to have some drips running down the tag.  I'm not a very patient artist, so to get the drips to "run faster" I used my Copic airbrush system (with no Copic inserted) to speed them up.  It worked perfectly!  And I soaked up the extra ink onto a white cardstock tag as well.  Just look at the difference of the colors on the manila versus the white tag.  Pretty cool, huh?


So how did I incorporate the tag onto my card?  By using it as the backdrop for my coffee cup and sentiment from the Daily Grind stamp set from Market Street Stamps.

Here it is:


I also used my Dylusions Dotted Flowers stencil to add some dots to the patterned paper from the Graphic 45 A Lady's Diary collection.  And let's not forget that yummy twine from the Twinery that topped it all off!

Here's a side view closeup of the dimension of the layers.  Can you tell I love my foam mounting tape?


That's all I have for you today!  Check back in on Monday for a new post from Julie!


Friday, August 17, 2012

Best Friends


Hi, everyone! Barbara here with a CAS card for you today. First of all, let me echo Kim when I say how fabulous all the eTeam projects were on re-launch day! OMGoodness, what inspiration! I, for one, am really looking forward to seeing what these talented ladies come up with in the future--how about you? And, I want to thank Kim for including me on this amazing team as she starts this exciting journey.

So, on to my card. I'm using this  gorgeous Maya Road Vintage Linen Burlap Rose that doesn't need much of a supporting cast to make a great card. I love a black/white/Kraft/pop-of-color palette so that's what I went with. I didn't want the flower to get lost in the crowd, so I simply die cut the frame from neutral patterned paper, popped it up on Scotch Foam Mounting Tape, added some twine and die cut leaves, and stamped the sentiment. Super simple but that flower makes a BIG impact and steals the show, don’t you think? OK, I'm done with the show biz references now :)

And that's it for me today--thanks so much for stopping by! Be sure to check back tomorrow to see what the uber talented Broni has for us. I can't wait to see it--it's sure to amaze!


Thursday, August 16, 2012

All Dolled Up

Morning bloggers!  Kim here to share a card and a BIG word of thanks!  Yesterday's re-launch was so much fun!  I love the blog hop, all of the wonderful comments from friends and customers, and the excitement of seeing the new site live!  A wonderful time and I am so thankful for my husband, children, design team, and customers who came out to hop and shop!  We're looking forward to more amazing days in the store with new products and new adventures so be sure to check back to the blog often, like us on Facebook, and sign up to receive our newsletter.

I also wanted to thank a few vendors that I worked with, who helped to make this launch possible. 

eCity Commerce - eCity went above and beyond in helping me with the new web site.  To turn around a new site in three weeks was hugely challenging and eCity rocked!!  I can't recommend them enough!

Take Heart - Danielle is a wonderful designer (she is primarily a blog designer) and did a tremendous job on the blog, which was then translated in to the web design.  Danielle also designed the new logo and other company related items.

The eTeam - Seriously, could they be any more fantastic!  Such beautiful artwork and they were all incredibly supportive leading up to the launch.  It's a real treat to work and craft with these talented women.

My husband, who has been amazingly supportive during this last month.  Helping with dinner when I had been sitting at the computer for 12+ hours, watching the boys, encouraging me when I was feeling frazzled, and he happens to be the best shipping guy around.

And my precious boys who helped me unpack and stock shelves, pack orders, and tell me things like "good job" when orders began to arrive.  That they can offer support at their young age is so touching.  Being able to work from home, and be with my boys when they're little, is a huge blessing and I'm grateful that I have this opportunity to make that happen with eP.

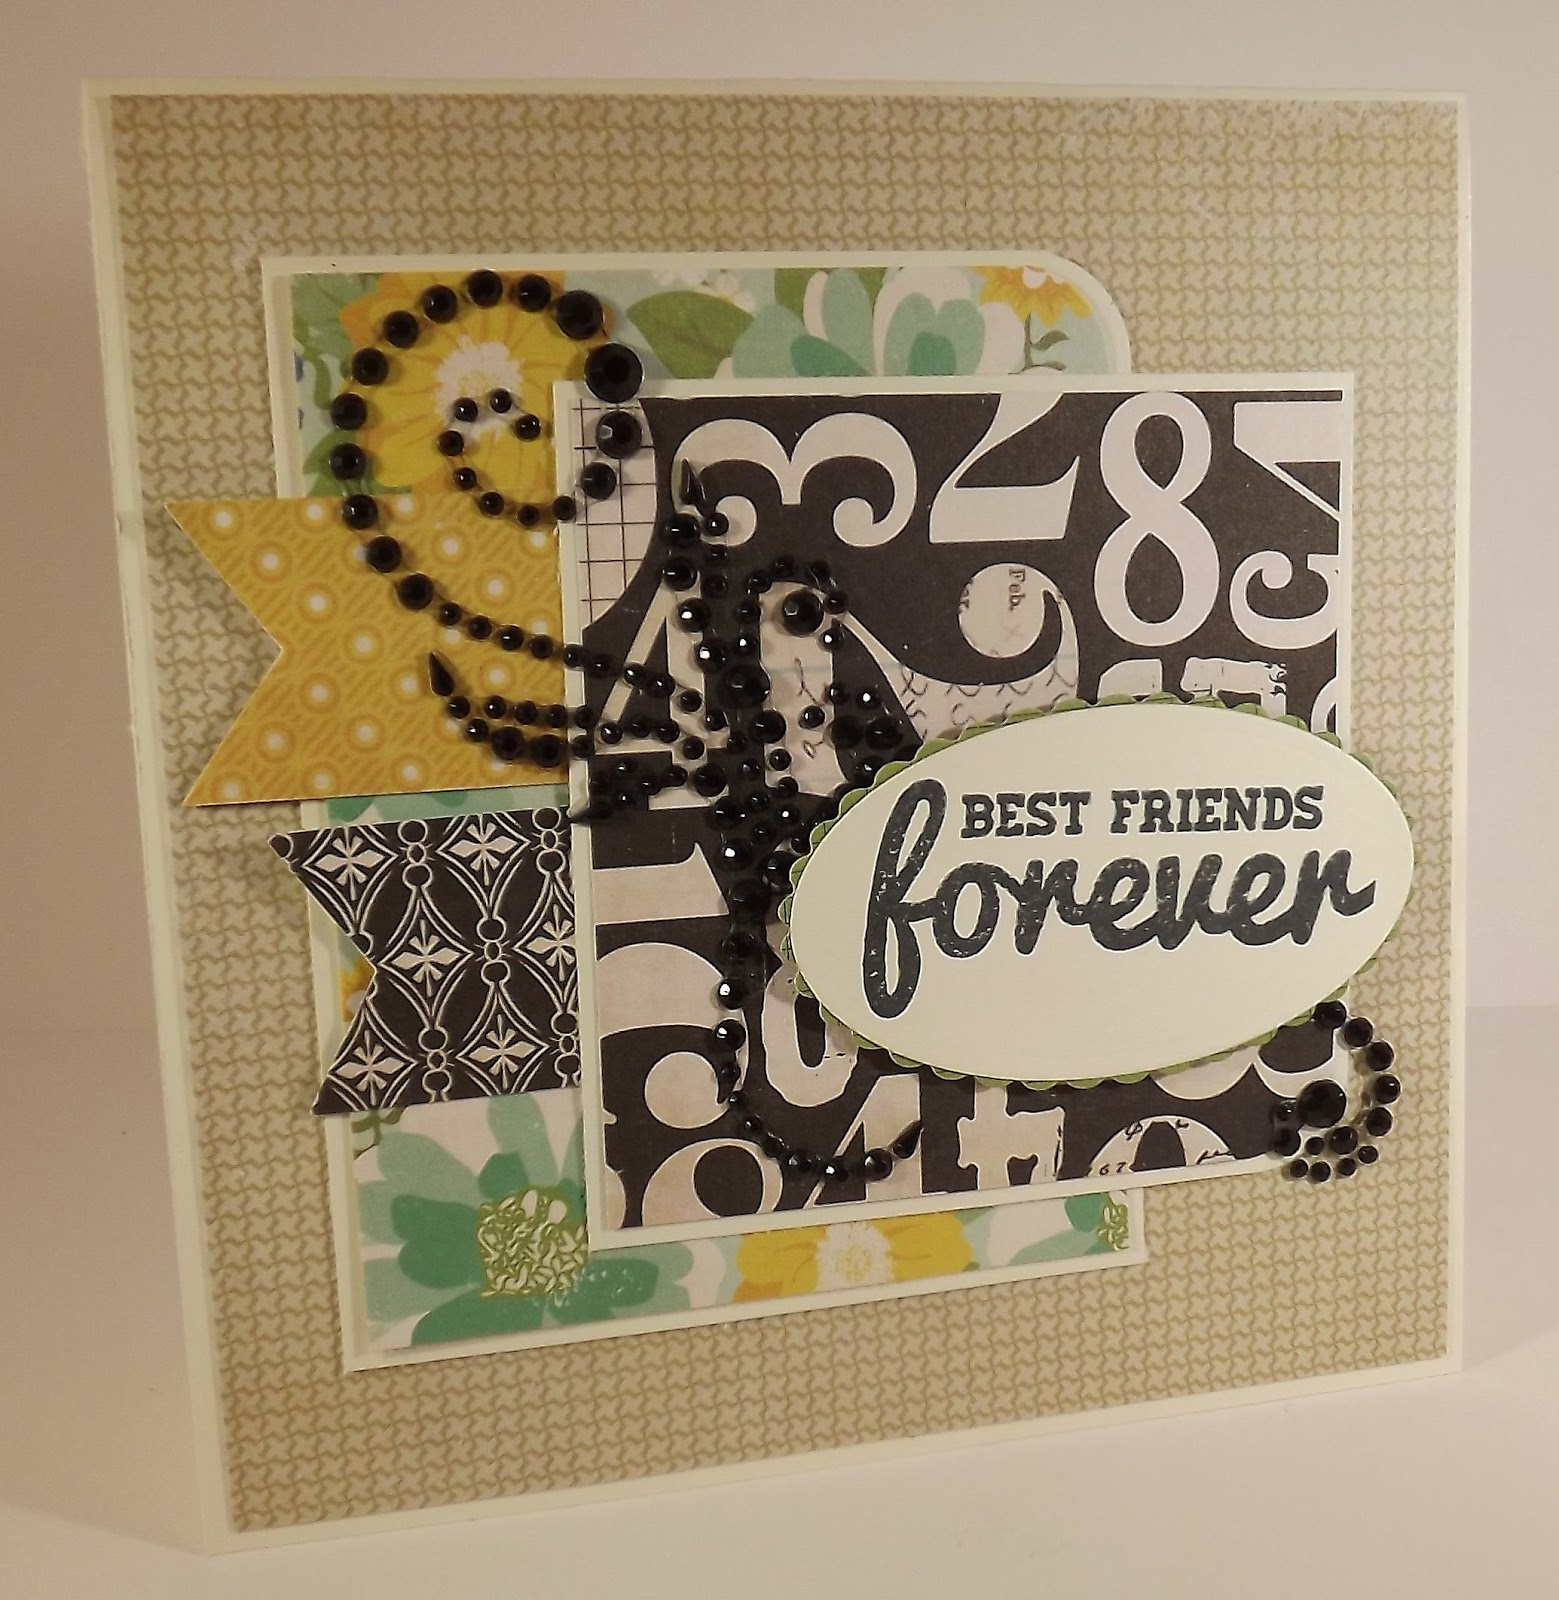
OK..so today's card...I confess that I haven't been crafting much yet it's my turn to post on the blog...hummmm (BTW, we're going to be posting every day on the blog so sign up to become a follower!!)....so I'm sharing an older DT project that features this beautiful paper from Authentique.  This is from the Lively 6x6 paper pad.  Love the colors in this pad...oh heck, I love everything from Authentique, they are definitely one of my favorite paper companies.  I also used Pink Sorbet twine for the cord on the blow dryer and KasierCraft rhinestones as a little accent on either side of the sentiment.  And the images are colored with Copics (did you see our new Copic marker pricing?  But five, get one...FREE...this means that each marker is only $5.83 each!)  And the stamps...I confess that I'm not carrying this particular set (but I'll get it if you want it!) but I have a bunch of other sets from Sweet Stamp Shop....check 'em out here!

Enjoy today's card...check back tomorrow for more and THANK YOU all so much for your ongoing patronage!!


Wednesday, August 15, 2012

Welcome to the new eP!!

Wow!!  I can't believe this day has finally arrived!  The past few weeks have been a whirlwind of activity, from placing new orders, stocking shelves, creating a new web site, and assembling an amazing design team, and we're so excited to share all of the changes with you!  This is a packed newsletter so read through everything carefully and then come visit the new store and have a look around!

Let's start with a few specials that we're holding to celebrate the grand re-opening!


  • The first 25 people who place orders will receive a special 12x12 paper sampler pack from Carta Bella.  These are beautiful, heavy weight papers that will make a wonderful addition to your paper collection.
  • Order a set of the Summer Seasonal Distress Inks and receive all three reinkers for FREE!
  • The following products have been marked down 25%
  • The Grand Prize!!!  Tonight at midnight (EST) one shopper will be randomly selected to receive their entire order...for FREE!!
I'm excited to share a few special changes in the store; flat-rate shipping and new Copic marker pricing.

You can read our full shipping policy here but the short story is that we're offering flat-rate shipping to US, Canada, and international locations.  But that's not all...Once you hit a certain dollar amount, your order will ship for FREE!  As a customer this is my preferred shipping method and we're thrilled to be able to pass on this new policy to you.

We've also made some changes to our Copic marker pricing; you can read all about those changes on our web site as this offer is just too good to advertise.

Also note that we've made a few newly released items available for pre-order, specifically Graphic 45 paper and stamps, and Spellbinders.  We expect these shipments to arrive shortly and will get these products out to you asap.

Lastly, don't forget to like us on Facebook as this will be an area where I'll share quick news, such as inventory updates, new product arrivals, or just a few behind the scenes sneak peeks.  Also, sign up on our home page to receive our weekly email newsletters.

And now on to the rest of the show!  Please visit the blogs of the new eP below...you're going to love what you see!

eclectic Paperie Blog - You're Here!!


Saturday, August 4, 2012

What's Perking

I had some time to play with some new products a few night's ago.  One of those products is stencils. Many years ago I used to use the metal stencils and a stipple brush to create my name image (who remembers those?). However, The Crafter's Workshop stencils are much larger (come in a variety of sizess) and are plastic. Since this is a new product for me, I wanted to get my hands on a few and spend an evening just playing!

I grabbed my Distress Inks (new Summer colors), paint daubers, Glimmer Mist (Dylusions sprays would work as well), Distress Stains, a bunch of cardstock, and my blending tool. (The kids even decided to play with me...love that!) Then we got to work trying out different products to see what worked the best. The conclusion...everything works with stencils! My preference ended up being the Distress Inks because the color was rich and I could mix colors (that sample coming up next week). The sprays worked great as well, either on their own or as an accent over the Distress Inks. The stains blend a little bit but that can create a fun vintage look. I also really liked the paint daubers and can see using this type of method on altered projects.

I decided to use my sample as designer paper on a card, 'cause cards are my favorite go-to craft! I paired my stenciled paper with designer paper from Authentique (ohh...perhaps a product sneak peek), and stamps from Hero Arts, from the What's Perking set.

I had a great time using stencils and can see bringing them into my studio for use on a regular basis! eP has a great selection of stencils, paints, mists, and inks available...why not check out some of these great products this weekend!

Enjoy!

Blending Tool

Thursday, August 2, 2012

Hello eP Nation!!

Sending a Warm Hello to eP's Customers

Welcome to today’s big announcement!  I am so excited to introduce myself as the new owner of eclectic Paperie!!  I can hardly believe that this day, a dream of mine for many years, has become a reality and that the dream is coming true not only through Daisy Sparks but eP!  eclectic Paperie has been my preferred online vendor for many years and  Daisy and the eTeam have always been a source of crafting inspiration and support.  It is truly a wonderful and amazing honor to be able to serve you, eP’s loyal customers.

Today, I wanted to take a few minutes to tell you a little bit about myself and to provide you with some details about what's coming up in the next few weeks.

To begin, the store is currently open and functioning, although there may be a slight delay in shipping as I wait to receive the product from CA and get the shelves stocked.  Please know that I view each order as important and do not want to delay shipping any longer than necessary.  Orders will be fulfilled as quickly as possible and I will be in contact in case there are any unexpected delays.  There will also be a few ongoing changes to the web site, updating contact information, the about us section, etc. that you'll see happen over the next few days.

Next, let me tell you a little bit about who I am and my background.  My name is Kim Schofield and I am a SAHM living in New England with my husband, our two children, a cat, and a bunch of chickens (yes…I have chickens!).  My background is in high-tech marketing communications and event management and for the past 10 years I’ve run a consulting firm from my home.  However, my passion is paper crafting and for many years I dreamed of being able to merge my love of all things crafty with my marketing background.  Over the years, I’ve been blessed with the opportunity to be on a number of design teams, have had my work published in a few magazines, became an instructor at my local scrapbook store, and most importantly, forged amazing friendships.  I truly love this industry, the people and the products, and am so looking forward to working with you!

Lastly, we’re planning a fabulous, craft-filled re-launch on August 15, which will feature our new design team, new look, and new product lines!  Mark your calendars and be sure to check out the eP blog, http://eclecticpaperie.blogspot.com, on the morning of August 15!

Before we get to the excitement of the re-launch, I want to hear from you!  I’ve created a very short survey to get an idea of what products, styles, and techniques you love.  You can view the survey here:

http://www.surveymonkey.com/s/PTNB3PD

It should take you less than five minutes to complete the survey.  Thank you so much, I truly value your feedback and appreciate that you would take the time to share your thoughts and opinions.

If you have any questions please feel free to contact me at info@eclecticpaperie.com.  You can stop by my blog any time as well http://paperiepetals.blogspot.com.