Photobucket Photobucket Photobucket Photobucket Photobucket Photobucket
Showing posts with label Stampington n Company stamps. Show all posts

Saturday, February 1, 2014

Practice

Hi all...Kim here, running late with my blog post once again!  So happy that our DT Manager, Bonnie Irvine, sends me early morning emails that contain gentle reminders of my memory lapse!  I'd be lost without her!  Thanks, Bonnie!  So on to today's project...let's start with the quote (written in my most awful handwriting...Donna Downey, I am not!) 

Practice is the hardest part of learning...

It's true, right?  It's not so hard once we've mastered a particular skill but ongoing practice takes a commitment.  Can I just tell you how many times I want to give up on trying to draw faces?  Ugh...I'm seriously horrible at drawing...like I can't even draw a very good stick figure!  However, I'm continuing to push past those annoying little "just give up" voices in my head and am moving forward with more practice and working to find what style works for me.  This journal project started in the midst of a big snowstorm, which, in my opinion, is the perfect time to create art!

I started by sketching my face with a "magic" pencil...and really, I'm going to get these for the store...I also used a reference photo that I found in a face drawing book I picked up.
I don't feel a real need for super perfect details on my face drawings and actually would probably like them more if they were more "sketchy," if that makes sense.  But my strong left brained ways has a hard time letting so of being precise...I'm working on that...hey, I'm publicly sharing my kind of crooked face drawing...that's a start! LOL!  (I do like the nose on this gal...)

I then added color to the face using Gelatos (links at the end of this post) and seriously...this is my most favorite way to use Gelatos.  Just scribble some color onto your project and using a watercolor brush to blend...LOVE!
And yes, I love how the water brush picks up and moves the black lines from the pencil...instant shading!  Since I wasn't sure what to do with the hair, I left that and added color to the background of both pages by applying acrylic paints, layering a stencil over the paint, and removing paint with a baby wipe.  (Thank you, Dina Wakley!)
Don't mind the lump on her neck...I'll fix that in a minute!  Once the paint was on the background, I remembered the Donna Downey class I had taken, where we layered flowers all over the woman's head so I thought I'd try my hand at using a stencil to create the same look.  Here's what I came up with...
This was a lot easier than hand drawing leaves and flowers.  I used a sponge to "pounce" the paint through the stencil...just like you would on a wall.  Then I added some flowers...
For the flowers, I traced (using pencil) through the stencil and then added the paint over the pencil lines.  Once the flowers were added, I needed to fill in those empty spots so I added lots of little dots and squiggles (that's a technical term) to fill everything out.
I also beefed up the eyelashes a bit on my model and then I stamped this great quote from Dina Wakley, "create with abandon, just put the brush to the paper and see what happens...." over my girl's fixed neck.  Lastly, I used India ink to hand write the practice quote...not sure I'd do that again as the ink really spreads quickly and I had a hard time controlling the ink.  I prefer either typewritten or sticker letters but it was fun to practice with the ink.

And there you have my snowy day next face project...I hope you enjoy and you find some time today to create with abandon!!

Gelatos (Neutrals and 50's Diner)


Wednesday, August 14, 2013

Shrink Plastic Distress Stain Splats!


Hi, Lucy here again with a bit of an experiment to see if it was possible to do Distress Stain splats on shrink plastic. I've used this gorgeous Dina Wakley Silhouette Script Woman stamp but I'm starting with my embellishments, the shrink plastic circles, to allow for drying time.

I wouldn't normally use a water-based medium on shrink plastic so I used the rough side of a piece of translucent shrink plastic and evenly applied gesso using cut n dry foam and let it dry naturally, to provide a key on which to apply the Distress Stains. As they have dabber tops, it is great fun to zap them down hard on a surface so you get a splatter effect. I used vibrant colours: Tumbled Glass, Mustard Seed, Picked Raspberry, Wild Honey, and Fired Brick. Squeezed Lemonade would be a good one if you have that colour. I let them run a tiny bit but not too much and I spaced them out to allow some white space as they will be closer together when you shrink them. I put this aside to dry and did the same thing on a piece of glossy cardstock, but with the colours a little closer. I then stamped the Dina Wakley stamp in Jet Black StazOn on the cardstock.


Choose your size of canvas such as a 6 x 6 here (I just used one I already had in my stash but cut your cardstock to fit the canvas you have used). Cover it with Tim Holtz Tissue Wrap using gel medium and apply gesso with cut n dry foam. Using TCW Reversed Chicken Wire Stencil apply Viva Ferro in Blackberry to the corners that will show under your images as shown here.

Returning to your shrink plastic, die cut circles in different sizes using Tim Holtz sized circles. You will be able to get plenty from the one sheet so you might like to put some into a little bag for other projects, or perhaps cut other shapes. Ink up the Script Woman again and stamp the edges of the circles with the script part of the stamp for some extra interest. Dab the circles with Versamark and dip in Clear Embossing Powder, and then shrink with a heat tool. Edge with a Black Sharpie.


Finally, assemble the canvas by mounting your coloured cardstock panel onto black cardstock to create a border and pop it onto the canvas so that the stencilling shows around the edges. Then arrange your shrink plastic circles in a pleasing fashion - they will be really glossy now!

Friday, July 12, 2013

Lets get Messy with a Mixed Media layout . . .

 Hi everyone, Tracy here today with a Mixed Media layout using some yummy goodness from the eP Shop along with a little of this and a bit of that.

Soooo, hands up if you looove to get all messy!

Yeah, I can see you all and guess what?

Eclectic Paperie has a challenge going on right now hosted by the lovely Mary Ann and the theme she has chosen is . . .
" Bringing it on "
Yep, Mary Ann is challenging all you mixed media fans to bring it to a layout, check it out HERE!

A list of materials with links can be found at the end of this post.

I started with a sheet of 12x12 Tim Holtz Kraft-Core and gave it a light sand before applying a
white Pan Pastel to give a more muted look to the background . . .
. . . see the difference it makes.
 Time to crack open the big guns -
Tim Holtz Distress Stains and Paints
  just splat and splodge, then spritz with water to get some nice runs...
 . . . once I started I couldn`t stop . . .
splidge, splodge, splitter, splatter then spritz and spray with Ranger perfect pearl Mists, followed by some
 Tim Holtz Remnant rubs 
and
that beautiful Script Heart stamp by Dina Wakley { looove!}
Still I wasn`t finished yet . . . out came my sewing machine for some wonky tonky stitches, roughed up all the edges and added embossing powder for more texture.
Time to pop the background to one side and layer up a focal point!
I used yummy yummy stash . . .the tissue paper that comes all wrapped around my goodies from the
eP Store { thank you Kim xx}
along with -
Tim Holtz Remnant Rub ons, Tim Holtz dies,
Look how I popped the rub ons inside the die cut windows and see the shine... that`s more embossing powder,
some bits and bobs from
7 Gypsies Travel paper pack ... swooooon moment ... yes Kim has products from7 Gypsies in the store!
Along with some odds and ends I came across in my stash.
 Here`s a closer look at the remnant rubs on the materials and the tissue paper ... love the eye rub on.
It`s so easy to get this look-
I rooted around my stash for pink, black and neutral tones, made up into layer after layer until I was happy with how it all looked, then I fixed it all together with staples and a hot glue gun.
Fixed it onto the background, added a little Walnut Stain Distress ink with a blending tool all around the edges to age it even more.
 Finished and my hands could tell you a story seeing as they are now all ink and paint splattered!

A shout out again to Mary Ann for such a great challenge and I hope you enjoyed my post.
It would be great to see you all join in . . .go on, go get MESSY!!!
Till next time
Tracy
xoxox
Materials from the eP Store, just click on the links -

Pan Pastels
Tim Holtz Distress Stains -Vintage Photo, Walnut Stain
Tim Holtz Distress Paint - Picket Fence, Spun Sugar, Picked Raspberry, Walnut Stain
Tim Holtz Distress Ink Pads - Black Soot, Walnut Stain
Tim Holtz Distress Re- Inker - Tattered Rose
Inkssentials Blending Tool
Ranger Perfect Pearl Mist - Perfect Pearl
Tim Holtz Remnant Rubs - Words, Elements
Tim Holtz Bigz Die - Picture Wheel
Tim Holtz Alterations Die - Torn Notebook
Stampington & Company - Script Heart Stamp
7 Gypsies - Gypsy Travels Paperpack
Kim also has Tim Holtz  Kraft Core in stock in 6x6 paper pad here.

Monday, June 10, 2013

Own Your Style


It's Bonnie Irvine here today to share a mixed media canvas featuring one of the Prima Mixed Media Doll stamps by Julie Nutting. I am absolutely smitten with these stamps. They are so versatile allowing me to design whatever Project Runway outfit I wish plus the quality of the stamp gives such a clear image. They really are awesome.

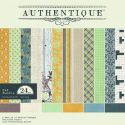
The project started with a plain white 8 x 10" canvas to which I added torn papers from the Authentique Renew Collection. These were collaged onto the background using gel medium, overlapping, leaving some white spaces, and making full use of the double sided paper. White gesso was applied with a wet brush to blend the papers and knock back some of the patterns. Further blending and colour was added with Blueberry, Cotton Candy, and Lime gelatos spread sometimes with a dry finger and other times with a wet finger depending upon the intensity of colour I wanted.


Studio 490 Black Embossing paste was applied through TCW's Mini Punchinella stencil as well as their Reverse Chickenwire stencil and allowed to dry thoroughly. Pieces of doily were fussy cut and gel mediumed to the upper right and lower left corners to add shots of white and give the eye places to rest. The stitching stamp from Tim Holtz's Seamless Experience set was added randomly with turquoise ink. Black and white washi tape was added in two lengths to give this diva a platform on which to stand and another to bring the pattern to the right side of the canvas. A script stamp from Tim Holtz's Urban Grunge set was rolled onto the background using Ranger Archival black ink.


The lovely and stylish Diva was stamped a number of times: once in her entirety on text background from Authentique's Strong Collection;, her bow on Renew dotted paper; her dress on Renew's distressed yellow paper; her crown on a yellow striped scrap from the Strong Collection. All pieces were shaded and highlighted with Prismacolor pencils before being fussy cut and assembled on the complete stamped image. Diva's crown was given a coat of Icicle Stickles for sparkle factor. Because she didn't stand out as much as I wanted against the busy background, she was matted in black cardstock, fussy cut and then shaded around with a charcoal pencil after she was adhered to the canvas.


To complete the project, some stronger black elements were needed. Three half circles were punched from black cardstock and dotted with white pen. A Bazzill chipboard arrow was sprayed with Dylusions Black Marble ink and doodled with the white pen. A butterfly was punched and given a button body before being adhered next to the Idea-ology Alpha Parts sentiment. To give the sentiment more visual weight, thin strips of black cardstock were adhered below each word. Those four elements gave me the visual triangle (the sentiment and butterfly read as one) that I wanted to move the eye around the canvas and created great contrast with the background. They also frame our lovely Diva making sure that she is the center of attention.

Thanks for visiting and for reading this (no surprise) lengthy post. We love your visits and your comments. I hope you have found some inspiration here today. If you have been sitting on the fence about these doll stamps, I can tell you that they are so fun and of exceptional quality. Love 'em all!

Hope you find (make) time to play. You can connect to the eclectic Paperie store to view some of the products used on this piece by clicking on the thumbnails below.

Thanks,
Bonnie


Thursday, March 7, 2013

Get Altered Challenge - Altered Fabric

Hi Everyone and welcome to another Get Altered with eclectic Paperie challenge.   The Get Altered Challenge is held on the first Thursday of each month and each challenge is an opportunity for you to be inspired by one of our eTeam’s creations, and to share your work, and be entered into our challenge prize drawing!
This week it's Micki's turn to host another fun and exciting challenge. After much thought, I decided on a FABRIC themed challenge.   I challenge you to use fabric in your project.  


I came up with the idea to incorporate fabric into my project because I've had this wonderful hand embroidered pillow case which had a huge rip in the middle of the case.  Instead I ended up using the fabric as my canvas.  And Ladies (and Gents), let me just gush right now about how awesome the fabric feels covered with paint.  Totally LOVE it.  It feels like leather.  So Ladies, grab your paints and some old material and let's play!

The case is cotton and over time the material has gotten really thin.  The majority of the pillow case is white cotton with the embroidery along the edges.  Because this is the first time I'm doing mixed media on fabric I decided to play it safe and use the plain white part of the pillow.  But trust me, I'll definitely will use the embroidered part ..... just haven't quite figured out how or what....yet.

I decided on a basic heart shape, which I lightly sketched onto the fabric with a regular pencil, which I then cut out.  I had kept the material folded so that when I cut out my shape I had two, one front and one for the back. 

Using Helmar 450 Quick Dry Adhesive, I applied a narrow strip of glue around the edge of the fabric heart. I applied the glue around 3/4 of the heart, leaving the rest free of glue for the opening for the fiberfill stuffing.
You could use a brush to smooth out the glue, however, I completely forgot to that in my rush to start playing with paint.  Next I aligned the two heart pieces and smooshed the edges together.  I let the heart dry overnight.
Once dry, I cut a smaller heart out of card stock and inserted it into the heart through the opening.  The card stock helped to prevent any gesso from seeping through and "gluing" the front and back pieces together.

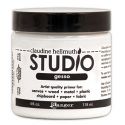
Next I applied two coats of Claudine Hellmuth Gesso  to both sides of the heart, making sure to let each layer dry before adding another.  One layer would have been enough, but because the fabric was really thin, I wanted to play it safe which is why I added a second coat of gesso.
Then came the fun part.  Using a pencil, I sketched a quick body outline and then worked on the background adding paints, stamps and stencils. 


I had just gotten my eP package of the new Stampington & Company Circle stamp and the Earnest Cling Mount stamp.  Love these wonderful stamps.  I also added Unity's She Art Print stamp and Graffiti stamp.  Stamping randomly on both sides of the heart with Jet Black StazOn ink. 
I used the smaller stars from Dylusions Starry Starry Night stencil, using Adirondack Purple Twilight Paint Dabber paint. Once I was happy with my background, I finished my girl using Adirondack paints.  I added shading by using my finger, dipped in water and Faber-Castell gelatos.
 In the picture above, you can see that the painted fabric lacked any sheen (but boy did it feel heavenly to the touch) and because I wanted to seal everything, I added a nice coat of Claudine Hellmuth Multi Medium to both sides.
Once that was dry, it was time to stuff my little heart.  NOTE, remember to take out the card stock :-)
After the heart was stuffed with fiberfill, I added  Helmar 450 Quick Dry Adhesive to the opening and used office binders to hold the edge together until dry.  I added the wax paper to prevent any glue that seeps out from sticking to the binders.


The sentiment was computer generated, printed onto regular copy paper and added with  Claudine Hellmuth Multi Medium.   In the end I decided to add some wire and use this little happy heart as a door hanging.
But I could totally see a basket full of these little mixed media hearts.  I totally love using fabric as my canvas.

The Get Altered Challenge is about exploring your creative journey, about stepping outside of your comfort zone, experimenting with new products, and creating altered and mixed media art.  Share a unique card, a scrapbook or journal page, a canvas, or any other project where you’ve used paint, ink, paper, and embellishments.  We want to see your work and hear about your inspiration!  
All of those who play along with our challenge will be entered into a prize drawing for a $15.00 gift certificate to the eclectic Paperie store.
So grab your supplies and play along!  Here are a few things to keep in mind for this challenge…
  • You do not have to use products sold in the eP store…but we do love it when you do!
  • Share a direct link to your creation, not just your blog, using the Linky Tools feature at the end of this post.  If, for any reason, the Linky Tools doesn’t cooperate, please add a link in the Comments section of the blog.
  • When uploading to any online galleries, please use any of the following keywords; eP, eclectic Paperie or Get Altered Challenge.  Link your creations to the eP blog.
  • If you’d like to be considered as one of our featured projects and be entered into our prize drawing, please be sure to add your link no later than 6:00 pm EST on Thursday, March 20th.  
We can't wait to see what you create!


Supplies Used: