Photobucket Photobucket Photobucket Photobucket Photobucket Photobucket
Showing posts with label Tim Holtz Rub ons. Show all posts

Monday, September 16, 2013

Read

I (Mary-Ann, in case you weren't sure!) have always believed that reading to my boy is very important.    Since my son was young, we would cuddle in his bed, he would twirl my hair and I would read.  Now that he is 8, he is reading to me.  I must admit that I miss the hair twirling!  Reading is definitely his strength.  (You should see homework time that involves math!)  Except this summer, time has snuck by, summer homework is not complete, and getting him to read in our time crunch is like pulling teeth.  So, on a long trip to Maine last weekend, we rented a couple audio books from the local library and voila, the problem is solved!  He was bored in the car, so listening and flipping pages filled the time gap! (You know if you have ever had an 8 yr old, this was still a struggle.)

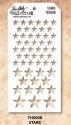
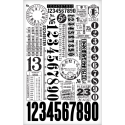
For this layout, I knew which photo I wanted and needed a background color to anchor my "302" 6x6 papers from Farmhouse Paper Company.  I layered my papers, metals, tags, stickers, chipboards until I developed a collage that I liked.  Once my papers were glued down, I decided to add  scattered stars using the Stars layering Stencil by Tim Holtz.  This stencil allowed my to place different size stars exactly where I wanted them.  I threw on some yellow punched stars I had on hand and some sequins.  I stapled the sequins on to help bring in more metal for balance.  They were attached with Tim's Tiny Attacher and a long reach stapler from Staples.  I added stitching, foam tape behind items that needed dimension and a title cut from my Silhouette.  


Thank you for taking a peek at my layout.  Hope you are inspired to fill some more pages of your albums!


Here are the items from the shop here at Eclectic Paperie!


Thursday, May 30, 2013

Father's Day

Hi eP fans, it's Mary-Ann here with you today to share some of my very simple, fast Father's day cards. I need to make several cards for this holiday and I was determined after being late for Mother's Day, that I would NOT let that happen again. (shhhh, I still have two mother's day cards to be mailed!)

I LOVED the Strong collection from Authentique.  Here I used the 6x6 paper pad and embellishments. The papers in this collection allowed me to create three different cards that look like they are three different lines but they still all coordinate beautifully.


For the first card,  I layered several patterned papers and a couple Stamp Blocks and Circles.  I inked all my edges with Distress Ink Pad - Vintage Photo.  This helps soften the edges.  I added a FarmHouse Paper Company key and May Arts ribbon.  See that great big delicious brown button?  That gem came from an antique store in Maine.  I just love how rich it is.  Of course, I added some Scotch Foam Mounting Tape behind some elements to bring dimension to my card.


For my second card, I layered some of the beautiful blue papers.  Again, very simple but the layering makes it look richer and more detailed.  I added a couple tags and twine that I had on hand.   I again used foam tape for added volume. 


I needed this tag to add to my dad's present.  I used an Inkssentials Surface #5 Black tag an covered it with the newsprint paper.  Added a strip of the GORGEOUS woodgrain.  I added punched circles that but thought it needed something more.  I dug out my Idea-ology - Tim Holtz - Remnant Rubs chopped them up and added small pieces in different locations that helped embellish my tag, still keeping it simple.   Adding ribbon, Black Shine twine from The Twinery and foam tape finished off my tag.


With just a simple, gorgeous pad of paper, I made three completely different cards.  I hope you are inspired to start your cards a bit early.


Tuesday, May 14, 2013

Chalkboard Makeover with Simple Stories

 Hello everyone, it`s Tracy here today
{ waving madly at you all }
with a quick chalkboard makeover using -
Aha, are you liking my materials list,hmmmm . . .
 I started with a quick coat of white Acrylic paint and being the impatient type . . . blasted it with my heat tool, I love how it bubbles up and adds texture.
I kinda like the shabby look so out came my Walnut Stain Distress Ink pad and blending tool for a quick rub all around the frame.
Chopped up some pretty papers and fixed in place with a glue stick.
What I adore about Simple Stories collections is the beautiful Teeny tiny bingo cards and page
elements
 which I chopped up and added a few staples too. . .
 . . . next it was time to distress the seam binding with Distress Stain and attaching it in place along with the red rope using my ever trusty glue gun.
I wanted the deeeeelish elements to pop slightly sooooo  . . . I added a little chipboard circle behind a few.
The Maya Road wooden circles I have had in my stash forever and thought it was about time I actually put them to use! 
They worked like a dream on the painted, distressed wood and added that extra little something to this project.
If you haven`t tried them then you neeeed toooo they are AMAZING!!
  If only you could see this in real life . . . sadly my picture taking skills ain`t that great  . . . SORRY!
Well that`s it for me today.
Thank yooou so much for taking the time to look.
Catch you next time around.
Happy crafting
xoxox

Materials from eP Store -
Tim Holtz Distress Stain - Tumbled Glass
The shop does carry
which would work just as great as the one`s Iused.

Tuesday, April 23, 2013

Dreamer of dreams

 Hi everyone! Tracy here today with a little project I popped together using the new
 along with
they are a dream to work with!
{You will find a list of other materials used at the bottom of this post.}
When I started my project I had no idea what I was going to create!!!
Looking at the back of the packaging on the She Art Rub ons is the most beautiful
 She Art done by Christy Tomlinson.
A touch of inspiration and madness descended upon me...please keep in mind that this is my first attempt at drawing  my very own She Art... no lessons, nothing.
So a quick slather of white acrylic paint and then the scarey part . . . drawing!
I started with Tim Holtz Distress Stain in Peeled Paint  for the hair because I love the color,lol.
 Followed by a little Walnut Stain and Black Soot. Once I was happy with the hair, I used a fine black pen to add a little detail.
Do you see those gorrrgeous Border Rub ons . . .I looove them and they make me so happy.
At this point I knew it need a little something more . . . but what I wasn`t sure.
 More Distress Stains in Fired Brick to add a little color to her cheeks, little ribbon ties for her hair, a few rub ons dotted around and a little clear embossing to finish.
Hmmm now what to do with it, well I scratched my head, raked around, hummed and hawed until I found some corrugated card leftover from another project, some buttons, a little raffia, another rub on, bulldog clips,old book pages, a stapler and some wax.
Another little journal filled with old book book pages just waiting to be filled with my attempts at drawing.
Oh, what`s that peeking out the side?
Another first here, not perfect - Neck is of kilter, top half too broad . . . but I really do like the skirt,phew something,lol.
 Lots of rub ons {squeal}, Coffee filter sheets,  pretty patterned papers and scribbles with a fine pen . . . heaven!
Imagine Possibility
Having never tried this before who knows what will happen on page 2, 3, 4, 5, 6. . . . . .
Well that`s all from me today.
Thank you for taking the time to look.
Till next  time

Products from the eP Store - Just click to find them in the store.