







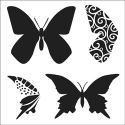
It's Bonnie Irvine, the wordy one, here today with a mixed media canvas to share. I couldn't wait to experiment and have a play with a couple of products neww to me.. I began by covering an 8" x 10" canvas with black gesso and allowing it to dry thoroughly.Then I took the TCW Layered butterfly stencil and applied Viva Decor Mother of Pearl Modeling Cream with a palette knife through the two solid butterflies. Again, I let that dry thoroughly. It came out the most gorgeous iridescent pearl colour and is slightly raised from the background...so pretty.

Having a curious streak, I wondered what would happen if I applied alcohol ink to the butterflies. On the stencil there are overlays that can be used to put a design over the solid butterflies. I used Stream, Meadow, and Gold Mixative alcohol inks with a bit of blending solution, applying this through the overlay to the top butterfly. So pretty. I applied the same mixture through the solid stencil over the modeling cream on the bottom butterfly...wow! The iridescence of the pearl shines through the alcohol ink for a gorgeous sheen.

Still in curious mode, I applied Gold Mixative alcohol ink through the overlay and over the bottom butterfly. There are layers of colour and the shimmer from the original cream still shows through. How fun is that!

For the background, I adhered torn corrugated cardboard in four spots and rubbed white gesso and Teal Silks Acrylic Glaze over it using my finger. Scraps torn from Authentique's Peaceful collection were layered over the cardboard. Two pieces of torn canvas were over-stamped with text and Coffee Archival ink before being grunged up with Vintage Photo Distress ink. These were layered over the larger corner collages.

To make the embossed butterfly trail and photo turn, a length of metal shiny tape from the garage was embossed in a folder and then punched into circles and die cut as the photo turn. Treasure Copper, a type of gilding wax, was brushed over both with my finger.

The sentiment, part of a Christy Tomlinson stamp, was applied to kraft cardstock with Versamark and then embossed with Copper Frantage powder before being heat set. The kraft cardstock was then inked with Vintage Photo, Walnut Stain, and Black Soot Distress inks before the sentiments were torn around. Lining around the outside edges was done with a Sepia Micron pen.

More Treasure Copper was applied through TCW's Confetti stencil onto the background. Treasure Silver was applied through TCW's Mini Punchinella stencil. More of the Teal Zircon Silks Glaze was pounced through TCW's Mini Chevron stencil using a scruffy brush. A few black splotches were added onto the torn canvas using the Confetti stencil and a black pen.

To complete the canvas, Idea-ology gears were adhered in three spots. The word EMERGE was made with Idea-ology AlphaParts letters smudged with Treasure Silver to tie them in with the other metal elements and allow them to show against the background. Idea-ology pen nibs were smudged with Treasure Copper and adhered to the butterflies with Glossy Accents. The antennae ends are nailhead stickers. A bit of lace lying abandoned on my desktop was added to the top right corner.

All in all, a most enjoyable play. I'm loving the Silks glazes and the Modeling cream. I definitely see more in my future :) They combine beautifully with stencils, one of my favourite tools. I can't wait to see what else they do. Many of the products used in this canvas can be found in the eclectic Paperie's store. Simply click on the thumbnails below to check them out. Thanks for visiting today.
Bonnie
 |  |  |  |
 |  |  |  |
 |  |  |  |
 |


