Photobucket Photobucket Photobucket Photobucket Photobucket Photobucket
Showing posts with label craft sheet. Show all posts

Friday, August 29, 2014

Happy Anniversary ~ Early!

Hi Everyone!  It's Sue Lelli here and I made an anniversary card for my DH early because I just received some new products from eclectic Paperie in the mail and I was itching to try them out!  I'll just save it until our anniversary in November!  LOL!
Here's My card:
What I WANTED to do was have a starfish in the center cut out with text underneath.  It would have been easier if the Tim Holtz alterations sand and sea die cuts had been separate but the weren't. So I improvised!  I ended up stacking fat chipboard over the images I didn't want to cut out and running it through my die cut machine.  They cut out anyway but there was so much texture and color and product on my Tim Holtz distress watercolor cardstock top page that when I pieced it back together like a puzzle, you really couldn't see it!  And I got the look I wanted!
I also wanted the seahorse floating in the water surrounded by bubbles (Tim Holtz texture fades - bubbles and waves) with it's tail wrapped around a plant.  That's how they REALLY look when you dive, hiding in plants and blending in to the surroundings.  For the plant I die cut a branch from the Tim Holtz spring greenery decorative strip.   I put wet glue on it and sprinkled Tim Holtz Distress Glitter on top.  LOVE the glimmer it adds!

I LOVE this seahorse and I puposely had the word MEMORY show through.  (I wanted to remind my DH of all of the FAB memories we have together.)  The text is Tim Holtz melange tissue wrap stained with tea dye Distress ink.
Here you can see the Wendy Vecchi translucent embossing paste.  I LOVE that it dries clear and looks wet on your project!

Here you can see the Prima seaweed flower and the Prima resin shells I added.  The idea-ology word band sentiment was perfect since this IS an anniversary card and we are living the life we have imagined!  Literally!  I tied it on with idea-ology jute.
The kraft paper behind the watercolor and text layers is my new FAB Tim Holtz idea-ology resist paper.  It is so cool with a design embossed on it so when you add ink, the embossing shows through.  This one I used has mini distressed dots ~ going with the bubble theme!

And on the inside, I put a photograph of last year when we renewed our vows for our 25th anniversary.  It was a dream!  Look at the color of that water and how it is mimicked by the distress paint colors on the outside of my card.

 Process Photos:
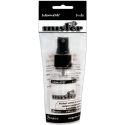
I squished some Tim Holtz Distress Paint on to an inksenssitials craft sheet I have cut to 8x8.  (I found it's easier to have several layers of craft sheets so your entire work surface doesn't get dirty ~ just small bits!)  Then I spritzed it with a mini mister filled with water.

I swiped Tim Holtz distress watercolor card stock through the paint once,

Then twice and this is what I had.  What I LOVE about these Distress Paints is that they react to water when they are wet and you can make them move around but when they are dry, they are permanent and you can add more layers and colors without creating mud.
So:
 I added some darker Tim Holtz Distress paints and swiped again.  Then it was too dark for me so I made two rows of two lighter blue shades of Distress Paints (in colors I already used):
 
And laid the cardstock straight down on top of the paint:
Then I sprayed it again with water from the mini mister.
 
I was happy with the colors but turned it upside down so the drip lines went up.  Then I embossed it with my new Tim Holtz texture fades bubble embossing folder.  I used the Tim Holtz sanding grip block on top of it to make the bubbles look white and stand out.

Here I added Wendy Vecchi's Studio 490 translucent embossing paste through the Dina Wakely plastic canvas stencil.  This dries completely clear and made the card front look wet.  LOVE that WV translucent embossing paste AND that DW Stencil!
Those are all the photos I remembered to take.  I got caught up in the creative moment!
 
I hope you like my card!
THX for stopping by!


Saturday, August 23, 2014

Turning 43

Guess how old I turned this year?  
Mary-Ann here, divulging information that should totally be kept a secret:o)  This year was hard for me.  If I am 43 then my boy is turning 10, I am full of gray hair and I just noticed wrinkles.  Lots of them.  So, I refuse to celebrate any more birthdays until next year.  hehe

I decided, for a change, to focus on a "me" layout.  I am hardly in the photos we take unless I insist on a "groupie" picture.  Even then, one of us is usually making an inappropriate face and the entire event becomes a battle.  I'm yelling, telling them to pretend to have fun, or "take another, my hair didn't look good" or "you can see my waddle!" 
I promise, I did have fun creating this layout and I hope you enjoy the journey with me. 
 I promise not to get all weepy.


FYI, this entire layout, except the white base is made from a 6x6 paper pad.  No 12x12 paper was harmed in the making of this page:0)  After I decided on my colors, I decided to spray paint a couple wood veneer numbers that I had on hand.  (A great big fat reminder of how old I am!) You could color these with Dylusions.  A paint brush will do the trick or even just spraying.  


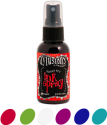
The white base you see, is actually a little creamy once I started taking pictures, it is a big piece of watercolor paper.  I sprayed Dylusions ink (red, small amounts of black, and white) onto my craft sheet.  I added a few squirts of water from my Ranger Mister bottle and squished my paper face down on my craft sheet.  When I lifted it, this is what I got.  


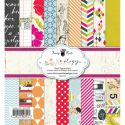
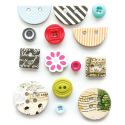
I started layering Fancy Pants Me-ology papers under my photo.  Painted a clothespin with the same black Dylusions spray.  I also tucked some of the banner buttons under my papers, clumped coordinating Me-ology buttons to the side with matching enamel dots.


You can see here that I utilized some Tim Holtz Index labels.  Just so happens, they come in black and red!  Perfect for this layout.  I wanted them to be a little sturdier, so I took the packaging from the Fancy Pants Buttons and backed the stickers.  See photo below.


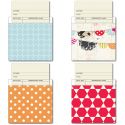
Added a cool title, more enamels and my journaling, which is neatly tucked inside one of the Fancy Pants Library Card envelopes.  I didn't want my journaling card to stick out too far, so I trimmed down the existing library card and turned it over to utilize the white side.


It is pretty simple.  Just some fun coloring and painting, paper layering and story telling.  I hope you have enjoyed my layout today.  Keep checking back  daily for more design team inspiration.

Supplies used:  


Monday, October 15, 2012

Apples for a Friend

Hello eP fans!

I had a customer recently request a card with apples I had listed for sale on my blog, and here I had sold it already and forgot to take it down!  So I contacted the customer and offered to make another as similar as I could to the original, and she said “just another apple card would be fine…” so this is what I came up with.  I hope she likes it!

eP101312

The apple stamps I used here are from the Apple of My Eye stamp set from Flourishes, and I stamped and colored this with Copics from the eclectic Paperie store.  The papers used are Simple Stories “Harvest Lane”… just LOVE this line for Fall!  I embellished with various Nestabilities die-cuts, button, thread, pearls, tag, etc. and a seam binding bow hand-dyed with some Scattered Straw Ranger distress reinker.  My cardstock and paper edges were also sponged with Antique Linen distress ink, using the Inkssentials Foam Blending tool, and my Non-Stick Craft Sheet.


Happy stamping!

eP Signature - Tammy Hershberger

Saturday, October 6, 2012

Thinking of You

Happy Card Making Day, eP Friends!

I’ve been having fun playing with all the Dylusions Ink Sprays and Dylusions Cling Stamps in my art journal but since today is World Card Making Day, I wanted to share a card which used both in creating my card.

I know that the first thought that pops into heads when mentioning Dylusions Ink Sprays and Dylusions Cling Stamps is art journaling, tags, or mixed media. Which these are wonderful for, however, both the ink sprays and the stamps are wonderful for creating just cards.


As much as I like color, I also love a clean and simple style and lots of white space. I mean, how can one go wrong with that combination, right?  Whenever I can't seem to get a card to come together, this is what I fall back on.

I used the large bird and the flowers from Dylusions How Does Your Garden Grow set, stamped onto watercolor paper with StazOn Jet Black ink.  I spritzed the Dylusions Ink Sprays onto my Non-Stick Craft Mat and using the Tim Holtz Water Brush - Detailer,  colored the images.  For the sky I used the broad nib Tim Holtz Water Brush.  Using a paper towel to pick up any excess ink and to create a bit of texture.  I did this a lot on the sky which really makes the texture of the water color paper come through.

It's personal preference, but when I watercolor I want my projects to look like they were water colored.  Which is why I love the 'un-eveness' for lack of a better word.

The sentiment is from the Big Greetings stamp set from Market Street Stamps.  When I first spotted this set in the shop, I knew I had to get these.  One can never have too many greetings and I love the size of each of the greetings.  They stamp like butter!!!  I used Scotch Foam Mounting Tape to pop the sentiment panel up a bit.

To cover up a 'boo-boo' in the lower left hand corner of the card (which always happens when my project is 99% complete, sigh) I added an orange button from Buttons Galore with twine from The Twinery.

I absolutely love how this card turned out.  I love the vibrant colors achieved by using the Dylusions Ink Sprays and a Water Brush.

Dylusions How Does Your Garden Grow stamp set is a wonderful line art set - perfect for Copics, or any coloring medium you choose.

And in honor of World Card Making Day, eclectic Paperie is having an awesome sale on select items.  Stamps, 6x6 paper pads, embellishments and more.  Details below or you can head over to the shop and check it out!

30% off select stamps
40% off select 6x6 paper pads
40% off Authentique Collection Kits
30-50% off select embellishments

50% off select Spellbinders Dies
30% off all Button Galore products
But that's not all...Post your creation in our World Making Card Day 2012 Album on eP's Facebook page and be entered in to a random drawing for a $25.00 eclectic Paperie gift certificate! You have until October 8th to enter a card and the winner will be announced on Tuesday, October 9th! Want to see what some of the other members of the eTeam are up to today?  Visit the links below!

Thanks for stopping by and I hope you get inky!


Supplies: