Photobucket Photobucket Photobucket Photobucket Photobucket Photobucket
Showing posts with label copics. Show all posts

Tuesday, October 28, 2014

Thanks for the memories, Steph Ackerman

Hi everyone, Steph Ackerman here today.  By now you know that eclectic Paperie is closing it's doors.  That also means the end of the blog and the design team.

We have had a fabulous run as members of the eclectic Paperie Design Team and wish to thank you all for your interest and support over the years. With the eP blog coming to a close at the end of the month, we all wanted to do something special to celebrate the fabulous friendships, tons of inspiration from other team members, from Kim, and from all those who participated in our challenges. Each of the current DT members is taking a day to post some of her favorite makes from her time on the eclectic Paperie team. We hope you enjoy the look back.

While I've only been on the team a short while,  I have really enjoyed working with this team and have loved the wide variety of products available in the store.

This was the very first project I created for eP and I had so much fun creating it - the stencils, the stamps and assorted Art Anthology paints were so much fun to work with.


This canvas uses a large Prima stencil, some molding paste and Art Anthology paints.


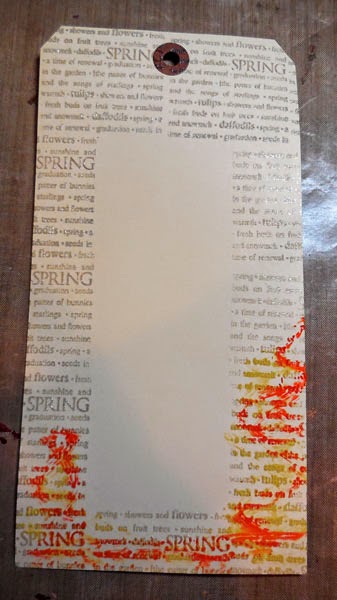
And a fun use of the same stamp to create tags for all seasons with Gelatos.


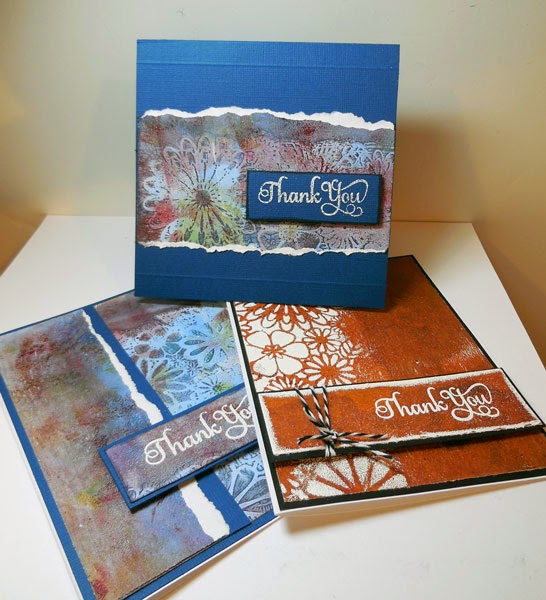
I loved creating these cards with Art Anthology paints, a Gelli Plate and The Crafter's Workshop stencils. 


And I just wanted to shout out a big thank you to Kim for giving me the opportunity to work with her and this amazing design team.
 
Steph
 

Wednesday, May 14, 2014

A Tag For All Seasons

Hi everyone, Steph Ackerman here with my second post as the guest designer for eP for the month of May. 

Today, I'm showcasing my tags for all seasons.  I used the same products for each tag, just changed up the colors for each season.


I used the new Prima Marketing stamp - Warm Wishes as the focal image.  She is dressed for winter, but change the colors and you can get away with using her for any season.  Each image was colored with assorted Copic Markers in keeping with the season.

To begin, I stamped each tag with an older Hero Arts stamp set I've had forever.  Using VersaMark Ink, I stamped one season repeatedly on each tag, then added Clear Embossing Powder and heat set each tag. 


Here are the details of each tag:

Spring Tag


I used Faber Castell Gelatos in Yellows, mixing the colors with water until I had the look I wanted. 


I added some Gold Metallic Gelatos around the edges and used a paper towel to remove some of the color.


Summer Tag


I used Faber Castell Gelatos in Reds, mixing the colors then removing some of the color.


Fall Tag


I used Faber Castell Gelatos in Neutrals and Metallics.  Loving the earthy feel of this tag.


Winter Tag


I used Faber Castell Gelatos in Blues and Metallics.  I love the included purples and how the metallic colors make the tag shine.


Once the tags dried, assorted twine from The Twinery - Charcoal, Gunmetal, Blossom, Strawberry, Cantaloupe, Honeydew, Buttercream, and Cappucchino was tied around each tag and through the hole.

Using assorted papers from 7 Dots Studio's Nature Walk - wonderful earth toned papers with imbedded images - I cut them into 3" x 6" panels.  Each panel was inked with the same Gelatos that were used on it's coordinating tag, then matted with black cardstock.

Using additional papers from Nature Walk, I die cut 2 sizes of ovals and placed them on the panels.    Glue Dots were placed behind the panels for dimension, allowing them to pop.

Each stamped image was fussy cut and added to the oval with Glue Dots for a little dimension.

Please stop by the eP Store and pick up all the wonderful products I used in this week's project.

Thanks for stopping by this week.
 

Steph


Monday, October 28, 2013

Fall Swim


Hi, Mary-Ann here! With watercolor being an up and coming challenge here at Eclectic Paperie, I decided I'd try my hand at watercoloring on this swimming layout.  Fitting don't you think? WATERcolor with swimming!!  Anyway, I also tried a new technique.   


I laid out my non-stick craft sheet and lightly sprayed color mists directly on the sheet and then diluted this by spray by spraying water directly on top.  This helped thin my colors.  It is hard to see in this photo but look closely!


I then turned my paper face down onto the wet puddles of spray.  When I lifted and turned my paper over, I could see where the colors mixed on my paper.


Once I decided where my photo and papers were going to be, I got out my Tim Holtz Stars Layering Stencil and with a gray watercolor pencil, I traced where I wanted random stars.  With a blender pen or water brush, I lightly went over the pencil marks to make them blend like watercolor.


See the stars?  I then took the same colored pencil and drew light lines and lightened those with the same blender pen.  


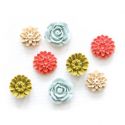
Layered on my tags, ephemera embellishments and resin flowers.


This Fancy Pants line, Happy Go Lucky, was PERFECT for the colors in my photo.  I must say, I have tons of product left that would create a completely different style layout.  After this layout was complete I trickled droplets of gold spray in various places and used gold thread to sew.  This time, the sewing helped keep my tile and small embellishments in place.  

You can find the items from this layout here in the shop or on the links below.


Tuesday, October 8, 2013

US

Ever have those times when you start and finish a project and what you had in mind does not translate to paper?  Then, you tear it apart and start all over again?  That happened to me on this layout.  Sometimes things come naturally, other times, its forced.  Well, you should have see the "dirty" part of my layout before.  NOT pretty!  This rendition is much better and I would love to share it with you.  So, it's Mary-Ann here, about to share my labor intensive layout:o)


I sprayed three different color inks to get my desired look on my cardstock base.


Then I totally stole an idea from a fellow blogger Ashli Oliver and spread Gesso over my patterned paper at the bottom of my layout.  It helped soften the darker colors.  I hand drew in some of the arrows that I wanted to stand out.  


Layered my October Afternoon papers, stickers, A Flair for Buttons flair, My Mind's Eye enamels and October Afternoon brads.  You will see below on the completed layout that I used the same spray ink to add color to my title from Fancy Pants and wood veneers from Basic Grey.


This end result is a much more pulled together layout than the last!  Blue, gray and pink make me happy when they are together.  This photo is celebrating my 8th Mother's day because of that beautiful boy with me.  I am blessed.

Thank you for stopping in.  Below you will find a link to all the items you can purchase over at Eclectic Paperie.