Photobucket Photobucket Photobucket Photobucket Photobucket Photobucket
Showing posts with label My Mind's Eye. Show all posts

Tuesday, October 8, 2013

US

Ever have those times when you start and finish a project and what you had in mind does not translate to paper?  Then, you tear it apart and start all over again?  That happened to me on this layout.  Sometimes things come naturally, other times, its forced.  Well, you should have see the "dirty" part of my layout before.  NOT pretty!  This rendition is much better and I would love to share it with you.  So, it's Mary-Ann here, about to share my labor intensive layout:o)


I sprayed three different color inks to get my desired look on my cardstock base.


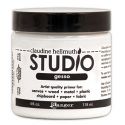
Then I totally stole an idea from a fellow blogger Ashli Oliver and spread Gesso over my patterned paper at the bottom of my layout.  It helped soften the darker colors.  I hand drew in some of the arrows that I wanted to stand out.  


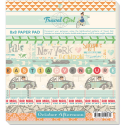
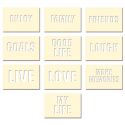
Layered my October Afternoon papers, stickers, A Flair for Buttons flair, My Mind's Eye enamels and October Afternoon brads.  You will see below on the completed layout that I used the same spray ink to add color to my title from Fancy Pants and wood veneers from Basic Grey.


This end result is a much more pulled together layout than the last!  Blue, gray and pink make me happy when they are together.  This photo is celebrating my 8th Mother's day because of that beautiful boy with me.  I am blessed.

Thank you for stopping in.  Below you will find a link to all the items you can purchase over at Eclectic Paperie.  


Monday, June 17, 2013

My Chalk Family!

Hello "REAL" people, it is Mary-Ann here today to share "My Chalk Family!" layout with you.  Just recently I attended an open house at Eclectic Paperie's new store front location and got my hands dirty with some really cool product.  I felt like that really clean girl in a fancy fluffy dress, not wanting to play in the mud puddle with all her friends.  But, with much encouragement from my mixed media friends, I jumped in....with only one foot!  I enjoyed seeing the creations of others and decided I would buy Gesso.  What?  I am still not sure what it is but I like it.  I tried my hand at what I thought was reaching WAY outside the box, for me!  This is what I started with.


Then I thought that the white Gesso was to stark on my choice of blue paper, so I dug deep and found some old blue embossing powder when I dug out my heat gun to help dry my Gesso.  Maybe that is why I am not hard-core mixed-media, I have not patience when allowing things to dry.  I like instant gratification folks and my heat gun helped.  So did the powder!  LOOK!


After I changed the  Maya Road- You've Been Framed Wood Embellishments with Distress Stain - Pumice Stone, I added Gesso and embossing powder to the bottom.  Which I actually turned on its side.   I added stitching to help hold some of my embellishments in place.  I layered papers, tucked tags and added random chipboard pieces.  I also added the perfect color flair from A Flair For Buttons.


I added some more little touches of My Mind's Eye enamels, Jillibean Soup Sugar Picks and The Twinery - Platinum Shimmer twine.


Here you can see that I changed the Basic Grey - Hipster - Wood Veneer banners with Pumice Stone like before and the word "awesome" with Forest Moss Distress Stain.  I added another flair and a Wendy Vecchi - Blossom Bucket - Red Heart


Ta-da, a Mary-Ann style layout with a mixed media twist!  Thanks for getting a "little" dirty with me!


Wednesday, May 15, 2013

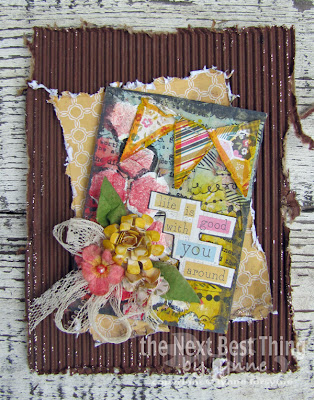
.....An ATC!

....THEN WHAT??!??!

Howdy Peeps.....
Lynne Forsythe here for another Guest Design Team post!

I have quite the affection for ATC's.
Such a little tiny space...
to stretch the design skills....

Here is my latest ATC I've create.....


How much goodness
can you pack onto a 2.5" x 3.5" surface??!??!


I collaged on some of Christy Tomlinson's
Coffee Filter Paper using
Multi Medium ~ Matte.

Then I colored on the collaged paper
with 50's Diner Gelatos.
With a wet paint brush I blended the colors.

Using The Crafter's Workshop template,
I applied some Gesso over the collage
and then applied "Blood Orange" Gelato
over the gesso!

Whipped up a little banner....
from the "Unforgettable" collection by MME,
stapled it to the ATC with
my Tiny Attacher.


Of course I had to stick on a flower cluster.
I colored the flowers with the
same "50's Diner" gelatos.

Now....my question always was/is...
What do you do with the little ditties after
you've had sooo much fun making them?!??!


Adorn the face of a card....
and send it to a friend!!


Hope I've inspired you to try one out...
if you never have before!!

Saturday, May 11, 2013

Spring whimsy canvas

Greetings!

I had so much fun coloring the little wooden embellishments by Prima on the altered jar project (seen here) that I wanted to color some more! The cute little box they come in contains lots of pieces and they just seemed so springy and whimsical I was inspired to create this canvas to feature them on:
(click on photos to enlarge and clarify)
I started with a base of sheet music paper. It is from a child's lesson book and is called "Little Spring Song".
After coloring the paper with Gelato in blues and greens, I decided I wanted more coverage and went over it with Tim Holtz Distress Paint. A bit of texture was added with Staz-On ink applied through punchenella and a little stamping with the Unity Stamp Company "She Script" stamp.

The My Mind's Eye "Remarkable" paper collection was perfect for all of the elements on my project. I free hand cut all the pieces and inked the edges with Staz-On in Stone Gray. Tim Holtz Distress Paint in Fired Brick perfectly matches the papers so I colored a piece of chip from my stash to use for a roof.
I decided the papers that make up the tree were in need of another layer so I put Distress Crackle on the trunk. In playing with Wendy Vecchi's Embossing Paste, I discovered it can be colored with Gelato without changing the viscosity of the paste - love that! I mixed the embossing paste with two yellow colors of Gelato and applied it through the Crafter's Workshop mini Chicken Wire Reversed stencil on to the tree top.


"Santa's Sleighful" is the name of the font I used to type the verse - this is one of my favorite fonts and is perfect for this project despite it's winter name! 
After adhering all of the paper pieces with Mod Podge I shaded around them with Faber Castell Big Brush Pen in Cold Grey III. Next came coloring the little wooden embellishments by Prima with Faber Castell pens. The India Ink in these markers is perfect for coloring the wood. The last step was to add the sun. I mixed up another batch of embossing paste with Gelato and applied it through the Crafter's Workshop Mini Zinnia stencil.


Thanks for stopping by today, 
all the products I used are linked to the eclectic Paperie online store for your shopping convenience!
I hope I've inspired you to create something springy yourself!

Tuesday, May 7, 2013

Getting ready for Mother's Day

With Mother's Day fast approaching, and time running out, I thought I would scratch 'making cards' off my list.  This card can easily be re-created multiple times for any mother in your life.  Here I used Simple Stories - Vintage Bliss 6x6 paper pad.


If you take a close look, you can see that I dug out my chalks from many moons ago and lightly created a 'polka dotty' look with the Wendy Vecchi - Studio 490's art stencil.  With Scotch foam tape, I elevated my stripped paper for dimension.  I created a pocket by machine sewing silver thread to accent my Platinum Shimmer twine from The Twinery.  I layered an old button with paper, wrapped the twine and topped it with A Flair For Button tin.  For a tad more bling, I inserted a crystal Maya Road Trinket Pin  and a blue My Mind's Eye pin.  The Idea-ology Tiny Attacher is perfect for attaching fine detailing  like "happy."  I also distressed all of my papers to help tone down the raw edges and help pop the gray with Graphite Black ink pad from Brilliance.


My mother is an avid, no, obsessive tea drinker and she will  be delighted to receive this card!  It will accompany her large pink (another obsession) tea cup plant pot , blooming with pink flowers!  
Happy Mother's Day to you.


Friday, May 3, 2013

Teacher Appreciation

Hi there, ePer's!  It's Erin here with you today, sharing some Teacher Appreciation decorations!  I apologize for the lateness of this post, but I had to decorate today while the teachers were in another building!

I oversee the Hospitality Committee, and one of the things that we do is Teacher Appreciation!  I had this "brilliant" idea to decorate each teacher's door in the theme that was chosen.  I decided on Dr. Seuss.  I figured, how hard could THAT be?!  Well, it's a bit challenging because Dr. Seuss has been around FOREVER, and most stores only carry new stuff.  So......a lot of hands-on crafty time was put in this week, and also for why I may nod off here during this post!  If you do too, I won't be mad!  ;D

Ok, so only one door decoration actually qualifies to be on this website, but I'll share the others with you, just so you can see....  (I had to draw everything else...)

When I chose Dr. Seuss, I raided my kids' bookshelves and stocked up at the library for the rest of the collection and pored over them, trying to decide which books I would feature on their doors.

Without further ado, here we have the first one, "It's a Great Day for Up!"


To make this decorated door, I took yellow cardstock and created 3-D stars from Tim Holtz's 3-D Star Bright  Bigz Die.  Oh my gosh, can I just gush a little about this 3-D star?  I have been lusting after 3-D stars for quite some time, but never knew how to make my own.  Pinterest has tons w/ complicated instructions, and that just isn't for me.  It shouldn't be complicated to make a star!!!  So, when we got to preview what Ranger was coming out with, I signed up for the star die first thing!  It is SO incredibly easy to use!
1.  Die cut your paper. 
2.  Fold along the mountains and valleys (I also sponged the mountain creases for contrast)
3.  Tim designed little tabs that fold underneath that you put glue on and adhere your star to your project!
And that's it!!!!  Piece of cake!  Get one and try it!  You'll LOVE IT!

I took circle nestabilities and folded each circle in half and glued them together to make a 3-D hot air balloon.  The paper I used is "The sweetest thing" by MME.  I used my whole pack, so I'll definitely by purchasing another one!!!  LOVE this paper!!!!


Here you can really see how the 3-D star looks when it's hung up on a wall!  These would make great ornaments!!!


 Here are the other doors!

"If I Ran The Circus"


"One Fish, Two Fish, Red Fish, Blue Fish"


"The Best Nest"


"Ten Apples Up On Top"


Thanks for bearing with me!  Have a wonderful day!

Erin

"You're never too old, too wacky, too wild, to pick up a book and read to a child." ~ Dr. Seuss