I then painted the frame with Tarnished Brasss Distress Paint Dabber. I smoothed this over by brushing the surface lightly with a soft paintbrush.
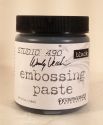
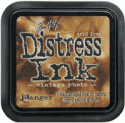
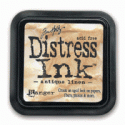
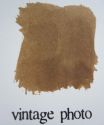
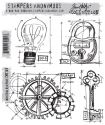
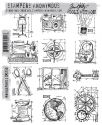
Next came the three stages of stamping and texturising the surface. I started with Tim Holtz's Industrial Blue Print cog stamp, (also on clearance at the moment!), I used the smaller cog stamp from the Stampers Anonymous Mini Blue Prints #3 as well. These have all been stamped with Black Archival Ink. I then used Wendy Vecchi Embossing Paste through The Crafter's Workshop Tiny Circles stencil, and once dry, gave the surface a rough coat of Antique Linen Distress Paint and once dry, I sanded it back to reveal some of the stamping . I then rubbed in Vintage Photo Distress ink and also Black Soot for a bit more grunge. Once all this was dry, I used The Crafter's Workshop Roman Letters stencil with gold Ferro Paint. Finally, after I was happy with the background I started on the contents inside the frame. I stamped out the large Stampers Anonymous Skull onto manila card using black Archival Ink, I also stamped a couple of apothecary bottles onto acetate.
The stamps are from a Graphic 45 Set I've had for some time. The labels are from Ideaology, stamped using the same G45 set. Here's the skull after it's had the Antique Linen treatment and then heat embossed with Clear Embossing Powder.
The cogs I've used are actually a couple of white plastic ones, which I've treated with a two part rust kit, I'm really pleased with the way they turned out. Here's the proof...
The centre is a butterfly pin which I've 'rusted' with Vintage Photo Distress Embossing powder mixed with a bit of gold Frantage. I used the same technique on the studs around the frame and cut the backs off before adhering with a glue gun. If you decide to try this I recommend using tweezers to hold the studs when heating or placing onto hot glue. I used a black Faber Castell Big Pen to colour the inside and outside edges of the frame.
I couldn't resist adding the little plastic flies. My son had given me these as he thought I might use them for crafting. He knows me very well !
This was a fun project to make which I think fits in well with the current trend for all things 'apothecary'. If you want to stock up on some of the supplies I've used, hop over to Kim's wonderful eclectic Paperie shop where you'll find your old favourites as well as many of the new products arriving on an almost daily basis. Oh and don't forget to have a look at the clearance section, where you'll find some fantastic bargains. Have fun ! x





12 comments:
What a fantastic piece Toni! Love the rusting, and the way you've layered the stamping and stencilling; very pleased you showed us step by step too so we can see all the details). Hugs, Jenny x
This is fab, Toni; totally up my street! I love the rusting, the acetate bottles, and all your attention to detail! Wonderful make!
Lucy x
Awesome, Toni! I adore that pocket watch art part and you're created a stunning piece!!
Hi Toni
I love this piece so rustic and steampunky really great piece of art
Ria
Brilliant and one of my *all over the year theme* not only with Halloween.(:o)
Toni this is fabulous. I just love Halloween so you have given me a push to do something with the pocket watch frame too. I love the stamping and embossing and the rusting is just gorgeous. I have not used that G45 stamp for ages either - thanks so much for the inspiration! Hugs, Anne x
Oh my giddy aunt Toni...you have made a fabulous job with the pocket watch..loving the halloween vibe!!!
Big hugs
Tracy xxxx
Toni your make is wonderful and I love it and YES you have given me some ideas!!
sandy
Wow!!! I love this piece!!!
Lots of texture and 3D pieces all right up my alley :-)
Great spooky piece for Halloween!
oh this turned out great. Love the halloween theme!!!! And a great way to use the clock/watch. Love it.
Beyond brilliant, Toni - every element is absolutely delicious!
Alison x
Post a Comment