Photobucket Photobucket Photobucket Photobucket Photobucket Photobucket

Saturday, January 25, 2014

You & Me


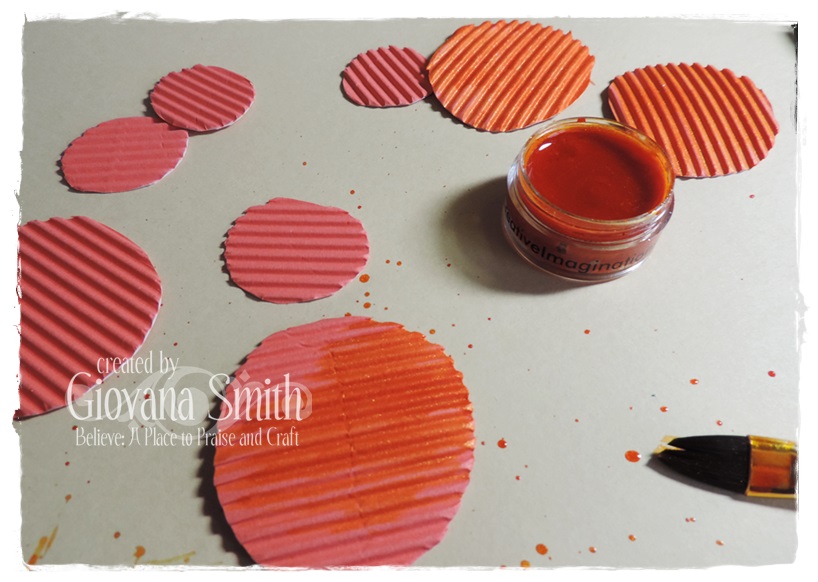
Mary-Ann barely here with you today to share a layout that took me four tries!  Yup, four.  Ever have one of those days when you have something in your mind but it just will not translate to paper the way you envision it?  Sometimes the results are even better anyway (now imagine me sticking my tongue out at my layout like a 3 yr old).  I created this layout by cutting the best watercolor heart out of one of my previous 3 pages.   My pink paper that you see to the side has remnants of one of the attempts.  See the gesso on the bottom?  You can also see some on my heart.   I totally smeared that page with my sleeve.  Although the whole layout was not salvaged, I managed to save some of it.  


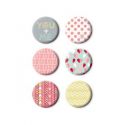
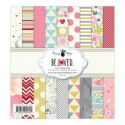
I like dimension on my pages, you can see it all from this angle.  I actually sewed the smaller hearts right to the 12x12 page, then curled my sides up.  The strips of paper that you see are all from one sheet of the 6x6 Fancy Pants Be. Loved. paper pad.  (Which by the way are hard to keep in stock.)  They created just enough embellishment to match my flair buttons and punched hearts. 


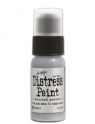
Anyone notice the twine shaped as a heart?  I love these photos of my boys.  You can feel the love.  Towards each other, not me, obviously, I am the one capturing it all with a camera.  BTW, those gray dots that look like enamel dots, I created those using Tim's Distress Paint - Brushed Pewter.  Need to get another bottle of that, I am using it like I love it:o)


Here is proof of one of the mishap pages.  Why did I use brown?? Good question.  But I did like the effect of the smear, however, when I added all my other embellies, I needed to trash the brown, for obvious reasons.  That and my non-artistic husbands asked what I ripped up from that spot.  Not cool.  

The fine products I used on this and the other three layouts are listed below.  Head on over to the shop to get your hands on what you need to create your next Valentine.


Friday, January 24, 2014

Love Owls!!

Hello EPeeps!!  Have you ever started a project or a layout and not been happy with the finished project? That happened to me this week.  I made a long canvas with 5 owls on it but it didn't work for me and I just wanted to paint over it.  However, when I looked at the canvas there were certain elements that I liked . . . the background and two owls.  So I started over.  I took the pieces that I liked and remade them.   And now I LOVE my little Love Owls!! So I really encourage you, if you are working on something that just isn't going right, pick out what works and keep those elements!  You don't have to get it right the first time!  Keep trying!


I started by randomly stamping directly onto the blank canvas.


I used my gelli plate and white tissue paper to create another part of the background. First, I made a print of chevron and then a second layer of hearts on top. 

I used matte medium to put the tissue paper down onto the stamped canvas.  The transparency of the tissue paper lets you see the stamped layer . . .  favorite technique!

Next I cut out my Love Owls from Fancy Pants, Be. Loved. paper pack. If you get any Valentine's Day papers this year, THIS is the one you need!! The patterns, the colors the shapes . . . perfect!!  I LOVE it! And honestly, this paper could be used all year!! I am tempted to get a second pad of paper, just so I can have extras to use again! 

I laid out my pieces, used matte medium to glue them down. (I really like using matte medium, if you didn't know that by now.  I like that matte medium isn't as sticky or gloopy as glue or decoupage).  After the matte medium dries, I used pens and Pitt Pens to highlight and finish off the canvas!! 


 Thank you all for stopping by today!! Click on the eclectic Paperie link as fast as you can and grab the Fancy Pants Be.Loved. Paper - I just can't tell you how much I love it!!  And I hope you all enjoyed my Love Owls and are inspired to keep trying when a page or a project isn't going as planned!!  
 (In fact, if you want to see the 5 owl canvas, I will bravely put it up on my blog, just to show you ... . ... make me feel better though by leaving me a comment on a project you almost gave up on but loved what happened in the end!)  
Karen

Thursday, January 23, 2014

Hope Canvas

Hello friends! Hope you are having a fantastic day, today it's my turn, Giovana here, to share a project with you. I decided to create a fun and simple "yes, believe me" canvas project. I am joining the eP Team Picks Challenge ~ HOPE. My canvas started as a freedom and hope, I just wish I could have wings and fly to Peru, I HOPE I can go there soon and visit my family, nothing like a warm hug from the ones you love.

Here are the details (Sorry, I forgot to take few pictures)
 
  •  Paint all the circles with Ginger Peach Twinkling H2O, set aside to dry, it will take few minutes. (Ohhh, I love this color!)
 
 
  • Add your circles, leaves, stems to your canvas with seal glue. Take your Faber Castell Black Big Brush pen and define all edges, then add a button to each center flower, Iwent ahead and wrote "hope" with my black marker.
 
 
This is final product!  I added Gold 3D Stamp Paint to some of the borders, I used my finger since I wanted a rough look. 

 
I HOPE you like my canvas and get inspired and come play with our eP Team Picks Challenge ~ HOPE.  You can win a $15 gift certificate to the eP store!!!
 

Wednesday, January 22, 2014

Cards (Guest Post from Isha Gupta)

Hello everyone! Isha here sharing my 3rd. post as guest designer for January. Today, I have 2 cards for you using the wonderful products from eclectic Paperie. I made these cards, which are totally different from each other.

For my first card, I want to tell you that you can create CAS cards using stencils. You don't only have to use the stencil for mix media or with spray mists only. You can use them as mask and sponge the inks for a wonderful soft feel.

So, I started with sponging the solid poppy stencil. I inked it using 2 green, red and orange Imagine Crafts/ Tsukineko Memento inks. I then put the outline only stencil and sponged using the dark ink. It gives a subtle definition to the image. To finish the center panel, I inked around the edges using Teal Zeal Memento ink. To finish, I just put some Delicata gold glitz ink and Memento Love Letter ink onto the acrylic block, added a bit of water and flicked.


For my 2nd. card, I went to no stamping again. It's fun to take different elements from the pattern paper itself. I used the Simple Stories Say Cheese collection. I used some Memento inks to edge the small tickets. I then added some washi tape and black flicks. Now this flair is from Fancy Pants Timbergrove, which gives this card an instant pop. Finally a touch of Glossy Accents on the heart on MAGIC :)


Hope you enjoy creating!

Supplies:
Card: 1
Cardstock: White; Stamp: Hero Arts (Everyday Sentiments); Stencil: TCW (Mini Poppies); Inks: Imagine Crafts/ Tsukineko (Memento: Black,Teal Zeal, Morocco, Love Letter, Pistachio, Olive Green; Delicata golden glitz, StazOn black); Vellum

Card: 2
Cardstock: White; Pattern Paper: Simple Stories (Say Cheese); Flair: Fancy Pants (Timbergrove); Ink: Imagine Crafts/ Tsukineko (Onyx Black)

Isha

Here are the links to the eclectic Paperie store for some of the products used above:

Tuesday, January 21, 2014

HOPE ~ created for the ePicks Team Challenge

Hi!  Sue Lelli here and My layout is all about HOPE.
I am playing along with our ePicks Team Challenge ~ HOPE hosted by Andipants!
I LOVE these resin Angels that I painted with Silks Acrylic Paints by Splash of Color.
The colors I used are Emperor's Gold for the wings and African Jade (which I toned down a little with Gesso to match the paper) for the letters.

Here is my layout and it is all about my friend's tiny little 2 month old baby boy who needs open heart surgery:

I used the photo from the actual baby announcement and built my page using Prima Elements that help me tell his story. The title Hope just says it all.

Here is a close up of the hearts (on the Prima "Princess Paper") I outlined with a Sakura Glaze pen. I used metal and wood gears and clocks with the hope that they can get his heart working again. See the tiny little plane on the clock? The family is waiting to hear when they can fly him to Boston Children's Hospital to have his surgery. I also used a lot of stitching to represent mending his heart.


Here's his Beautiful little face surrounded by more heart gears and time pieces and a wood Prima flower to represent Florida where he lives along with a butterfly made of cork. Can you see the tiny clothespin? Even that has the word Hope on it. The ruler is to measure his growth because hopefully, when the surgery is a success, he will grow into a fine young man.

Some photos of my process:
I LOVE this Prima Doily Stencil! I used it to apply my embossing paste and later my Silks paint.
The embossing paste looked so COOL for my background but I thought it needed a little color.
I painted the stenciled pattern with Silk Paint in African Jade mixed with Gesso and added outlines to the hearts with my Sakura Glaze pen.


I hope you like my layout. Creating is how I cope with the emotions of life. I'm not sure I will give this to his parents. I am going to wait and see how he does with surgery and maybe I'll change the word to LOVE and frame it for them to put in his room. But right now, I am filled with HOPE and prayers.


I HOPE you get inspired and come play with our eP Team Picks Challenge ~ HOPE.  You can win a $15 gift certificate to the eP store!!!