Photobucket Photobucket Photobucket Photobucket Photobucket Photobucket

Tuesday, June 24, 2014

eclectic Paperie and Add a Little Dazzle Blog Hop - Day 2

Welcome to Day 2 of our exciting joint blog hop with Add a Little Dazzle!  We are so excited to partner with them and have had so much fun playing with their products.  They have a beautiful collection of metal sheets, in a wide variety of colors, that works perfectly for mixed media projects!. Both design teams have combined their products and are ready to share some inspirational projects with you. Join in on the fun and make sure to enter for a chance to win amazing prizes.
Welcome to Day 1 of  the Eclectic Paperie & Add a Little Dazzle joint blog hop! We’re so excited to be sharing some fabulous creations featuring the wonderful products from both companies in today’s hop. We have two amazing days of inspirational projects so make sure to stop by tomorrow.

First we’d like to share a little bit about the two companies…
eclectic Paperie is a different breed of craft store, conceived as more than just a place where you can purchase supplies, we believe in the strength of collaboration, in coming together and sharing with like-minded crafters. Our goal is to offer a mixed media marketplace where a generation of artists can congregate, explore, imagine, and inspire one another.
Add a Little Dazzle specializes in an exclusive line of craft metal sheets that helps you take your crafting to the next level. Whether you are a seasoned or new crafter, our craft metal sheets will help you create unique projects that will make you stand out among the crowd. Are you ready to take your crafting to the next level? Add a Little Dazzle Craft Metal Sheets will help you turn the ordinary into the extraordinary.

Prize Alert!

Make sure to stop by and visit each of the Design Team Blogs for a chance to win 1 of 2 prize packages from eclectic Paperie and Add a Little Dazzle  valued at $25.  You have until Friday, June 27th to enter. The winners will be announced on both blogs on Saturday, June 28th.  You must leave a comment on all blogs.
 
 So Are You Ready for Some Amazing Inspiration?

Monday, June 23, 2014

eclectic Paperie and Add a Little Dazzle Blog Hop - Day 1

Welcome to our exciting joint blog hop with Add a Little Dazzle!  We are so excited to partner with them and have had so much fun playing with their products.  They have a beautiful collection of metal sheets, in a wide variety of colors, that works perfectly for mixed media projects!. Both design teams have combined their products and are ready to share some inspirational projects with you. Join in on the fun and make sure to enter for a chance to win amazing prizes.
Welcome to Day 1 of  the Eclectic Paperie & Add a Little Dazzle joint blog hop! We’re so excited to be sharing some fabulous creations featuring the wonderful products from both companies in today’s hop. We have two amazing days of inspirational projects so make sure to stop by tomorrow.

First we’d like to share a little bit about the two companies…
eclectic Paperie is a different breed of craft store, conceived as more than just a place where you can purchase supplies, we believe in the strength of collaboration, in coming together and sharing with like-minded crafters. Our goal is to offer a mixed media marketplace where a generation of artists can congregate, explore, imagine, and inspire one another.
Add a Little Dazzle specializes in an exclusive line of craft metal sheets that helps you take your crafting to the next level. Whether you are a seasoned or new crafter, our craft metal sheets will help you create unique projects that will make you stand out among the crowd. Are you ready to take your crafting to the next level? Add a Little Dazzle Craft Metal Sheets will help you turn the ordinary into the extraordinary.

Prize Alert!

Make sure to stop by and visit each of the Design Team Blogs for a chance to win 1 of 2 prize packages from eclectic Paperie and Add a Little Dazzle  valued at $25.  You have until Friday, June 27th to enter. The winners will be announced on both blogs on Saturday, June 28th.  You must leave a comment on all blogs.
 
Tomorrow You Can See More!
  Visit Eclectic Paperie and Add a Little Dazzle tomorrow for Day 2 of the Blog Hop!


 So Are You Ready for Some Amazing Inspiration?

Saturday, June 21, 2014

Put Your Brave Girl Boots On!

Hey there, everyone!  It's Broni here and I've got a fun tag to show you that I made using some Unity stamps, some TCW stencils and some Studio 490 embossing pastes.

I think I've always been a cowgirl at heart, and I firmly believe you can be one and still be a girly girl.  So pink boots are in order, right?

Here's how I made the tag:

I painted some Gesso onto the tag using the Mini Chicken Wire Reverse stencil.  

I covered the entire tag with Antique Linen Distress Stain.  The gesso resists the stain and still shows up white.  I also sponged on some Squeezed Lemonade, Bundled Sage, and Old Paper Distress inks.  Then I spread on some white embossing paste in random spots.

 Next I added more stain over the top of everything to blend it all together.

 I took another tag and sponged on some Worn Lipstick ink then stamped my cowgirl boots on top in Gathered Twigs ink.  You can see that the ink is still a little wet in this photo.

I sprinkled on some clear embossing powder and blasted it with my Heat tool.

I wanted some ribbon to match, so I smooshed some more Worn Lipstick ink onto my craft sheet and misted it with water, then dragged the seam binding through it until it was totally colored.  I left it bunched up to dry on my craft sheet, but you could also blast it with the heat tool.

I sponged some more of the Gathered Twigs ink onto the tag using my Mini Chevron stencil and stamped my sentiment too.

Then I felt that I needed some more pink in the design, so I sponged some onto the tag around the edges.

Next I smooshed some Gathered Twigs ink onto my craft sheet, misted it with just a little bit of water, then mixed in some white embossing paste.

I applied it to the tag through my Chicken Wire stencil.

I also applied some Metallic Gold embossing paste using my Mini Punchinella stencil.

I love that stuff so much!  Love the brilliant shine you get and the texture when applying it.  I think if it smelled like fruit I might try to eat it.  Yes, I love it that much!

Here you can see the shine when it's dry:

To finish up, I distressed all the edges with my Tonic scissors, added lace that I colored with my Antique Linen Distress stain and a strip of burlap using some Scor-tape.  I also attached a coil of hemp twine using my Mini Attacher and tied on my pink seam binding.  The boots were cut out and popped up on foam mounting tape.

Here's the tag again and also another view of the tag hanging up.


I hope you like it and that you enjoyed hearing about the process.  Let me know if you have any questions!

Thanks so much for stopping by today! 

Happy crafting!


Friday, June 20, 2014

Why, I declare...ePlay challenge project


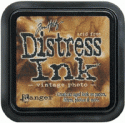
Hello everyone! It's Bonnie here with my response to the June ePlay Fabric Challenge. I had a copy of a lovely old photo which I purchased from Vectoria Designs and I was excited to create something worn, tattered, and vintage where she could be the star. Doesn't she look like she is saying "Why, I declare" in a lovely southern accent? I printed the image on white cardstock and then further distressed and aged it with Vintage Photo Distress ink. Everything else was built around her as the starting point.


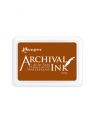
I chose a scrap of designer paper which had a collaged look to it and cut it to size. I knew that I wanted to do some sewing so I didn't adhere it to the chipboard substrate until near the end. Using Sepia Archival ink, some flourishes were stamped randomly around the edges of the background. I selected a lovely aged and yellowed page from the Sears Roebuck catalogue which was in my Michelle Hill Ephemera Pack and tore three sections from it to layer over the designer paper. Once that was adhered, pattern was transferred with white gesso on a brush through the Dylusions Blocks stencil. Pale Ochre Archival ink was applied through the Dina Wakley Plastic Canvas stencil using a makeup sponge.


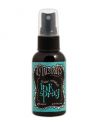
For the fabric bits, I had some remnants of burlap including a heart which I had cut to use somewhere and didn't. I also had some torn canvas fabric strips to which I wanted to add soft colour. I sprayed my craft mat with water and then Dylusions Melted Chocolate ink spray and dragged the strips through the puddles. The colour was very intense in some places so I rinsed the strips in the sink and came away with this brownish pink hue which I loved. I spritzed a little Vibrant Turquoise ink spray in a few places and rinsed that out as well. Then I hung them on the clothesline to dry, causing the neighbours to shake their heads and mutter... what else is new...LOL. I took one of the longer strips to the sewing machine and sewed as I folded in some pleats.

Next it was a case of playing with layering bits and scraps which were on my desk from previous projects until I came up with a composition that pleased my eye.The brown under the image had been embossed with the Diamond Plate folder and then not used for another project. The blue circle was punched, faux stitched and popped up on foam. The teal strips were offcuts from a Bingo card. also from the ephemera pack which I had sprayed with Studio Blue and Lark Art Anthology sprays for a previous project. I tend to save little scraps if I like what was done to alter them. They work well in larger projects and altered playing cards.


Once I liked the arrangement , I returned to my sewing machine to add some stitching to the right side, bottom edge, and through the short piece of canvas and heart. Love the texture and shabby chic effect.


 A length of lace was added to the bottom layers, as well as a mulberry flower and three threaded buttons. A layered kraft butterfly with a bead center was affixed to the top left corner of the image and an Idea-ology metal Word plate was attached with a brad over the pleated fabric.


The final embellishment was the key hole plate which I backed with black cardstock to allow the shape of the hole to stand out. Vintage Photo Distress ink was applied fairly liberally around the outside edges followed by Walnut Brown Big Brush pen before the entire layer was glued to the chipboard substrate.

Thanks for visiting today. I hope you gained a little inspiration and are keen to join us for our Fabric ePlay Challenge hosted by our very own Andiepants. Can't wait to see what you create!

Bonnie

Here are links to most of the products I used: