Photobucket Photobucket Photobucket Photobucket Photobucket Photobucket
Showing posts with label gesso resist. Show all posts

Friday, May 23, 2014

Technique Heavy Stenciled Tag!

Good morning!  Sherry here today and I have a tag to share that’s heavy with techniques.  Before I start with the details, I should probably tell you that I felt the need to go back to my roots of stamping and some of my favorite techniques with this project.  I haven’t been spending very much time in the studio these days, and I literally sat around for a couple of days wondering what I was going to make for today’s post.  Sometime yesterday afternoon it hit me . . . gesso resist with stencils . . . and it went from there!  In keeping with this month’s ePlay Challenge - Get Stenciled, I had stencils on my mind and was trying to figure out a way to use what I have on hand.

ImagineTagSC


I started with the basic Inkssentials Tag and applied gesso using the TCW Mini Well Rounded Stencil randomly on the tag.  My next step was the Wrinkle-Free Distress Technique using Tumbled Glass and Bundled Sage Distress Inks.  Using the same stencil again, but with a different design, Shaded Lilac was stenciled onto various places of the tag.

I even dug out a very old Tim Holtz set of stamps from Stampers Anonymous, Nature’s Discovery, and stamped some borders and butterflies on the tag.  I don’t think this set has seen ink (let alone the light of day) in close to 4 years.


ImagineTagCloseUpFull


I knew that I was going to use the sentiment from Nature’s Discovery, and stamped it on another tag.  After die cutting/embossing with a long rectangle, the sentiment was sponged with Tumbled Glass and Bundled Sage.  The edges were then distressed and sponged with Shaded Lilac and touch of Vintage Photo.  To finish off the sentiment, a flower was die cut/embossed from some old Graphic 45 papers and the leaves from watercolor paper.

ImagineTagCloseUP


Seam binding was dyed with Shaded Lilac and a touch of Tumbled Glass and Bundled Sage.  Really I just kept pouncing the last two colors randomly along the ribbon until I got the desire look I was after.

ImagineTagRightSC


That’s it for me today . . . thanks for stopping by and joining me!


SHERRY SIGNATURE


Project Supplies:


Monday, April 7, 2014

Golden Sunshine - Gesso Resist with water-color

Hello everyone!  It's Broni here and I wanted to share with you today how I made my Golden Sunshine card using the Gesso resist technique,  with water-coloring.


I started by taping my doily stencil to  the top of a piece of  watercolor paper.  I applied Gesso using a foam brush, let it dry, then applied another layer.  I also flipped the piece of watercolor paper around and did it at the opposite end.


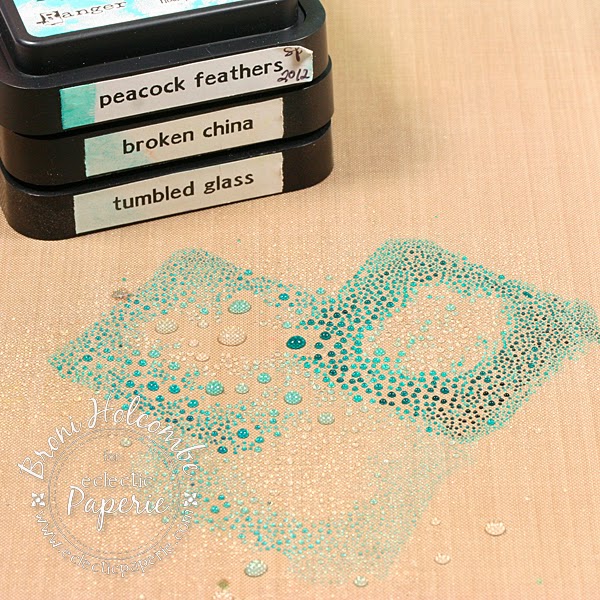
Next I smooshed (technical term) 3 colors of Distress inks onto my craft sheet - Peacock Feathers, Tumbled Glass, and Broken China.


I spritzed it with a lot of water then, when the Gesso was completely dry, I turned my watercolor paper face down into the ink.  I picked it up and dried it with my heat tool to keep the cool ink patterns.


I inked around the edges of the paper with some Peacock Feathers ink.


Next I spritzed it thoroughly with water.


I wiped it with a paper towel to give it a softer look and to remove the ink from the Gesso.


Then I stamped the sentiment in gold and also embossed it in gold.  I spritzed and dripped on some gold ink and added some gold bling.  It was added to a white card base using foam mounting tape.


And that's it for me today!  

Thanks so much for stopping in to visit!  I hope you have a very inky day, and we all hope you'll try to play along with us in this month's ePlay challenge - WOOD!


Saturday, July 27, 2013

Be True Journal Page!


Good morning!  Sherry here with you today and it’s my turn to post another project for you.  I decided to try my hand at another journal page  . . . after seeing Micki’s yesterday, I wish I had done something else!  I loved her video . . .  if you missed it, you can find it here!

I guess when I first started working in my art journal, I made a subconscious decision to use it for inspirational quotes/phrases that would empower, inspire and motivate me.  Sometimes a girl needs a little help!

BeTrueJournalPage

I started out by painting gesso down the spine of the pages, brushing excess onto the left hand page.  On the right hand page, I used a credit card and scraped the excess across the page all the way to the right border.  Distress Paints in Bundled Sage, Seedless Preserves, Broken China and Wild Honey were used to color the page.

BeTrueJournalPageCloseUpHeart

The heart was applied using a stencil cut from chipboard and stippling in Fired Brick and Aged Mahogany Distress Inks.   With the stencil still in place, Unity Classified Newsprint was stamped in Archival Coffee.    The heart was then outlined with a black marker. 

Making sure there was room for my phrase, white embossing paste was applied to the corners of the page using another stencil die cut with a CrissCross pattern. 

BeTrueJournalPageCloseUpUpperTexture

Once the embossing paste had dried, more Wild Honey and Broken China paint was applied and rubbed around with my fingers.

BeTrueJournalPageCloseUpLowerTexture

The phrase was die cut from watercolor paper, painted with Aged Mahogany stain, and then over stamped in Archival Coffee with the Unity Classified Newsprint Stamp.  Each letter was then embossed with clear embossing powder.  There’s also a little over stamping through out with Unity Graffiti Art and Unity Tattered Chicken Wire.

BeTrueJournalPage

Well, that’s all for me today.  Thanks for stopping by and joining me!


eP Signature - Sherry Cheever


Project Supplies: