Photobucket Photobucket Photobucket Photobucket Photobucket Photobucket
Showing posts with label Sherry Cheever. Show all posts

Thursday, October 23, 2014

Thanks for the Memories ~ Sherry

Hello eP Nation!  If you’ve been following along on the blog for the last week and a half, there’s no doubt that you already know eclectic Paperie is closing.  This also means that it’s time for the Design Team to step down and the blog to go quiet; but before that happened, we all wanted a chance to share one more time with you and reflect on the amazing friendships and inspiration that we have shared over the years.
I went back through my blog looking for some of my favorite projects  . . . and wow, there’s a lot of years there devoted to eclectic Paperie.  I’ll never forget the day when I got a phone call from Daisy Sparks asking me to help assemble her very first eP Blog Team (The e-Team).  That was back in March of 2010 and here we are in 2014 with Kim Schofield at the reins.  I’ve been very blessed to be included on this marvelous ride and have watched Kim grow eP into the mixed media home that’s it become today.  To everyone here at eP, I hope you all know how much I admire you and cherish our friendship!  Thank you for one heck of a ride!!

This is probably the most current favorite of mine.  A tag done just this year for the eP Blog . . .  Imagination

ImagineTagSC

The rest of my favorites are actually from a couple of years ago and maybe even earlier.  To me, they represent some of my best work and still hold prominent places in my home and studio.

HappyHauntingChunkyATC TagSide thumb

A Halloween Chunky ATC using Graphic 45 Halloween papers.
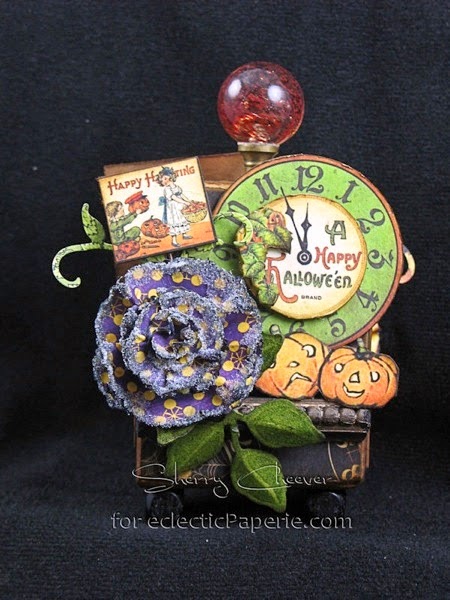
HappyHauntingChunkyATC ClockSide thumb

A Halloween decor piece made from chipboard and Graphic 45.  I just set both of these projects out at the first of the month!  Happy Haunting  . . .

HappyHauntingDecor thumb

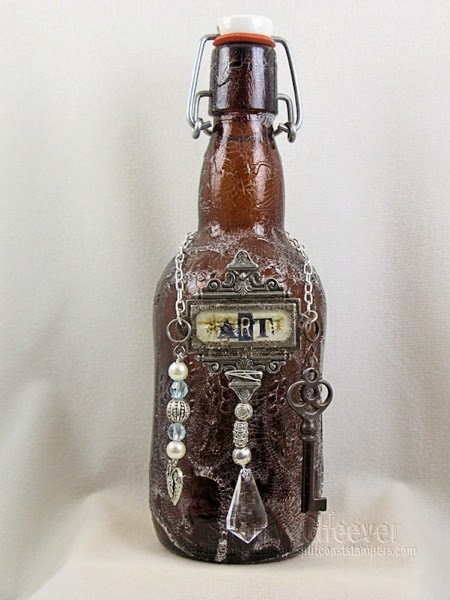
My first altered bottle . . .

FullBott


My absolute favorite of all time . . . A Chunky Tag and one which I seem to recreate every once in a while!

ChunkyTagDelight thumb

My most favorite side . . .

ChunkyTagFly thumb

Another Chunky ATC that was given as a birthday gift to a friend!

ChunkyATCSimple thumb

One day I’ll recreate this one for myself.

ChunkyATCBelieve thumb

My first Configurations . . . Family Memories

FullBox thumb

Then finally, one of my favorite Christmas decorations - Believe!

BelieveNov15DARCIES thumb

Thanks for so much for stopping by today and sharing this creative journey with me!

SHERRY SIGNATURE

Saturday, September 13, 2014

It's Raining Cats & Dogs!

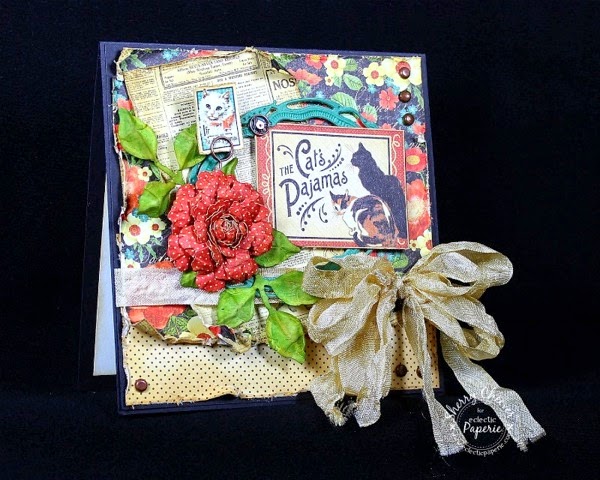
Good morning!  Sherry with you today and I have a 5.5 card to share using the Graphic 45 Raining Cats & Dogs Collection.  It’s been some time since I’ve worked with Graphic 45 and this card was a joy to create.  I love how all the papers in the collection compliment each other and can be mixed and matched so you don’t need to add other non-Graphic 45 elements unless you want.   I also used Graphic 45 6x6 Patterns and Solids for this collection to add more interest.

CatsPajamas2

The edges of the background papers were distressed with scissors and the edges were sponged with Antique Linen Distress Ink.  Brads were added to a few of the corners for interest.

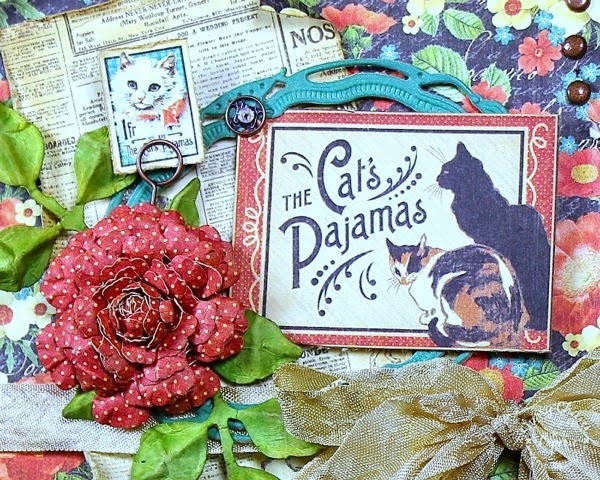
CatsPajamasCloseUP

A frame was made by gluing a solid color paper from the collection to chipboard and then die cutting it with ovals.  The cat image was also glued to chipboard and then cut out (to make it sturdier within the oval frame).  The flower was die cut from another sheet of the paper and the leaves were die cut from vanilla card stock, then colored with Mowed Lawn and Peeled Paint Distress Inks.

CatsPajamasAngle

The ribbon was dyed with Antique Linen Distress Ink.

Thanks for stopping by and joining me today!

SHERRY SIGNATURE


Project Supplies:


Tuesday, August 26, 2014

Altered Frame - Prima Decor II!

Good morning!  Sherry here today and I have an altered frame to share with you.  Sadly, I got so into the creation of the frame that I failed to take photos of each step.  It’s very simple though and I’m sure I can walk you through.

PrimaAlteredFrame

I started with one of those dollar wood frames from Michaels and applied Wendy Vecchi Studio 490 White Embossing Paste to the front using Prima Stencil - Decor II.  (all links can be found at the bottom of this post).

PrimaAlteredFrameCloseUP

All in all, this was a 3-step process, allowing dry time between each step.  The frame was painted black and then highlighted with thin coats of Art Anthology Bronze Metal Effects.  Can I just say, that this is the first time I’ve used the Metal Effects . . . and I LOVE them!!

PrimaAlteredFrameCloseUPCenter

The embellishments in the center were assembled from different stash pieces.

PrimaAlteredFrameLeft

Thanks for stopping by and joining me today!!

SHERRY SIGNATURE


Project Supplies:


Friday, August 8, 2014

Esther's Garden!

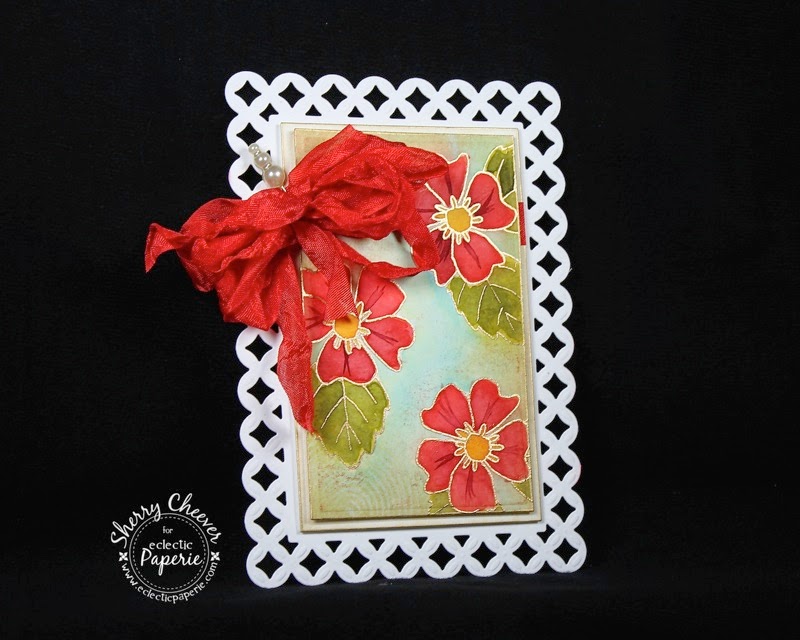
Good morning!  Sherry here today and I have a 5x7 watercolor card to share with you.  I used the Art Gone Wild set, Esther’s Garden by Catherine Scanlon Designs.  I also embossed, which goes along with this month's ePlay Challenge - Embossing.

SCRedFlowersRight

The flower was stamped and embossed in gold on watercolor paper and then water colored with Distress Ink Refills (listed below in Project Supplies).

SCRedFlowersCloseUPBottomLeft

After the image dried, Snowcap Pigment Ink was stippled to the background using TCW 6x6 Stencil, Well Rounded.  In the photo above, you can see the stenciled design on the bottom left and in the photo below, you can see it on the top of the card.

SCRedFlowersCloseUPTop

The edges of the water colored image was sponged with Antique Linen Distress Ink, which made the Snowcap stenciling pop out.  The seam binding ribbon was dyed with Barn Red Distress Ink with a dab or two of Antique Linen.

SCRedFlowersLeft

As a final touch, the edges of both the image and background panels were edged in a gold leafing pen.  As an extra tip, it is very important that after you dye ribbon, to wipe away the excess on your craft sheet.  I failed to do so!  When I was adding the foam adhesive to the back of the panels, they picked up some of the red ink from the craft sheet.  I actually kind of liked the look when it was all said and done, so I let it be part of the design.

That’s it for me today . . . thanks for stopping by!

SHERRY SIGNATURE


Project Supplies: