


Hello Everyone,
Shilpa here,
Today, I am back with Journal page.
If you have missed my mixed media canvas post..here is the link..
If you have missed my mixed media canvas post..here is the link..
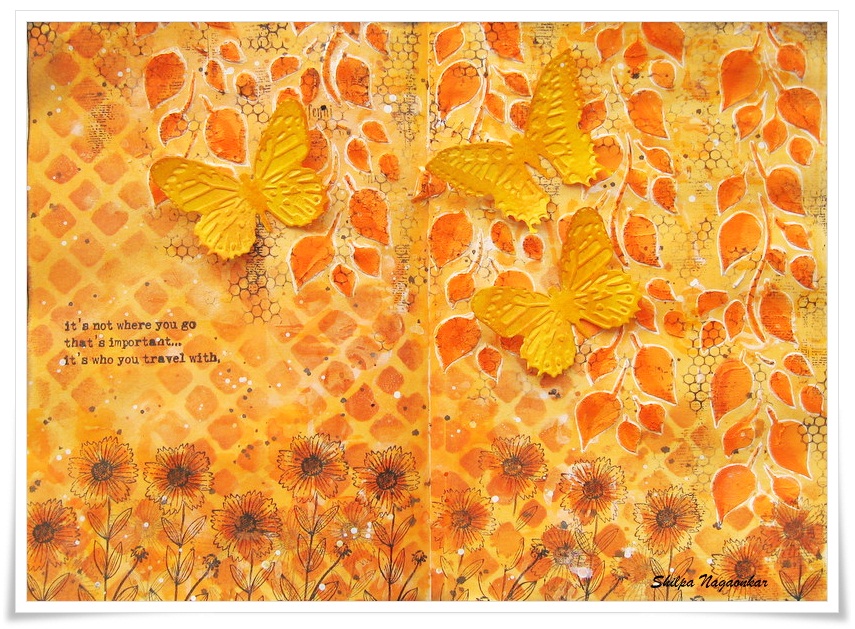
You may recognize, I've used Dylusion colors on my page.
yes, I've tried latest Dylusion paint - Squeezed Orange....and I'll say I need to add all colors in my collection. They are perfect for Art Journaling.

Its very easy to apply colors on pages with Baby wipes...Dyan has shown this technique during CHA. It dried immediately.

Another unique feature of Dylusion paint is, we can create another layer on it with spray inks.....thats awesome for someone like me who loves to create layers after layers.
I used Finnabair stencil and Dylusion inks sprays- White linen and Pure sunshine for my next layer.

For texture, I applied Wendy Vecchi White embossing paste through Dyan's falling leaves stencil.

Here is one more fun part,
I cut out lovely butterflies from Tim's Butterfly duo die, heat embossed them with
Wendy Vecchi Buttercup embossing powder. Next I used coordinating
embossing pads (sorry for glare on it) to create texture on them...applied Archival inks on raised area..they look awesome.

I colored leaves with dylusion paint and outlined them with white gel pen.

I stenciled more with Finnabair Netting stencil and archival ink.

And this beautiful flower stamp and quote is from Wendy Vecchi's - Art and You stamp set
- "Its not where you go that's important ..its who you travel with."
Thanks so much for stopping by.
I'll be here again next week with new creation.
Products used from Eclectic Paperie:
Dylusion Paints
embossing pads (sorry for glare on it) to create texture on them...applied Archival inks on raised area..they look awesome.

I colored leaves with dylusion paint and outlined them with white gel pen.

I stenciled more with Finnabair Netting stencil and archival ink.

And this beautiful flower stamp and quote is from Wendy Vecchi's - Art and You stamp set
- "Its not where you go that's important ..its who you travel with."
Thanks so much for stopping by.
I'll be here again next week with new creation.
Products used from Eclectic Paperie:
Dylusion Paints
Prima Alpha stencil
Ink sprays
Dylusion Stencil
Wendy Vecchi Archival Inks
Wendy Vecchi Embossing powders
Wendy Vecchi Embossing paste
Wendy Vecchi stamps- Art and You
Sizzix - Butterfly Duo
Ink sprays
Dylusion Stencil
Wendy Vecchi Archival Inks
Wendy Vecchi Embossing powders
Wendy Vecchi Embossing paste
Wendy Vecchi stamps- Art and You
Sizzix - Butterfly Duo


