
Hi again! It's Linda here, as
your guest designer for the month of June, with a layout tutorial. This actually isn't the project I had planned for this week, but the 7 Dots Studio Nature Walk papers have so won my heart, that I really wanted to do a layout with them... and I had just the perfect two photos to team up with them. I'll show you what I mean as I go along.

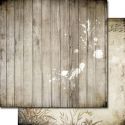
I started with the
back side of the Nature Walk "Musical Blooms" that looks like stained boards... the boards of our walk way leading up to our Virginia condo.

I only used the first 1 1/2" into
the sheet and trimmed out the center to use another place on the layout. I wanted to get all I could from this fabulous paper.

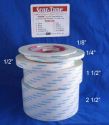
I used lightweight chipboard
as my base with the "board" frame adhered down to it with 1/4" Scor Tape. I roughed up the edges with my Tim Holtz paper distresser and sponged on Walnut Stain distress ink.

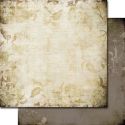
I loved the stains so much
on this sheet that I wanted more, so I pulled out my Crafter's Workshop Confetti stencil and put down some gesso.

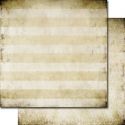
Now the "Cloudy" sheet
with 1 1/4" trimmed from all edges and distressed.

Here is my placement before
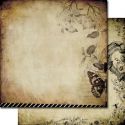
adhering it all down with Scor Tape and Scotch Foam Mounting Tape. I fussy cut butterflies, a blossom and a leaf cluster from the "Winged Vines" sheet. The chipboard pieces are from the Prima Cartographer.

With my Alterations Tattered
Florals die I cut three layers of each petal with "Winged Vines" and "Cotton". I inked the edges with Walnut Stain, scrunched them up in my hands and assembled the huge flower using glue. I added a Prima Time Traveler Say It In Crystals gem to the center.

Now I cut my foliage
using Alterations Spring Greenery and some paper from my Core'dination's Kraft Core pad as well as my Tim Holtz Wallflower one.

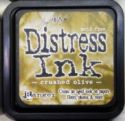
I rubbed some Crushed
Olive and Bundled Sage distress ink onto my craft mat, misted with water, and drug my foliage through several times until I got the look I wanted, drying with my heat tool between each inking.

Then I sponged on Walnut
Stain and shaped the leaves with my long tweezers and my fingers.

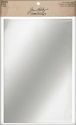
This is my flower and
foliage placement. I tucked in some green Spanish moss and an old glittered timepiece charm that had a pink rhinestone which I replaced with an Idea-ology bauble. I stuck in an Idea-ology memo pin with a Prima wood butterfly. On my fussy cut butterfly, I glued on an Idea-ology pen nib with Glossy Accents. For a little more pizazz, I added a strip of the mirrored sheet that I cut with Alterations Frameworks Courtyard die.

I tucked in a bit of Film Strip
ribbon to the left side and "nailed down" my board paper with nail heads from Prima's Junkyard Findings.


I hope there's something
here that will inspire you to try these gorgeous papers or any of the other product. I've had a ball putting it together, and now my husband and I have a keepsake to remember our time in Virginia.
Thanks for stopping by!
Here are links for the products used above:
 |  |  |  |
 |  |  |  |
 |  |  |  |
 |  |  |  |

This is just lovely Linda!! You sure used these pretty papers to good advantage - what a great trick to cut out the center of the back piece so as not to waste it!! Your pictures match the papers perfectly - your flower and foliage are beautiful - what a great job on this!!
ReplyDeleteBEAUTIFUL layout, Linda! Lovely elements and I enjoyed seeing the steps!
ReplyDeleteThose photos coordinate PERFECTLY with those papers. I LOVE your flower cluster and GREAT job on the greenery. This page is just divine.
ReplyDeleteWow! That flower clump is just amazing! You have layers upon layers, there is do much to see here! I love it!
ReplyDeleteI enjoyed seeing your process and the final result is beautiful Linda!
ReplyDeleteLinda what a gorgeous project you created. So many lovely details !! Also enjoyed your step by step photos ! You are so skilled !!
ReplyDeleteThank you so much for sharing this pretty piece of art.
Hugs from SPAIN