Welcome to another e Team Picks Challenge. It's Toni here to take the stage and introduce you to the latest challenge and I'm asking you all to 'do something with a bag' and that means that you can choose any kind of bag, be it paper, plastic, leather or even that old Louis Vuitton case you don't use any more! (and if you've got one of these, I'll give you my address later ! ) You can use any technique or medium you wish and in the true spirit of the eclectic Paperie challenges, just let your imagination fly ! I've chosen a canvas tote bag I've had knocking around for years. It was actually a magazine freebie. I've given it a fresh new look with lot's of Studio Paint and applied stamped tissue. I must say, I love the new look. Here's how I got started on the transformation.......
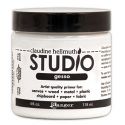
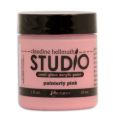
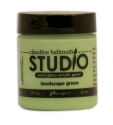
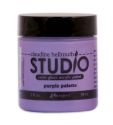
The first picture shows the rather sad, old bag I started with. I gave it a coat of Studio Gesso, all over including the handles, and already it was looking possible. Being somewhat impatient, I dried it with my heat tool, and then waded in with the paints. I chose, landscape Green, Purple Palette and Painterly Pink and applied them with a broad flat paint brush, in overlapping patches. Once dry, I repeated painting of the other side, varying the layout of the colours slightly.
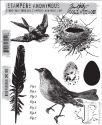
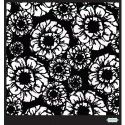
I then chose some of the fabulous stencils I've received in in my DT packages from Kim. Here you can see Wendy Vecchi's Dots and Stripes, Crafter's Workshop Mini Harlequin and a Donna Downey Flower stencil. I used Antique Linen Distress paint and positioned the stencils in places where the colours butted up against each other. I think this helps to 'meld' it all together. I quite liked it at this point but .... why leave it there when I was having so much fun? I love the technique of stamping on tissue and layering it onto canvas, so I decided to use this on the the surface of the bag. As the bag has lovely spring like colours, I thought it would be fitting to break out the new Tim Holtz Bird Feather stamps. I also delved into my stamp collection and found a selection of other botanical stamps. I stamped onto several tissues, using black Archival ink.
I cut around each shape and layed them on the surface of the bag. Once I was happy with the layout, I separated the two layers of stamped tissue and adhered each image to the bag using Studio Matte Multri Medium. If you have never tried this, you really MUST have a go ! It's easy to do and if it goes wrong you can scrape it off whilst its still wet and try again. It's amazing, you really can't see the tissue once it's dry Here a close up.....
To finish off, I added a little Maya Road wooden tag which I first painted white and then stuck on a little bird charm I made by stamping onto a piece of Polyshrink and heating to shrink the image. Just gives it a classy finish!
I hope this project inspires you 'to do something with a bag' Remember it can be any kind of bag, as simple or as complex as you like just go ahead and have some fun ! x
All of those who play along with our challenge will be entered into a prize drawing for a $15.00 gift certificate to the eclectic Paperie store.
So grab your supplies and play along!
Here are a few things to keep in mind for this challenge…
-You do not have to use products sold in the eP store…but we do love it when you do!
-Share a direct link to your creation, not just your blog, using the Linky Tools feature at the end of this post. If, for any reason, the Linky Tools doesn’t cooperate, please add a link in the Comments section of the blog.
-When uploading to any online galleries, please use any of the following keywords; eP, eclectic Paperie or eTeam Pick Challenge. Link your creations to the eP blog.
-If you’d like to be considered as one of our featured projects and be entered into our prize drawing, please be sure to add your link. Winner will be announced on the first Thursday of the month.
Here are some of the supplies available from the eclectic Paperie Shop, which I've used on my project. Good Luck !



Wow Toni, what a fabulous transformation! Your bag is just gorgeous. Thanks for the great tips on how to do it too. Love this - a lot! Anne xx
ReplyDeleteThis is gorgeous. Must get some of that multi medium to play with
ReplyDeleteOooohhhh love your bag! Love the colors and I'm thinking I have several bags..... I'm definitely playing along.
ReplyDeleteOh my giddy aunt how awesome that bag turned out Toni!!
ReplyDeleteI would pay good money for that from a shop...woohooooo Toni you rocked this!!
Love how you showed the how to as well.
Will be playing along for sure.
Big hugs
Tracy
xoxoxo
Toni, this is wonderful!! I need to find a bad to alter :)
ReplyDeleteI meant a "bag" not a "bad" LOL
ReplyDeleteStunning Toni ! Beautiful colours and love the stamping on the tissue. Sue C x
ReplyDeleteLove the colors and the images freakin' rock girlie!!! I didn't even think of the tissue paper thing on fabric! Genious! Pure GENIOUS!!!
ReplyDelete{{hugs}}
Hi Toni
ReplyDeleteThanks for stopping by my blog today - I love your genius plan. I wont be able to attend Tim's South African stint because both shows are not in the province that I live in and it is going to be too difficult to juggle my work schedule around it. I do like your evil plan though, to get some of those stencils......Great bag - love how you turned it into a piece of art.
Oh my goodness, first of all stenciling on the overlapping color ares, genius! The colors just completely blend together! Secondly, tissue paper and stamps is also a favorite of mine ... but putting the tissue on the bag, genius again!! Love, Love your bag!!
ReplyDeleteI love your bag! Great technique. I will have to try it.
ReplyDeleteWonderful colour blocking and those new stamps look stunning (mine are en route!!)... fabulous transformation.
ReplyDeleteAlison x
LOVE LOVE LOVE your bag, Toni! The colors, the stencils, the tissue, and all of the new products I MUST buy ~ WOW! Shrinking the bird was genius! THX for the inspiration!
ReplyDeletegreat challenge and wonderful samples from the dt
ReplyDelete